Spoonflower Sampler Quilt {Block 9: HST & Stripes}

HST_Stripes

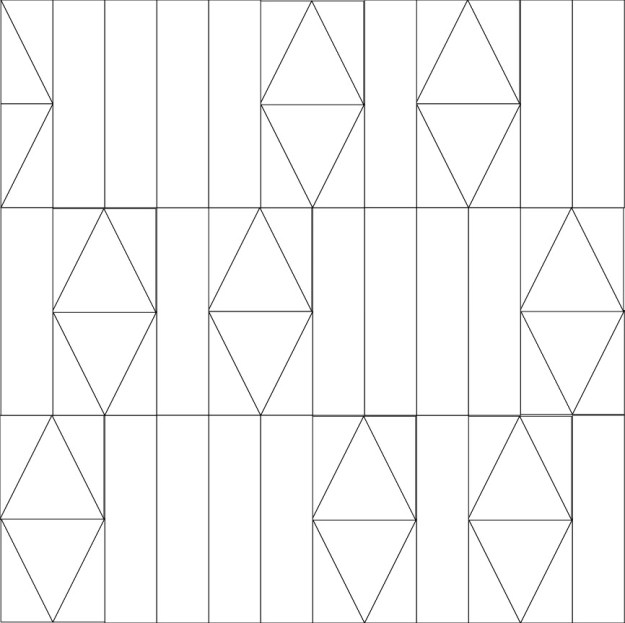
This block is a little different from the others as there are no fixed layouts. It is just a combinations of Half-Square Triangles and striped blocks.

Materials and Cutting Instructions

Fabric Amount Cutting instructions
 Fabric A (Green)   Scraps
  • Six (6) 1.5” x 3.5” pieces
 Fabric B (Dark Blue)   Scraps
  • Six (6) 1.5” x 3.5” pieces
 Fabric C (Orange)  Scraps
  • One (1) 6” square
 Fabric D (Light Blue)  Scraps
  • One (1) 6” square
 Fabric E (Grey)  Scraps
  • One (1) 6” square
 Fabric F (Neutral)  Scrap or Fat Eighth
  • One (1) 6” square
  • Twelve (12) 1.5” x 3.5” pieces

Making your block

Half-Square Triangles (total of 8 HST)

Use the 6″ Squares (in the 4 colours) to make two (2) sets of HST colors using method 1 in this tutorial. Note: you will land up with four (4) 3.5″ HST per color way.

Stripes (total of 8 Striped blocks)

The stripe blocks are very simple. In my block, I made two (2) of each alternating stripe blocks, mixing the order of the colored 1.5″ x 3.5″ strips with the white 1.5″ x 3.5″ strips.
Untitled(22) Untitled(21)

Finishing your block

This is now your choice on the placement of your 16 pieces.  Here are a couple of other ideas:
Block9of9_Sampler(2)   Block9of9_Sampler(3)

Block9of9_Sampler(4) Block9of9_Sampler

You will have a finished block 12″ (unfinished 12.5″).

Additional Spoonflower Sampler Quilt Block tutorials:

Please Note: If you every make the sampler or any of the blocks use #spoonflowersamplerquilt and/or link back to the tutorial. Michelle Wilkie @ Factotum of Arts”.


Spoonflower Sampler Quilt {Block 8: Inset Squares}

InsetSquares

I love this block as it looks complicated but actually really simple to put together. It also leverages Half-Square Triangle techniques from previous blocks.

Materials and Cutting Instructions

Fabric Amount Cutting instructions
 Fabric A (White)   Scrap
  • Five (5) 4.5” squares
 Fabric B (Dark Blue)   Scraps
  • One (1) 4.5” square
  • Two (2) 2.5” square
  • Three (3) 3.5” square
 Fabric C (Orange)  Scraps
  • One (1) 4.5” square
  • Two (2) 2.5” square
  • Three (3) 3.5” square
 Fabric D (Light Blue)  Scraps
  • One (1) 4.5” square
  • Two (2) 2.5” square
  • Three (3) 3.5” square
 Fabric E (Green)  Scraps
  • One (1) 4.5” square
  • Two (2) 2.5” square
  • Three (3) 3.5” square

Making your block

Corner Blocks

As you see the white square are surrounded by corners that are solid and corners that have two colors “split colored corners”. For the split colored corners you will need to make up 12 HST blocks measuring 2.5”.

CornerBlock

  1. First off, decide on your color palette and your placement of colors.
  2. Take two 3.5” blocks of the colors that you know will be one of the split color corners. For this example, I will choose the top left corners which is light blue and dark blue.
    CornerBlock(1)
  3. Follow method 2 in this blog post to sew, cut and trim the 2.5” HST.
  4. Take these two HST and one light blue and dark blue 2.5″ square. On the back draw a line on the back across the diagonal. This will be the stitch line.
    HST_with_markedline
  5. Line up the HST blocks with the corner of the white square corners. Place both HST on the opposite diagonals. Sew along the marked line.
    Split_Corners
    Trim the corners by a 1/4 ” on the outer edge. Press seams open.
  6. Repeat the process on the other diagonal with the 2.5″ squares.
    HST(2)
  7. The corner blocks will look like this:
    HST(3)
  8. Repeat the process for all 4 corner blocks and the center block (note that the center block uses 4 HST blocks, no 2.5″ blocks of one color).
    Note: in total you will make twelve (12) 2.5″ HST blocks (2 on each the 4 corners and 4 for the center block))

Finishing your block

  1. To make the larger quarter triangles you will need line up the center block, and corner blocks first.
    Block8of9_sampler(1)
  2. Now place the appropriate colored 4.5″ squares in the middle (denoted by the large white squares above.
    Block8of9_sampler(2)
  3. Sew each block in each row together, press seams.
  4. Sew together each row, lining up each if the blocks to make sure your larger quarter triangles also line up smoothly. Press seams.

You now have a finished block 12″ (unfinished 12.5″).

Additional Spoonflower Sampler Quilt Block tutorials:

Please Note: If you every make the sampler or any of the blocks use #spoonflowersamplerquilt and/or link back to the tutorial. Michelle Wilkie @ Factotum of Arts”.


Spoonflower Sampler Quilt {Block 7: Diamonds in the Rough}

DiamondsRough

This is the seventh block in the series – Diamonds in the Rough (finished 12″ block).

Materials and Cutting Instructions

Fabric Amount Cutting instructions
 Fabric A (Citrus)   Scrap or Fat Eighth
  • Six (6) 2.5” x 5” rectangles
 Fabric B (Dark Blue)   Scraps or Fat Eighth
  • Three (3) 2.5” x 5” rectangles
 Fabric C (Orange)  Scraps
  • Three (3) 1.5” x 4.5” rectangles
 Fabric D (Light Blue)  Scraps
  • Four (4) 1.5” x 4.5” rectangles
 Fabric E (Grey)  Scraps
  • Twelve (12) 1.5” x 4.5” rectangles
 Fabric F (Neutral)  Scrap or Fat Eighth
  • Thirty-four (34) 1.5” x 3” pieces

Making your block

There is two parts of making the complete block, the stripes and the diamond pieces.

The Diamonds

You will finish with 6 Citrus diamonds and 3 Dark Blue Diamonds.
FinishedDiamonds

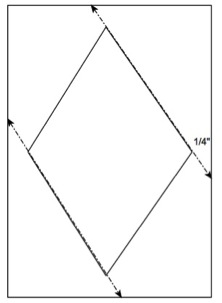
  1. The first step of making the diamond piece is to appropriately mark your pieces to ensure accurate piecing. For the diamond fabric piece (3.5” x 5”), you will need to mark out the ¼ seam marks.
    Diamond_piece
  2. Mark the ¼” on the end of the 1.5” x 3” neutral pieces. These are the pieces that will make the corners of the diamond shape.
    MarkedStrips
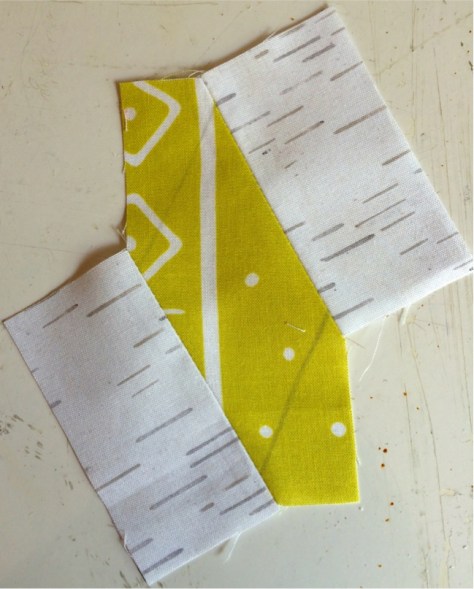
  3. Lay the neutral strips ¼ in over the line, matching the edge markings with the drawn diagonal line you drew. Stitch along the line, making a ¼” seam.
    FirstCornersSewn
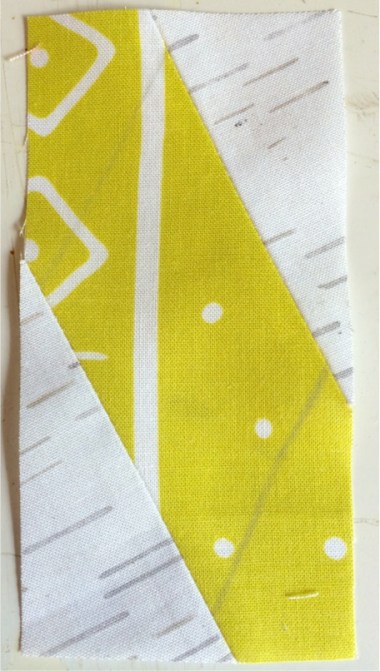
  4. Press the seams.
    TrimmingFirstCorners
  5. Use the edges of the diamond fabric to trim the block.
    FirstCornersTrimmed
  6. Repeat the process with the other two corners.
    TrimmingSecondCorners
  7. Trim your corners.
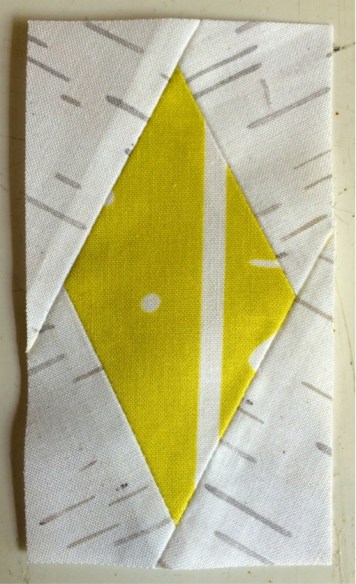
    SingleBlock
  8. The final size of the diamond block is 2.5” x 4.5”. When trimming ensure you leave at least ¼ from point to the edge of fabric. This will be your seam allowance.

The Stripes

  1.   Join the following 1.5″ x 4.5″ pieces together: Grey, Light Blue, Orange, Grey (in this order – 4 part stripes). Press seams. Repeat 3 times.
  2. Take one (1) grey and one (1) light blue 1.5″ x 4.5″ piece, stitch together and press seams (2 part stripes).
  3.  You should now have five (5) single grey 1.5″ x 4.5″ pieces left.

Finishing your block


  1. First row, sew together the following pieces/parts: 1 dark blue diamond > 4 part stripes > 1 citrus diamond > 1 single grey stripe > 1 citrus diamond > 1 2 part stripes.
  2. Second row, sew together the following pieces/parts: 1 single grey stripe > 1 citrus diamond > 1 single grey stripe > 1 citrus diamond > 4 part stripes > 1 dark blue diamond
  3. Third row, sew together the following pieces/parts: 1 dark blue diamond > 4 part stripes > 1 citrus diamond > 1 single grey stripe > 1 citrus diamond > 1 single grey stripe
  4. Sew rows two & three together. Press seams.
  5. Line up right side edge of row one & two together.  Sew together. Press seams. Finish by trimming the dark blue diamond down.


Block7of9

You now have a finished block 12″ (unfinished 12.5″).

Additional Spoonflower Sampler Quilt Block tutorials:

Please Note: If you every make the sampler or any of the blocks use #spoonflowersamplerquilt and/or link back to the tutorial. Michelle Wilkie @ Factotum of Arts”.