Category Archives: Uncategorized

Wonderland

I was so happy when I got Katarina Roccella’s new line in the mail. As soon as it was released I went out and bought 1/2 yards of the whole line.

IMG_5194

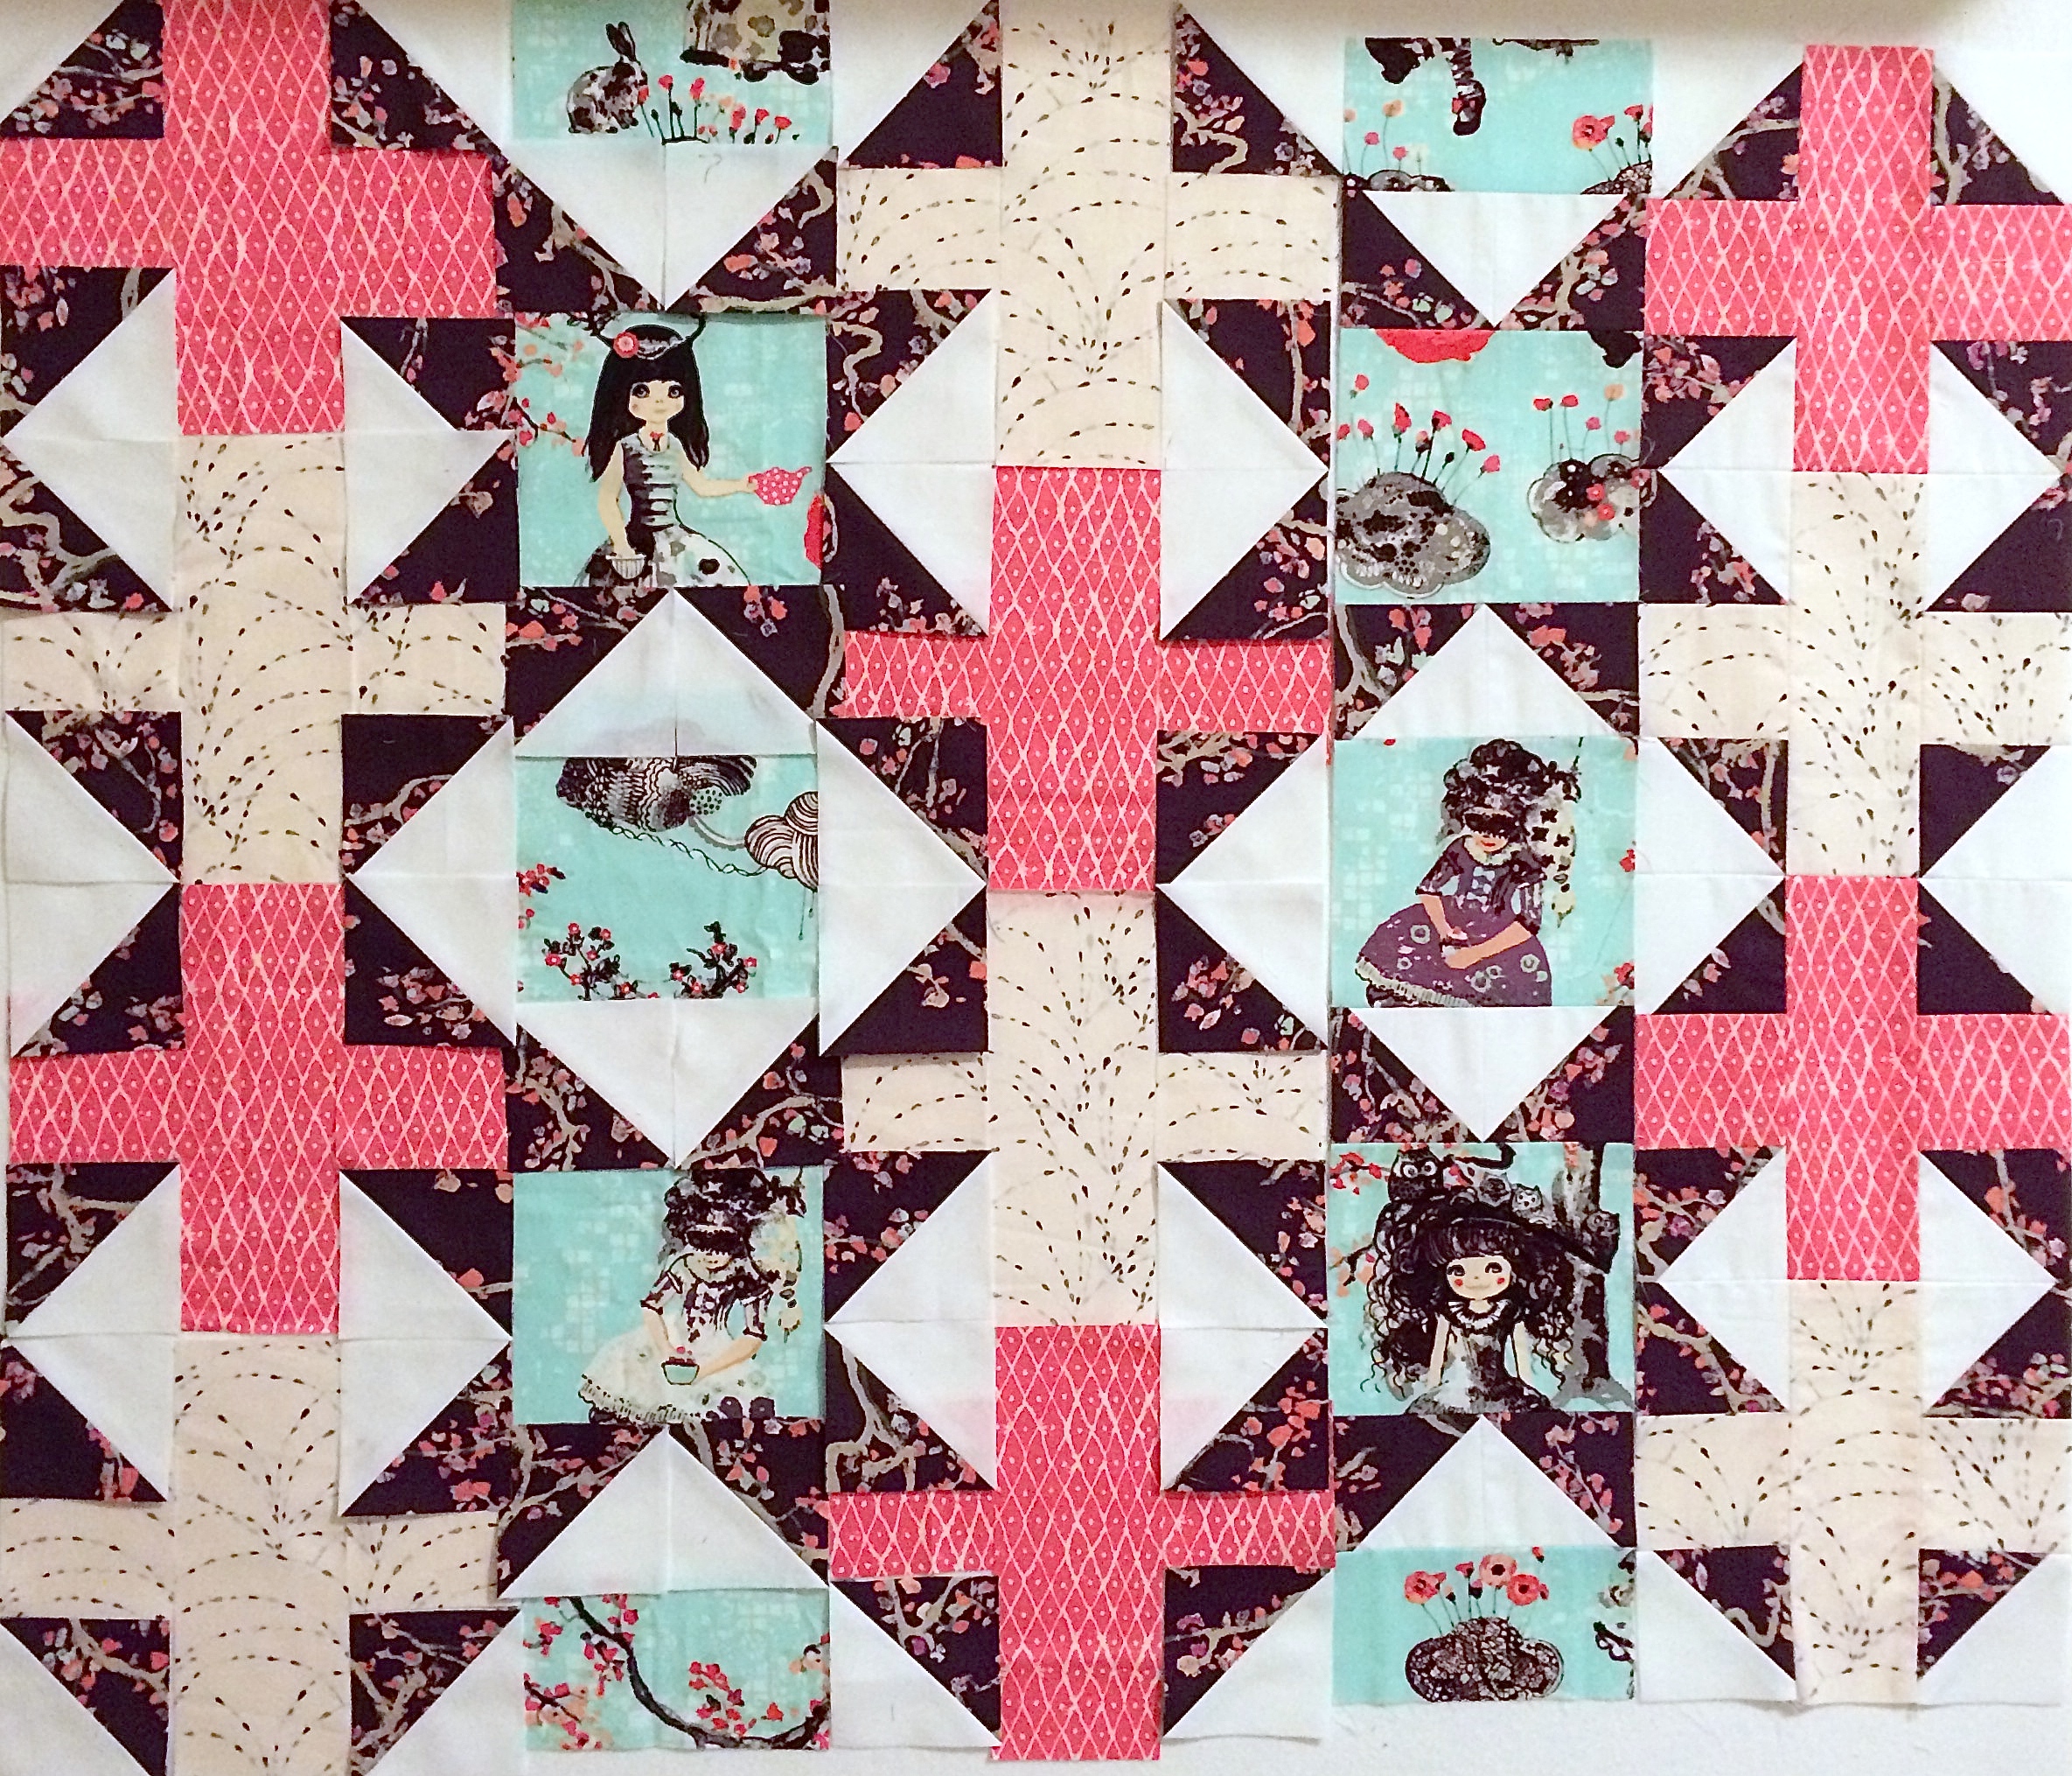
I knew immediately I wanted to use one of my Quilt Design a Day patterns, to make something for one of my niece’s for Christmas. Those girls are just so adorable.

QDAD_04JAN2015(1)

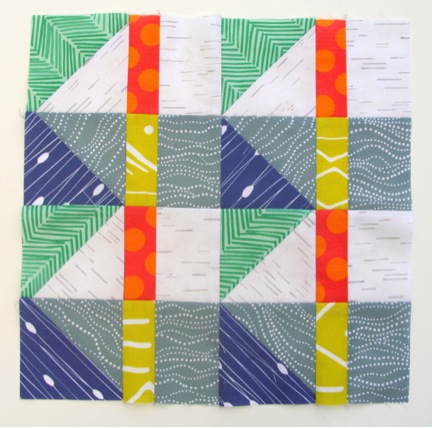
I am running a little behind in finishing this mini, for this post, unfortunately. All the pieces have been trimmed and are all ready to be sewn together.
IMG_5280

In total, the pieces you will need:

  • Sixty-four (64) Half Square Triangles
  • Twenty-four (24) 2.5″ Squares (for the plus block)
  • Twelve (12) 6.5″ x 2.5″ Rectangles (for the pkus block)
  • Six (6) 4.5″ Squares
  • Four (4) 4.5″ x 2.5″ Rectangles

This top is made up of three distinct blocks that are replicated with the individual rows.

  1. The plus block (where the measurements are with seam allowance) in the first column.  You will need to make Four (4) of these for each of the Plus Rows. I alternated a dark and light plus in each row. The Half Square Triangles used in each of the corners of the plus blocks, are also 2.5″ and you can use this tutorial to make them the HST.PlusBlock_04Jan2015
    The Half Square Triangles used in each of the corners of the plus blocks, are also 2.5″ and you can use this tutorial to make them the HST. Take care on the placement of the HST’s when making up the blocks.
  2. Column 2, uses a Flying Geese Block made from two 2.5″ Half Square Triangles. You will need 8 HST to make 4 flying geese that are used between each of the focus squares (#3).
  3. A 4.5″ (includes seam allowance) Square –  is used in column 2. I recommend fussy cutting and using these blocks as focus blocks. You will need three (3) full squares and two (2) 1/2 squares (4.5 x 2.5″) per column.

There are so many great projects using Katarina’s new line. Take a look. I hope you enjoy the other projects.

ERICA TOOLE – October 5th
LAURA SCARAMELLA of SIMPLE LIFE COMPANY – October 6th
DANA BOLYARD – October 7th
RACHAEL GANDER – October 8th
HEATHER and MEG of QUILT STORY – October 9th
JOELLEN KEMPER of SEW ILLUMINATED – October 10th
STACY BARRETT of a VINTAGE FAIRYTALE – October 11th
ERICA JACKMAN – October 12th
KATHLEEN RIGGINS – October 13th
MARIJA VUJČIĆ – October 14th
SVETLANA SOTAK – October 15th
KYLIE KELSHEIMER of SEW KYLIE – October 16th
ALEXIS WRIGHT of MY SWEET SUNSHINE – October 17th
MICHELLE WILKIE – October 18th
HEMAMALINI – October 19th
LYNNE GOLDSWORTHY – October 20th

Spoonflower Sampler Quilt {Block 3: Modern “T” Block}

Reposting original post (JUL 2014)

In May, I taught a Modern Block class at Spoonflower. I promised folks that I would share the designs/patterns of each blocks of my sampler quilt.

Spoonflower_Class1_Blocks

As promised, here is the first one – the modern “T” block. Finished size is 12″.
T_Block

Planning your Block

This block is actually a repeated pattern (the whole repeat blocks are marked in blue below). You can chain piece the block pieces or you can make it using paper piecing.  Start by planning your block, color in the pieces so you know where pieces go. I have included a template you can color here.

Note: This is considered a challenging block due to the small pieces – to give you an idea the sashing is 1/2″, the small square is 1″.

repeatpatternTblock

Method 1: Piecing

Cutting Instructions

Below are cutting instructions for the pieces. I have mapped these instructions with the colors in the T Block photo above.

Fabric Amount Cutting instructions
 Fabric A (Light Blue)  Fat Eighth
  • 4 1.5” x 3.5”
  • 6 1.5” x 3”
  • 7 1.5” x 2”
 Fabric B (Dark Blue)   Scrap
  • 5 1.5” x 1.5”
 Fabric C (Orange)  Fat eighth
  • 5 1.5” x 3.5”
  • 5 1.5” x 3”
  • 6 1.5” x 2”
 Fabric D (Citron)  Fat eighth
  • 6 1.5” x 1.5”
Fabric E (White Sashing) Fat eighth
  • 8 1” strips (~20 inches long)

Making your Block
TBlock_Order

  1. I chain piece all my small colored pieces to the white sashing strips. The white sashing will be pieces 2, 3, 4, 6, 8b and 9.
  2. Start with all the 1 pieces and sew them to a strip of white sashing (#2). Trim all the pieces so that you now have 1+2 combined. Press seams open.
  3. Now chain piece on the other side another white strip to the 1+2 pieces. Trim all the pieces, and now you have 1+2+3 combined. Press seams open.
  4. Now chain piece 1+2+3 to another white strip (#4). Trim to create 1+2+3+4. Press seams.
  5. Add #5 pieces to 1+2+3+4. Press seams.
  6. Chain piece 1+2+3+4+5 to a white strip (#6). Trim and press seams.
  7. Add #7 to the 1+2+3+4+5+6.
  8. Chain piece 8a to a white strip (#8b). Trim and press seams.
  9. Sew 8a+8b to 1+2+3+4+5+6+7 block. Press seams.
  10. Finally, chain piece 1-9 block to a white strip (#9). Trim and press seams
  11. Repeat 8 times for the whole block repeats (the sections marked above with blue lines).
  12. At this point, use a design board. Layout your whole blocks. Take the other remaining pieces and lay them out. For the remaining pieces, you can sew each of the pieces one by one, using the same system as a whole block above, sewing just the relevant pieces.
  13. Once all pieces /repeats are sewn, join pieces of each column (i.e. piece going down instead of the typical rows across).
  14. When piecing the 4 columns together, use a lot of pins. I recommend lining up all the colored pieces to ensure alignment is accurate.

Method 2: Paper Piecing

This is not an instruction for paper-piecing, I am assuming you know. The template for the repeat block can be found here. Here are some instructions:

  • Print template at 100%
  • Cut the block out along the edge
  • Cut down around the A, B and C sections
  • Once you finish paper piecing each section; make sure you measure the 1/4 inch seam allowance from the edge of the paper.
  • Join sections in the order A–>B; AB–>C
  • Once the ABC block is complete make sure you measure the 1/4 inch seam allowance from the edge of the paper.
  • Follow the above steps 13-14 in method 1 ( to join the blocks down each column and then joining column to column.

Hope you enjoy the block, let me know if you have any questions.

Additional Spoonflower Sampler Quilt Block tutorials:


Spoonflower Sampler Quilt {Block 2: Fallen Obelisks}

Block2

Materials and Cutting Instructions

Fabric Amount Cutting instructions
 Fabric A (Green)   Scrap
  • 1 6″ x 6″
 Fabric B (Dark Blue)   Scrap
  • 1 6″ x 6″
 Fabric C (Grey)  Fat eighth
  • 1 6″ x 6″
  • 1 2.5” x 15” strip (or 4 2.5” x 3.5”)
 Fabric D (White)   Fat eighth
  • 1 6″ x 6″
  • 1 2.5” x 15” strip (or 4 2.5” x 3.5”)
 Fabric E (Orange)  Fat eighth
  • 1 1.5” x 15” strip (or 4 1.5” x 3.5”)
 Fabric F (Citron)  Fat eighth
  • 1 1.5” x 15” strip (or 4 1.5” x 3.5”)

Planning your block

In this folder, is a blank map for your block. Use colored pencils to plan out your fabric selections.

Making your block

  1. To make the HST (Half Square Triangles) take the 6″ x 6″ squares and pair them based on your block plan. For this block the pairing was A-D and B-C.  Place each square RST (right sides together). Make sure you have all the corners lining up. Sew a ¼” seam around the square.
    ModernBlock_D
  2. Cut the square twice, corner to corner. This will give you the 4 HST of each color pairing. Press seams. Trim the blocks down to 3.5″.
    ModernBlock_E
    NOTE: Line the 45 degree diagonal seam up with your cutting boards 45 degree line while trimming. This seam line should remain finishing in each of the corners.

  3. Take the 15″ strips, and pair them based on your map, D-E and C-F. Place each strip RST (right sides together). Make sure you have all the corners lining up. Sew a ¼” seam. Press the seams.
  4. Cut each strip into four (4) 3.5″ pieces.
  5. You now have all the squares for making each row. Use your design wall to line up each row (HST, Stripe block, HST, Stripe block). Sew each of the blocks in each row together. Press seams.
  6. Once each row is complete. Sew each row together, pinning (using pins or glue) to match seams. Press seams. Your block is complete.

Here are some great examples from folks in my class last year.
ModernBlock_B
1. Daisy @ Ants to sugar; 2. Michele @ Undiscovered Optimist 3. Unknown

Leave a comment if you have any questions.

Additional Spoonflower Sampler Quilt Block tutorials:
{Block 1: Broken Chevrons}