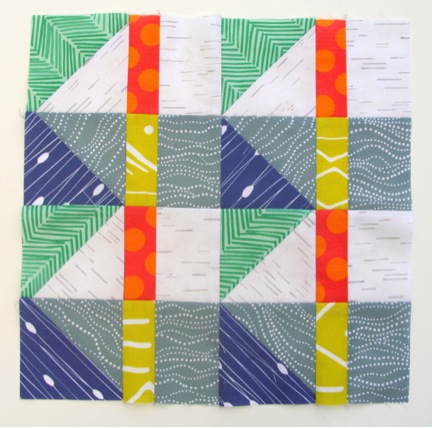
Spoonflower Sampler Quilt {Block 2: Fallen Obelisks}

Block2

Materials and Cutting Instructions

Fabric Amount Cutting instructions
 Fabric A (Green)   Scrap
  • 1 6″ x 6″
 Fabric B (Dark Blue)   Scrap
  • 1 6″ x 6″
 Fabric C (Grey)  Fat eighth
  • 1 6″ x 6″
  • 1 2.5” x 15” strip (or 4 2.5” x 3.5”)
 Fabric D (White)   Fat eighth
  • 1 6″ x 6″
  • 1 2.5” x 15” strip (or 4 2.5” x 3.5”)
 Fabric E (Orange)  Fat eighth
  • 1 1.5” x 15” strip (or 4 1.5” x 3.5”)
 Fabric F (Citron)  Fat eighth
  • 1 1.5” x 15” strip (or 4 1.5” x 3.5”)

Planning your block

In this folder, is a blank map for your block. Use colored pencils to plan out your fabric selections.

Making your block

  1. To make the HST (Half Square Triangles) take the 6″ x 6″ squares and pair them based on your block plan. For this block the pairing was A-D and B-C.  Place each square RST (right sides together). Make sure you have all the corners lining up. Sew a ¼” seam around the square.
    ModernBlock_D
  2. Cut the square twice, corner to corner. This will give you the 4 HST of each color pairing. Press seams. Trim the blocks down to 3.5″.
    ModernBlock_E
    NOTE: Line the 45 degree diagonal seam up with your cutting boards 45 degree line while trimming. This seam line should remain finishing in each of the corners.

  3. Take the 15″ strips, and pair them based on your map, D-E and C-F. Place each strip RST (right sides together). Make sure you have all the corners lining up. Sew a ¼” seam. Press the seams.
  4. Cut each strip into four (4) 3.5″ pieces.
  5. You now have all the squares for making each row. Use your design wall to line up each row (HST, Stripe block, HST, Stripe block). Sew each of the blocks in each row together. Press seams.
  6. Once each row is complete. Sew each row together, pinning (using pins or glue) to match seams. Press seams. Your block is complete.

Here are some great examples from folks in my class last year.
ModernBlock_B
1. Daisy @ Ants to sugar; 2. Michele @ Undiscovered Optimist 3. Unknown

Leave a comment if you have any questions.

Additional Spoonflower Sampler Quilt Block tutorials:
{Block 1: Broken Chevrons}
Spoonflower Sampler Quilt {Block 1: Broken Chevron Tutorial}

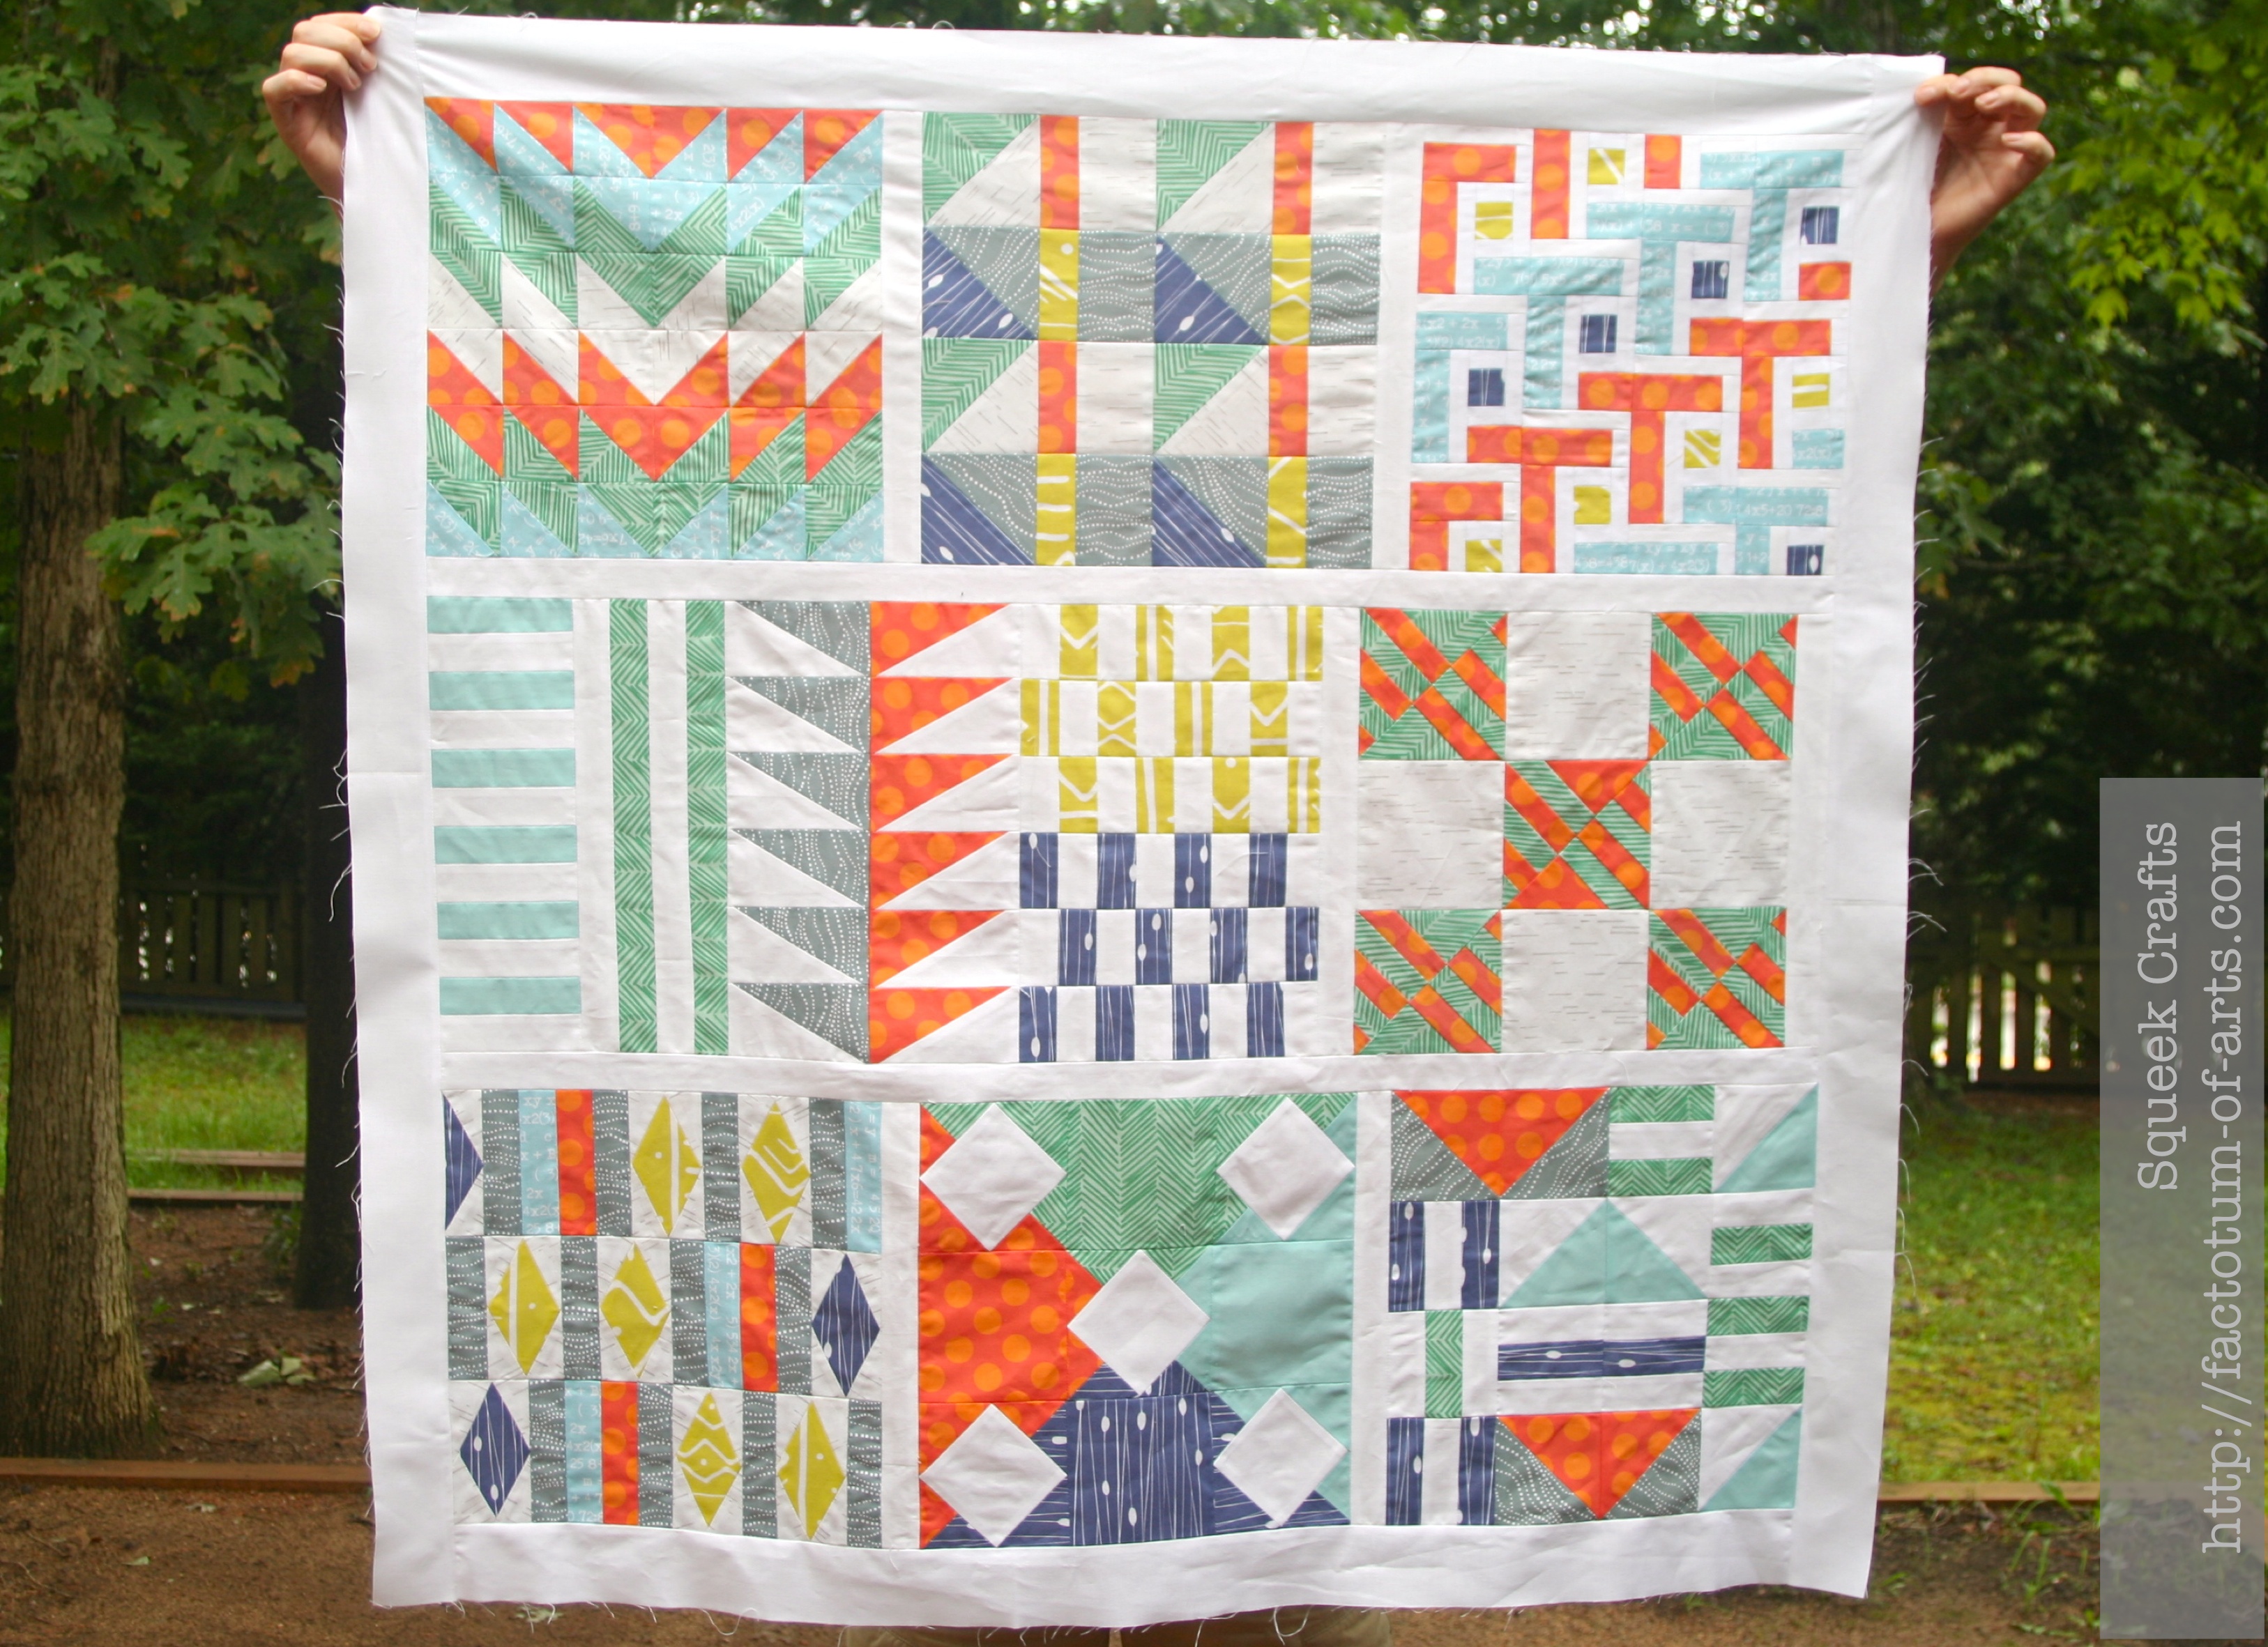
I am finally getting around to posting each of the block tutorials for the Spoonflower Sampler quilt. Just a reminder of what the sampler looked like, here is a picture of the quilt top. Each block is 12″ finish.  This is a great project if you want to practice Half Square triangles (HST), Half Rectagle Traingles (HRT), Diamonds and a lot of 1/2 inch piecing!! If you have any questions at anytime just leave a comment or send me an email.
Spoonflower Sampler Quilt Top

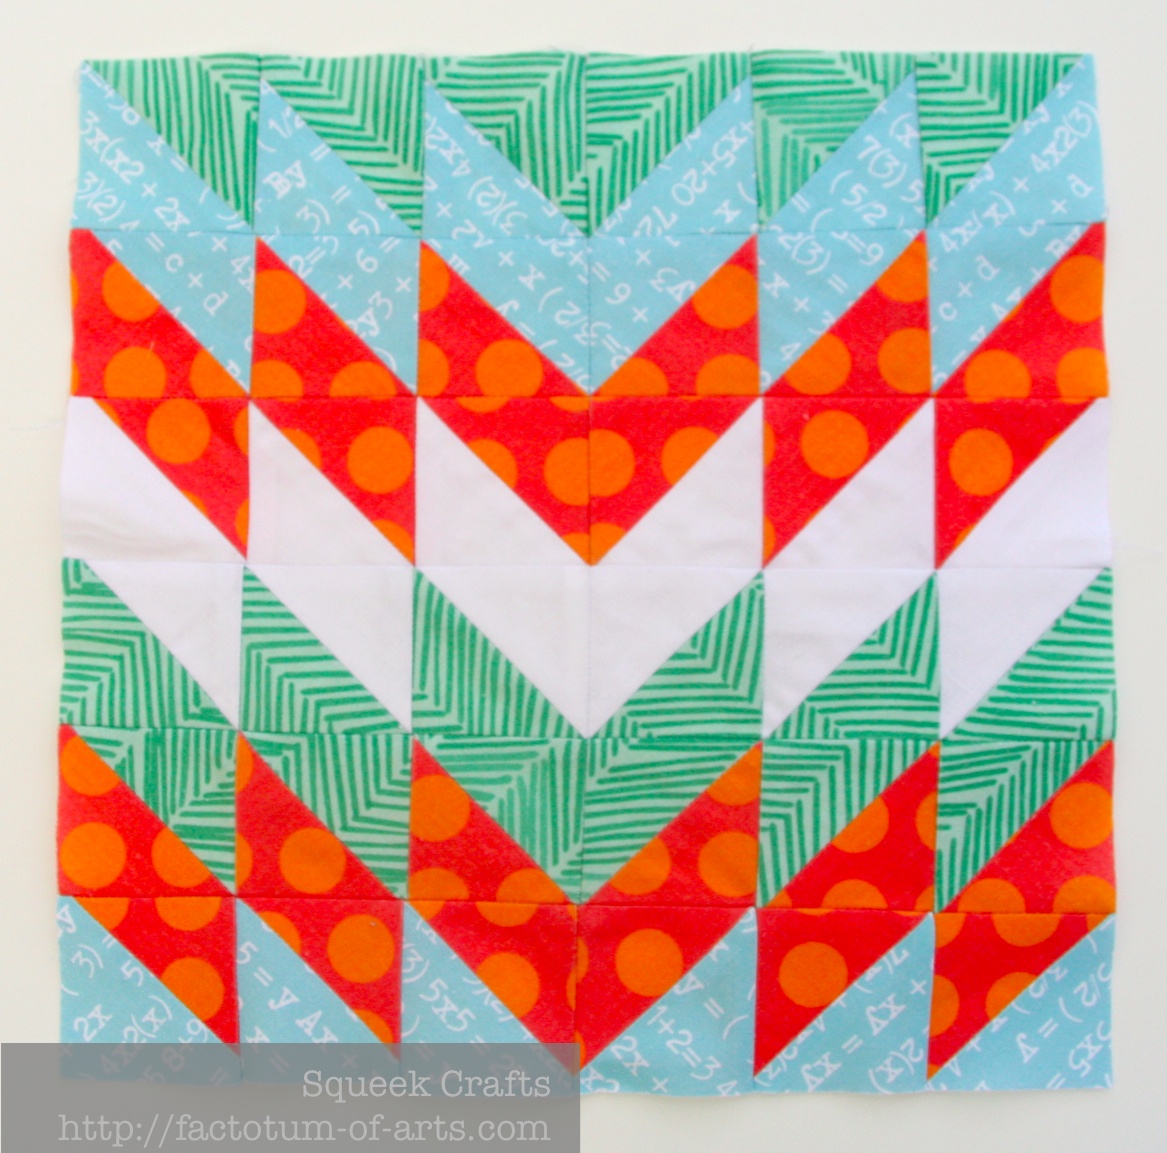
Block One: Broken Chevron

ModernBlock_C

Materials and Cutting Instructions

Fabric Amount Cutting instructions
 Fabric A (Green)   Fat eighth
  • 3 4.5” x 4.5”
  • 3 3.5” x 3.5”
 Fabric B (Blue)   Fat eighth
  • 3 4.5” x 4.5”
  • 3 3.5” x 3.5”
 Fabric C (Orange)  Fat eighth
  • 4 4.5” x 4.5”
  • 4 3.5” x 3.5”
 Fabric D (White)   Fat eighth  

  • 2 4.5” x 4.5”
  • 2 3.5” x 3.5”

Planning your block

In this folder,  is a blank map for your block. Use colored pencils to plan out your fabric selections, as this is important to work out your HST combinations. For example, the above block had the following combinations:

  • A-B
  • B-C
  • C-D
  • D-A
  • A-C
  • C-B

Making your block

This block is made up of all 2″ (finished) HST. There are two main methods used to make these blocks based on the size squares you cut out above. Follow this tutorial, as it walks you through:

  • The two main methods of making the HST’s
  • How to finish your block
  • Pressing seam options (pros and cons with HST’s of pressing open to one side).

Once you complete the tutorial this block is complete. Again, let me know if you have any questions. Stay tuned for block 2, later this week.


Abstract, Improvisation, Intent

Our Guild has decided to participate in the QuiltCon Charity Challenge 2016. The theme is Improv with intent and it uses a limited color palette. I have been so inspired by #beesewcial (check out the hashtag on IG) that I was so excited about this challenge, even though the color palette is a little scary (1/2 the colors very bold, the other 1/2 very neutral).

Our guild did things a little different but playing in the rules:

  • Each person was allowed to pick fat eighths of any or all the colors that the MQG had selected.
  • We chose to stick with solids only.
  • Also, we added that the block must have a triangle in the design.
  • One block required by each person who collected F8’s.

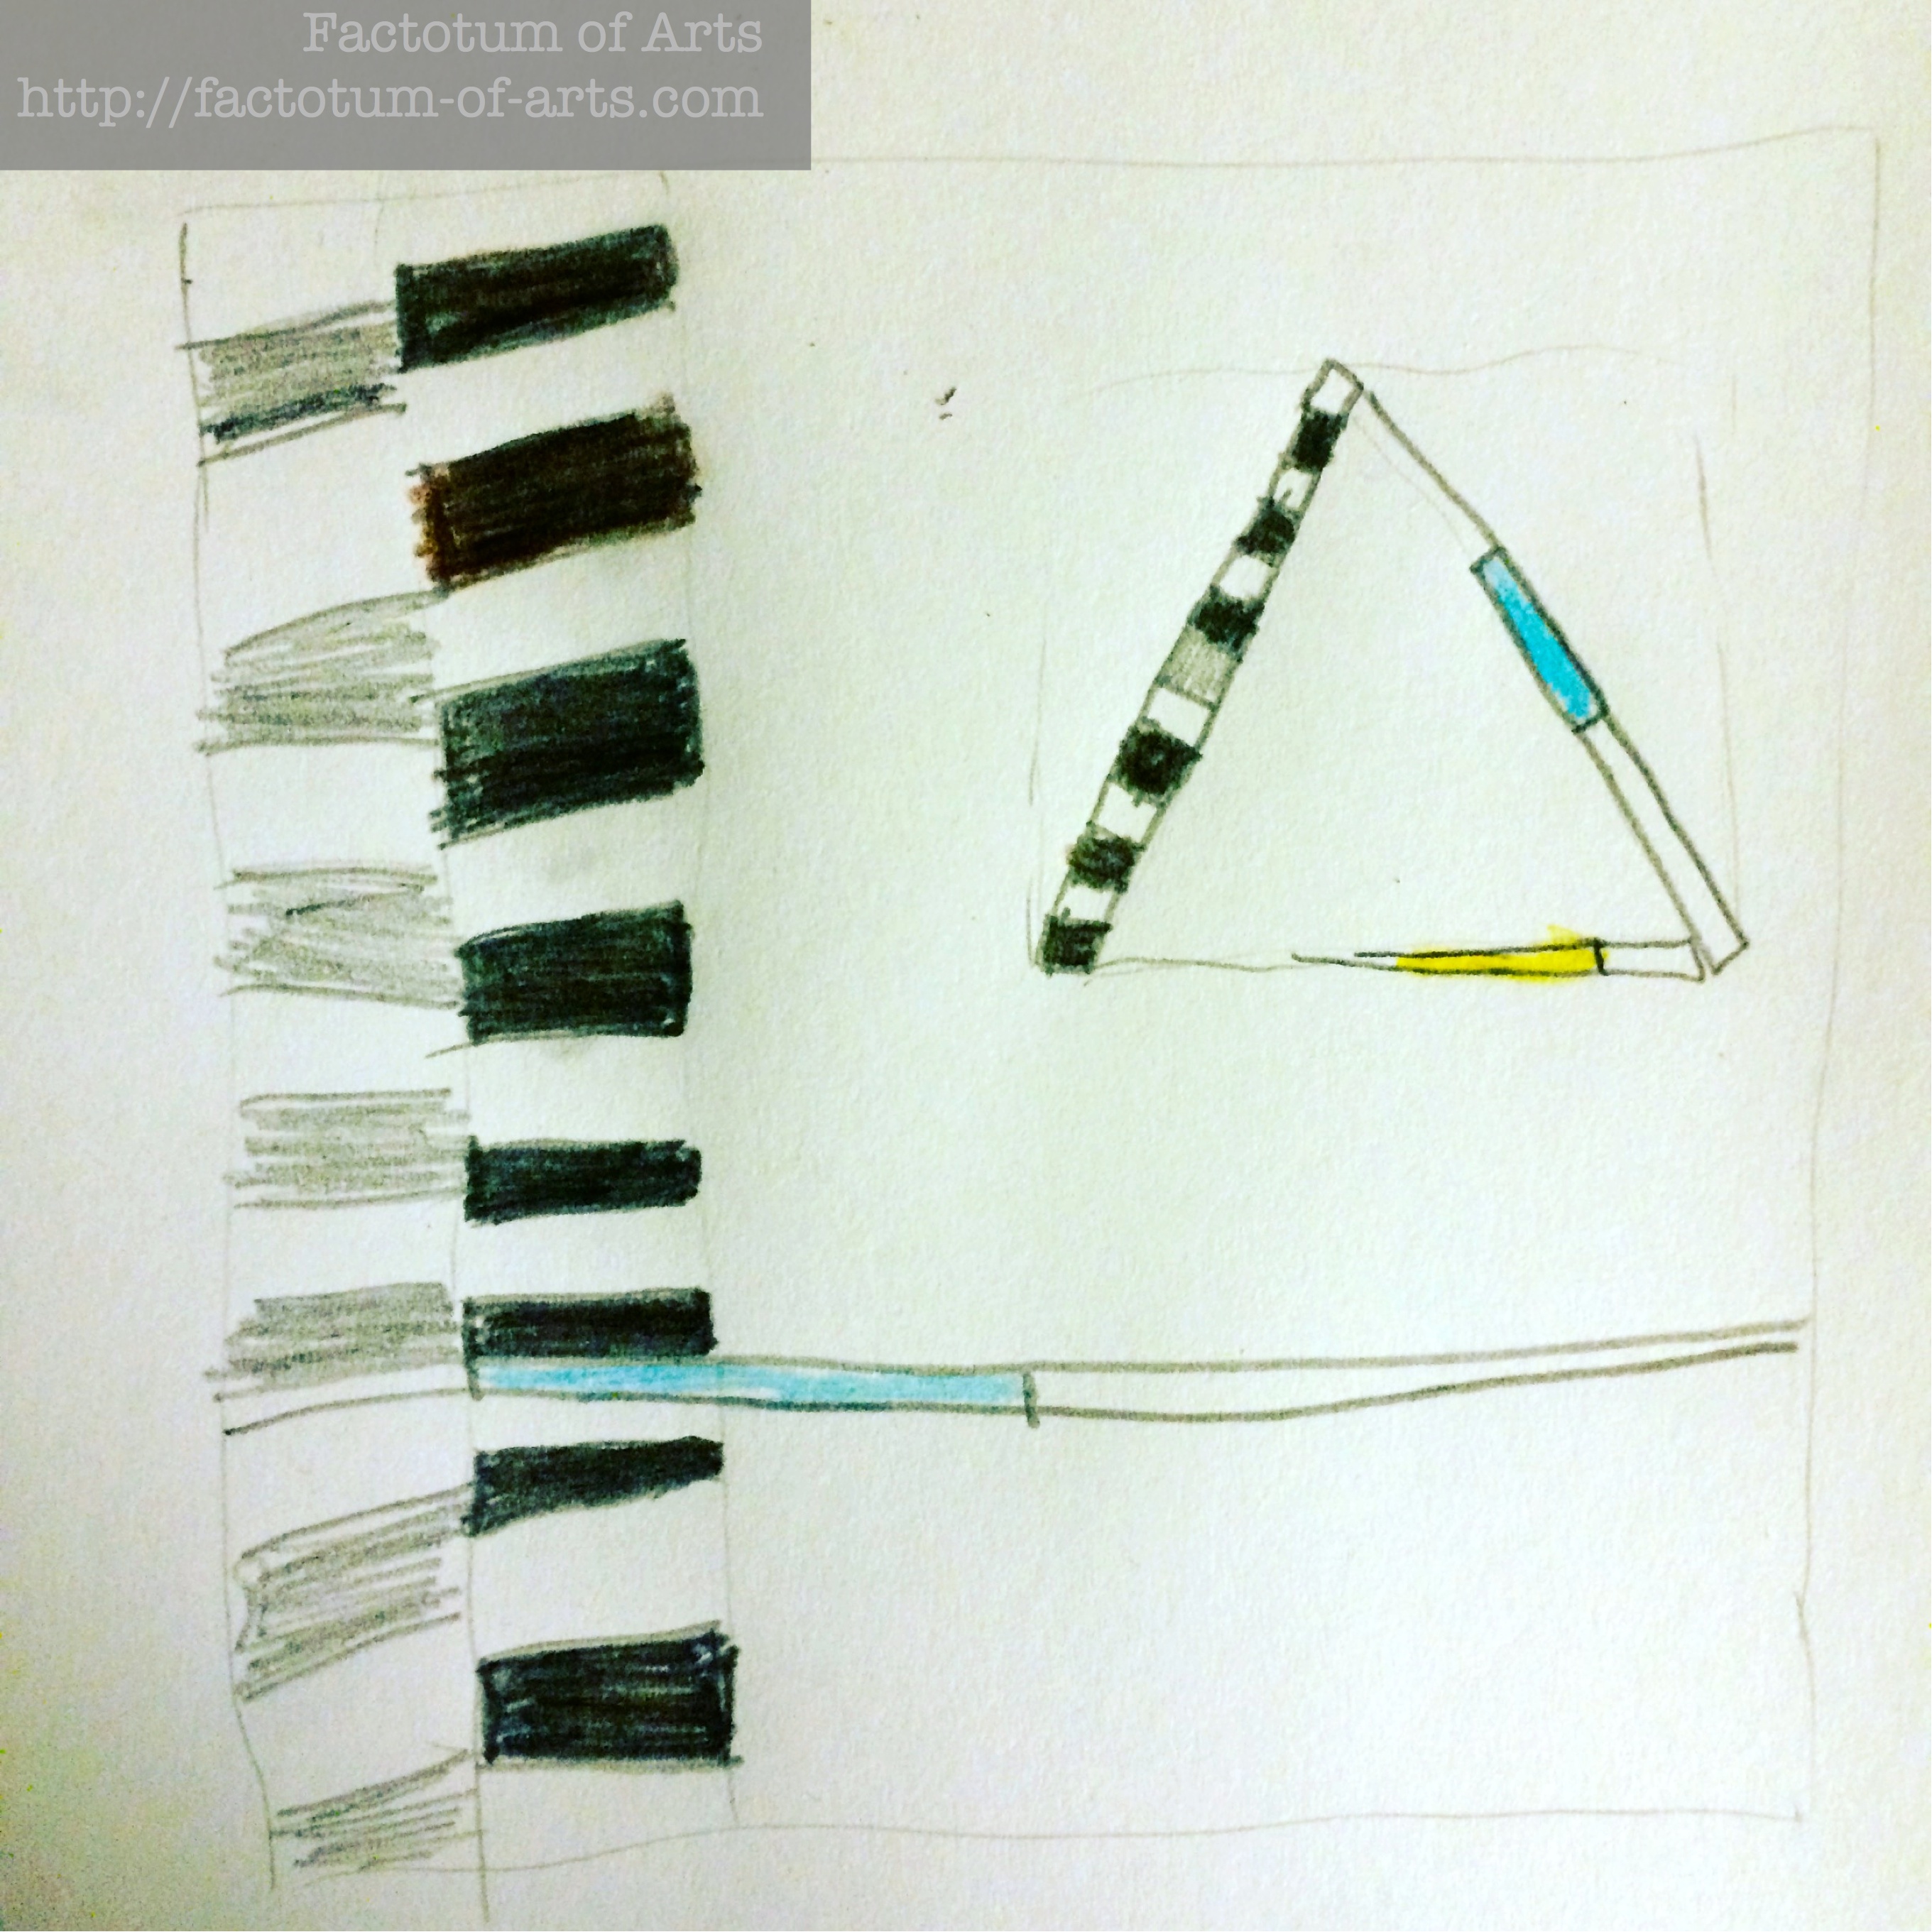
I am so inspired right now with the abstract movement, I think that you will definitely see that in both my designs. My first design, I wanted to use the white, black and grey in stripes and just have pops of color. ImprovIntent_Design1

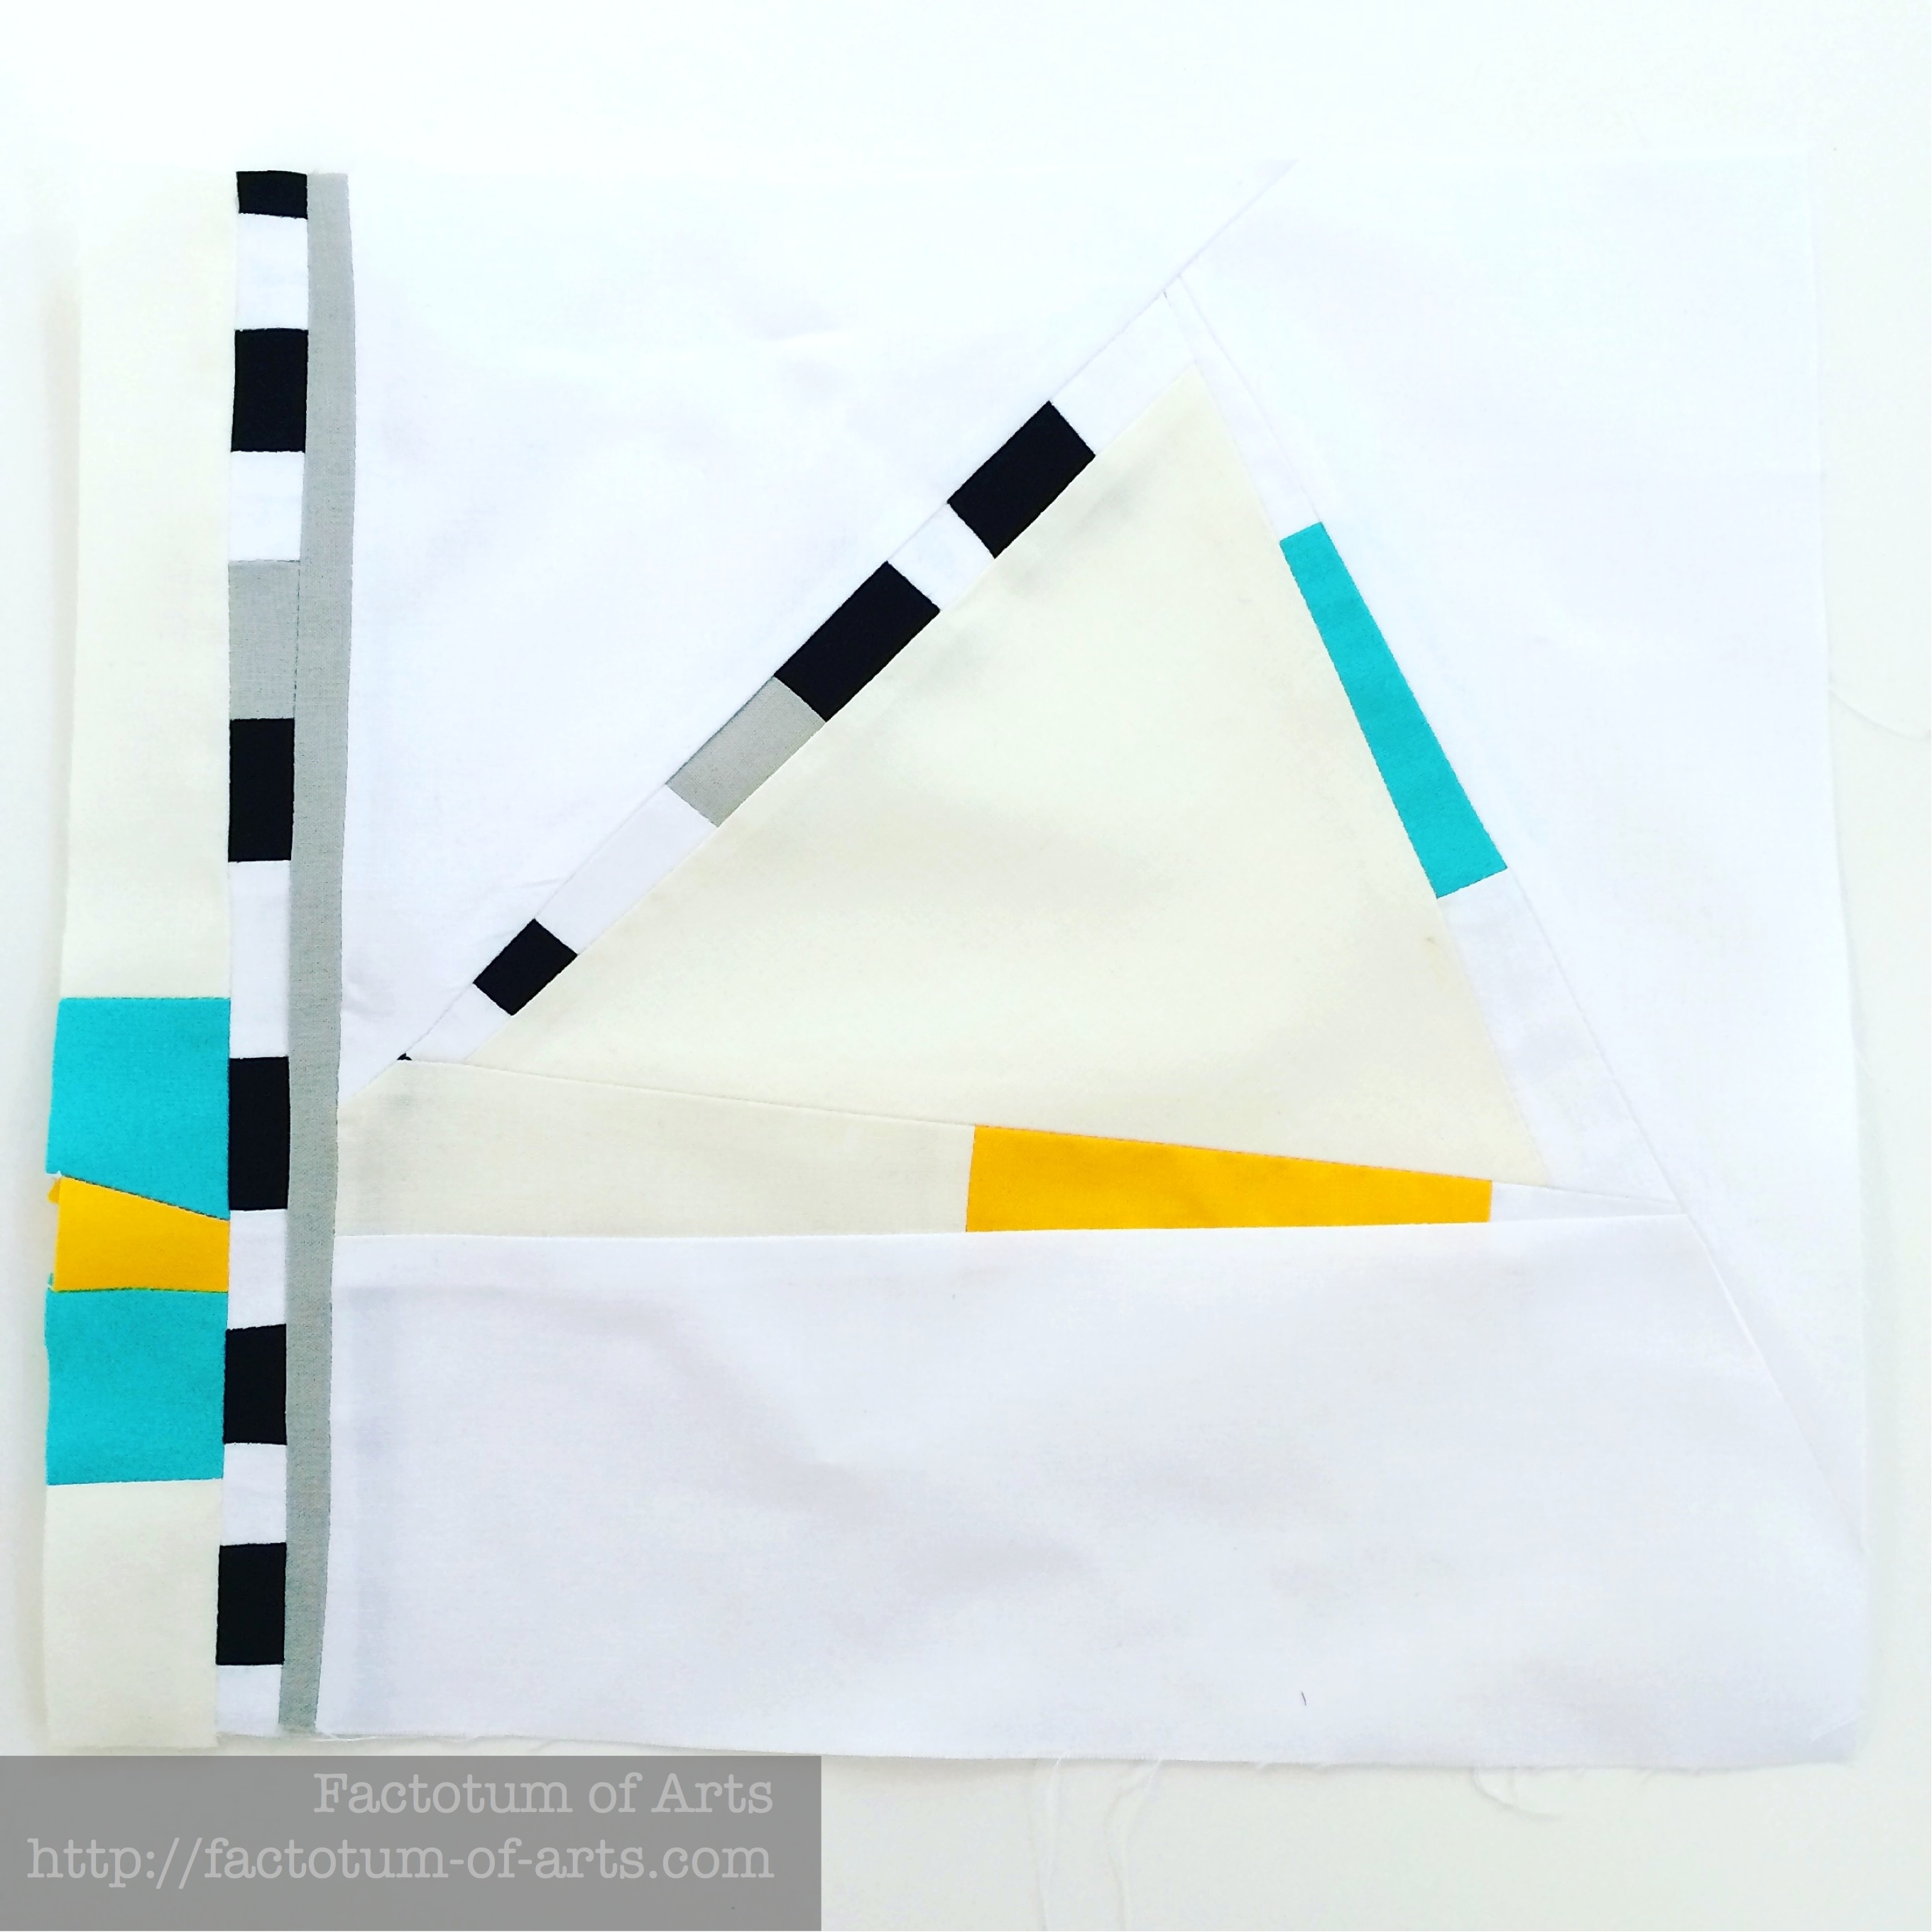
That turned into this…
ImprovIntent_Block1
I loved the whole process of using no rulers and just using my rotary cutter, ignoring 1/4 seam allowance as I pieced pieces together.  It made it seem so much quicker (maybe 30 minutes).  I had plenty of fabric left over.

That night, I was thinking about how the past week at work, deadlines and having family visiting had made me feel a little more stressed/pressured lately. I was trying to relax and the idea of a second block popped into my head, opposing triangles pushing down (or up) on a line. I literally jumped off the sofa and put the idea into this next improv block.
ImprovIntent_Block2

I have to say this is one of my favorite blocks ever. I really wish I was making the whole quilt :-)…maybe over Christmas break I can come back to playing/experimenting.

It is so fun seeing my guild’s and other guild’s blocks coming alive….check out #quiltconcharityquilt.