Last week, I posted the tutorial for Trapped which was featured on Sew Mama Sew.
This was the first of a series, I am calling “Houdini”. The other block is Escaped. Here is the tutorial for the second block.

Fabric Requirements
Fabric A: (Kona Red, A)
- 1 4” x 6.5” rectangle (extra inches included)
Fabric B: (Kona White, B)
- 1 5” x 1.5” rectangle
Fabric C: (Kona Black, C)
- 1 6.5” x 17.5” rectangle (extra inches included)
- 1 5” x 9.5” rectangle
- 1 5” x 7.5” rectangle
- 1 7” x 17.5” rectangle
Batting: 17.5” square
Muslin: 17.5” square
Additional Materials:
Frame: 18” square frame
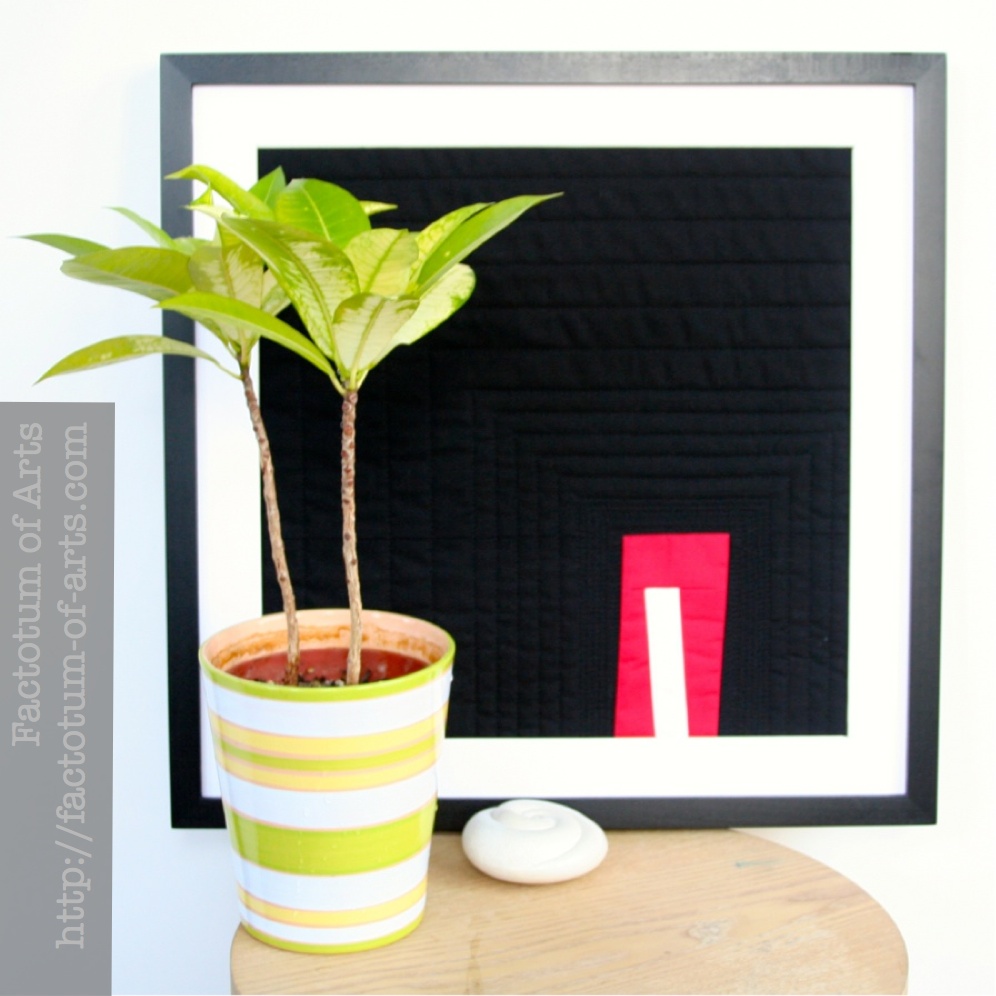
Escaped Block Assembly (Finished Size 17”)
Always use a ¼” seam allowance while piecing.

- Take Fabric A (red, A1), measure from the bottom right corner place your ruler at this mark, at the top have your ruler move in ¼” (as shown in picture above) and cut.
- Place your ruler along the outer edge of A1, and measure 3” and cut the same parallel outer angle.
- Use the 6.5” x 17.5” strip of fabric C, and cut a piece 6.5” x 9.5“. This will be for piece A3. Overlap A1 outer edge (minimal overlap) and the right edge of A3, lining up the bottom and top edges. Both pieces should be right sides facing up. Using A1 edge as the template, line your ruler up along the fabric edge and cut the below black fabric. This is now the inner angle/edge
- Sew A3 to A1. Press the seam.
- With the remaining fabric (6.5” x 8.5”), this will be A2. Overlap A1 outer edge (minimal overlap) and the left edge of A2, lining up the bottom and top edges. Both pieces should be right sides facing up. Using A1 edge as the template, line your ruler up along the fabric edge and cut the below black fabric. This is now the inner angle/edge.
- Sew A2 to A1–>A3 piece. Press the seam. Now the bottom 1/3 of the block is complete. Trim if need be, the bottom ½ should measure 6.5” x 17.5”.
- Sew the 7” x 17.5” rectangle to the bottom 1/3. Press the seam. A1–>A2–>A3–>C1
- Next step sew B2–>B1–> B3
- Sew this last piece to the other 2/3 of the block, to complete the block.
- Create a quilt sandwich using your completed top, your batting and the muslin for the backing fabric. Baste using your preferred method.
- Choose how you would like to quilt your block. I used straight line quilting techniques, and having those lines get denser as they closed in to the red and white boxes. Trim your block to 17” square.
- Once quilting is complete, it is ready to be framed. I used a 18” square frame, with a mount board of ~2” wide.

I’m pinning all of these cause I’m thinking I have some walls that need some framed quilted pieces! Thank you for taking the time and sharing.
These quilts would look so cute stacked one above the other!