Author Archives: mlwilkie

Unknown's avatar

About mlwilkie

Software Developer, Mother, Wife with keen interest in art, design and crafts of all kinds.

Art Journey – Exhibitions {Part 2}

Sorry for the delay in this post. The last quarter of 2022 was so busy as I was transitioning my out of my job and the company I worked for, for 24 years. Also, in December I got to go Morocco and came back from traveling with COVID. It was a very interesting year end.

Just a reminder, this is what I have found or done on my journey moving from being a quilter to a textile artist. This may or may not be the best path for you. Let’s talk about how to get into an exhibition and where to start.

Where do I start?

I have found most galleries will have a call to entry. This could be for a curated exhibition (themed or a group exhibition) with multiple people participating or it could be a call for a solo exhibition – all the pieces will come from one person.

I do multiple things to keep an eye out for the call for entries:

  1. Follow places I am interested in exhibiting at on social media and sign-up to their newsletters if they have one. I tend to do this with places that are local to me, for example: Artspace NC, Cam Raleigh, McColl Center, and 311 Gallery.
  2. Join groups that have exhibitions regularly and/or post other opportunities. Here are examples of some local places to me Durham Art Guild, Fine Arts League of Cary and some inter/national groups such as SAQA, Surface Design Associates, Fiber Art Now.
  3. Sign-up for sites that post Call of Entries for galleries, shows and other companies. The most common one I found was Cafè (note it is not specific to quilts but provide a lot of opportunities for art shows….after all Quilts = Art).

In Preparation for Submission

In preparation, for submitting your quilts to a call for entry, here are the things I have on hand just in case. These can be daunting at first but once you have them prepared it is much easier.

  1. Artist Bio (biography): This is a description, in the third person, about me. I keep bio to ~200 words and at times I will have to cut it down to 100 words. This should cover the artist career highlights, and a summary of their work to the present day. If you have been formally trained then also include education.
  2. Artist Statement: An artist statement is usually a statement that accompanies a selection of new art and explains the artist’s process and motivation as they created those artworks.This can be different depending on what you are applying for. If you are submitting a specific piece you would talk about that piece. If you are submitting for a solo exhibition it would be about the theme and goal of the your pieces that go into that exhibition.
  3. Resume: You may be asked to submit a resume which should include what you have done as an artist such as previous exhibitions/shows (include your quilt shows too), also include other things you have done as an artist. I include publications, teaching, and volunteer activities. It should not be longer than two pages. Depending on what I am applying for I change these categories around, since we are talking about exhibits here make sure that is at the top.
  4. Like other quilt shows, also have available, material used in quilt, date finished, name of art piece, dimensions, and amount you are willing to sell it for. You may want to have a list prepared and stored in a document so it is editable and easy to copy.
  5. Have you photo images ready. I have found that the images of your quilt must be flat and on a white background and usually a high quality image. If selected they may use this image for the exhibit marketing materials. You may need also a detail shot but this is less likely for an art exhibition.

You may never have written an artist statement before or created an artist statement, best advice I can give you is to take a look at other artists, ones that are similar to you and ones that are not. What did you like and not like and style yours based on that.

Applying for a Call For Entry

  1. It is important to read the instructions and any additional details they provide. These instructions will let you know:
    • if there are any restrictions (like size, or if they are looking for specific theme or a focus that excludes your medium) or
    • the selection process (judging and dates for announcements and delivery of your piece) or
    • the piece must be sellable and how much the gallery will keep vs. how much you will receive.
    • Hanging instructions, you may need it “ready to hang” includes wire etc.
  2. Most call for entries will have a fee.
  3. Exhibitions may have prize money.
  4. If you are applying for a solo show, make sure you read the fine print on the photos you submit. They will either ask for x number of photos of the art pieces (quilts) you will be showing (and you must show these quilts with substitutions if you have to but it is usually of a similar piece) or you will be asked to submit a “portfolio” of your work that matches the Artist Statement you submit. In this case, they don’t have to be the exact pieces for the final show.

Important, I save all images and documents for each call for entry in its own folder, even if that means I duplicate things. This way you have a record of what you submitted in case you need to validate down the line. I also keep a spread sheet with the following information: Name of quilt, date made, size, link to artist statement for the one piece, submission/call for entry, date of deadline, date of announcement, date to ship by, Accepted or not, shipped (Y/N), Date of shipped, expected date of return and other notes of importance.

Additional Information for Solo Exhibition

In my experience (accepted for my first solo exhibition), once selected for a solo exhibition the process differs slightly.

  1. You may have to sign a contract committing to dates and space, opening reception, hanging and takedown dates and times etc.
  2. You may or may not sell your work. If you sell your work again the gallery will take a commission so consider that in your prices. If you aren’t allowed to sell your work ask if you can provide a flyer or information at the door for with contact information (or even prices).
  3. Ask for the layout of the Gallery, wall and floor space. Get the dimensions of where you can hang work and what size you can use in each space. Consider windows, doors or other non-useable space.
  4. Ask about what will be available to hang with and what is allowed.
  5. Make sure you organize folks to help hang and take down the show if it is your responsibility.

Art Exhibition vs. Quilt Show

There are similarities and differences between the submission process for a quilt show vs. an exhibit. Here is a list to see some differences:

Exhibit ProcessQuilt Show Process
Eligibility Rules and guidelines
Instructions for Call for Entry Instructions for submission
Photo full view
(High quality, white background,
photo must meet size and naming requirements)
Photo full view
(High quality, white background,
photo must meet size and naming requirements)
N/A Photo detail view (High quality, white
background, meeting size and naming
requirements)
Artist Statement (description of solo show/
or single piece submission; possibly in a separate
document)
Description of Quilt (typically within
submission)
Year made Year made
Artist Biography (separate document) N/A
Sellable
(typical, and gallery will take commission 30 or higher is possible)
Choice between Sellable or not for sale
(NFS)
Curated
(usually the curator will be announced in the call for entry)
Juried into the show and then Judged.

Above is the most common processes and expectations I have seen but this may vary if it is an online show vs. in-person, or if the exhibit is an open call where everyone will have a piece accepted but typically there is another process where a curator will choose top pieces or a smaller exhibition that will follow-on.

I am happy to share any of the documents, I mention above, if you are interested. Let me know if you have any questions.
Art Journey {Part 1}

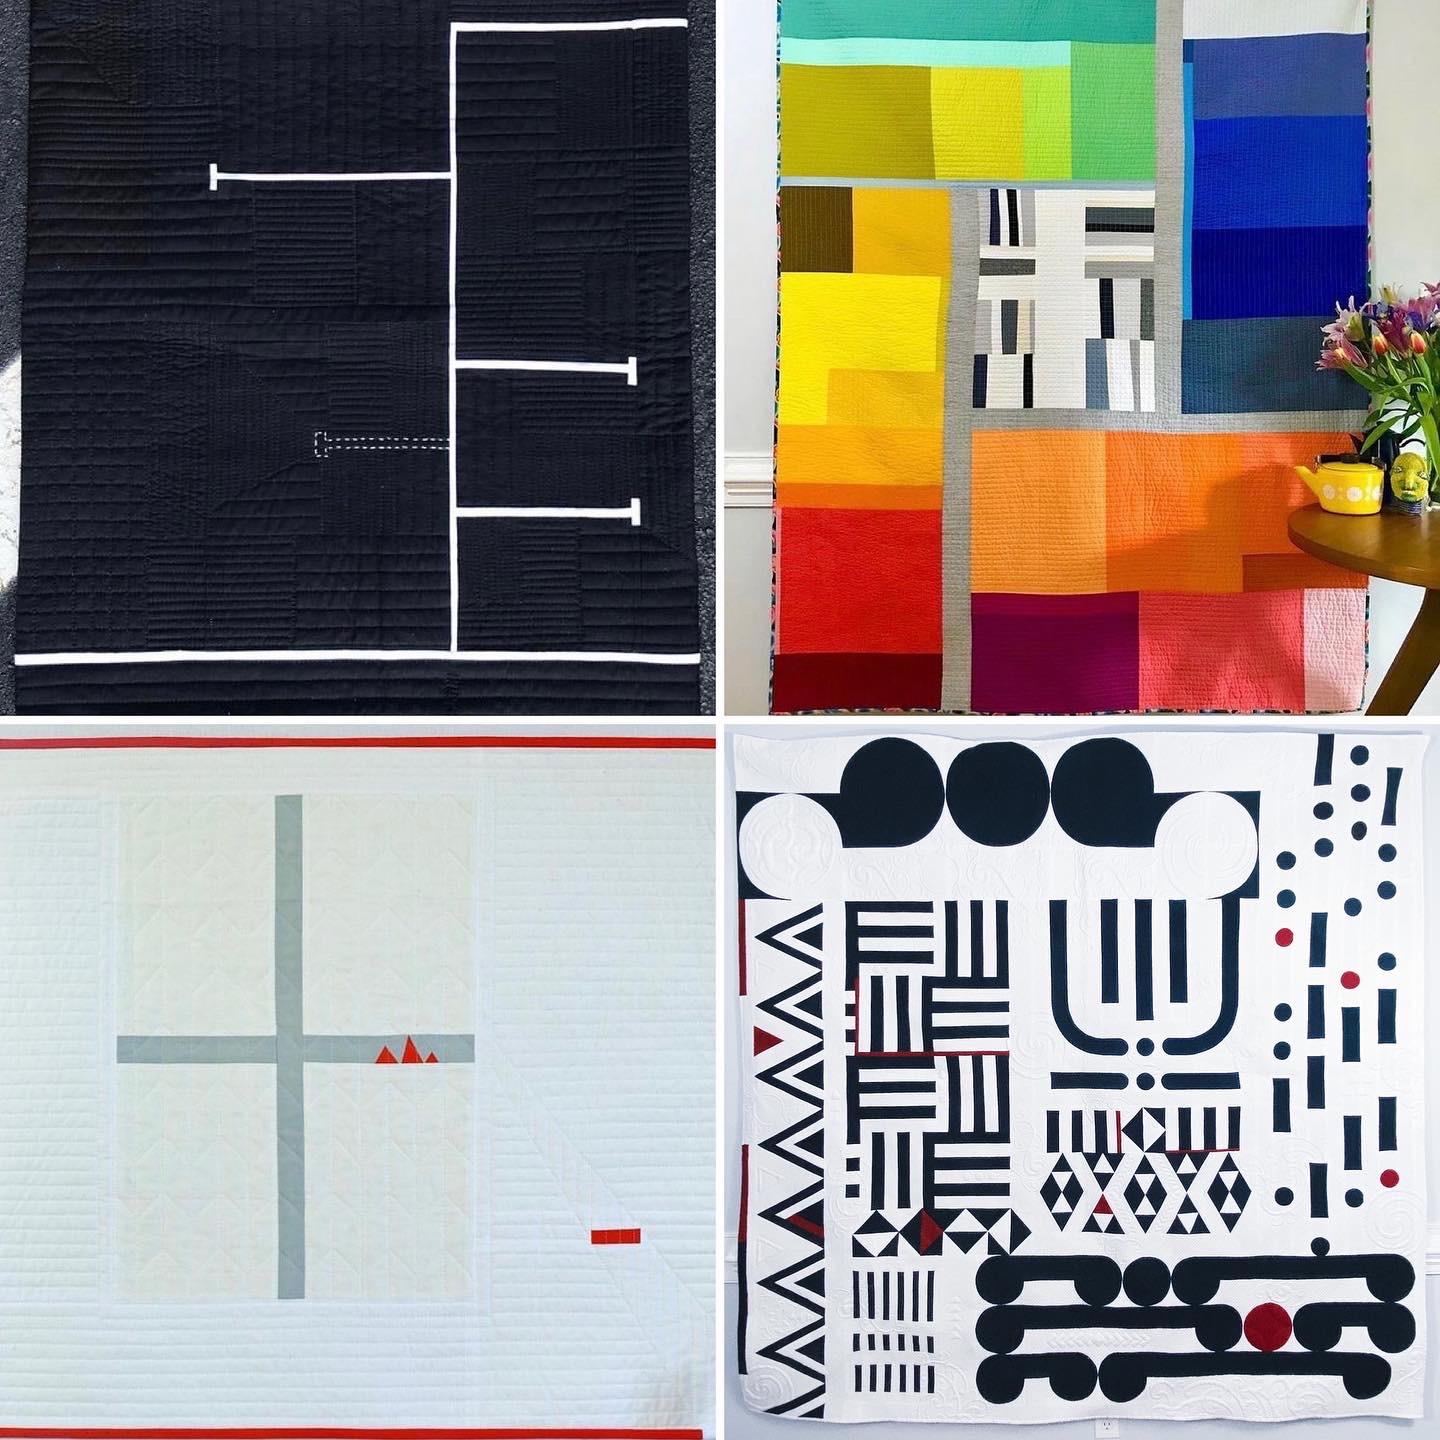
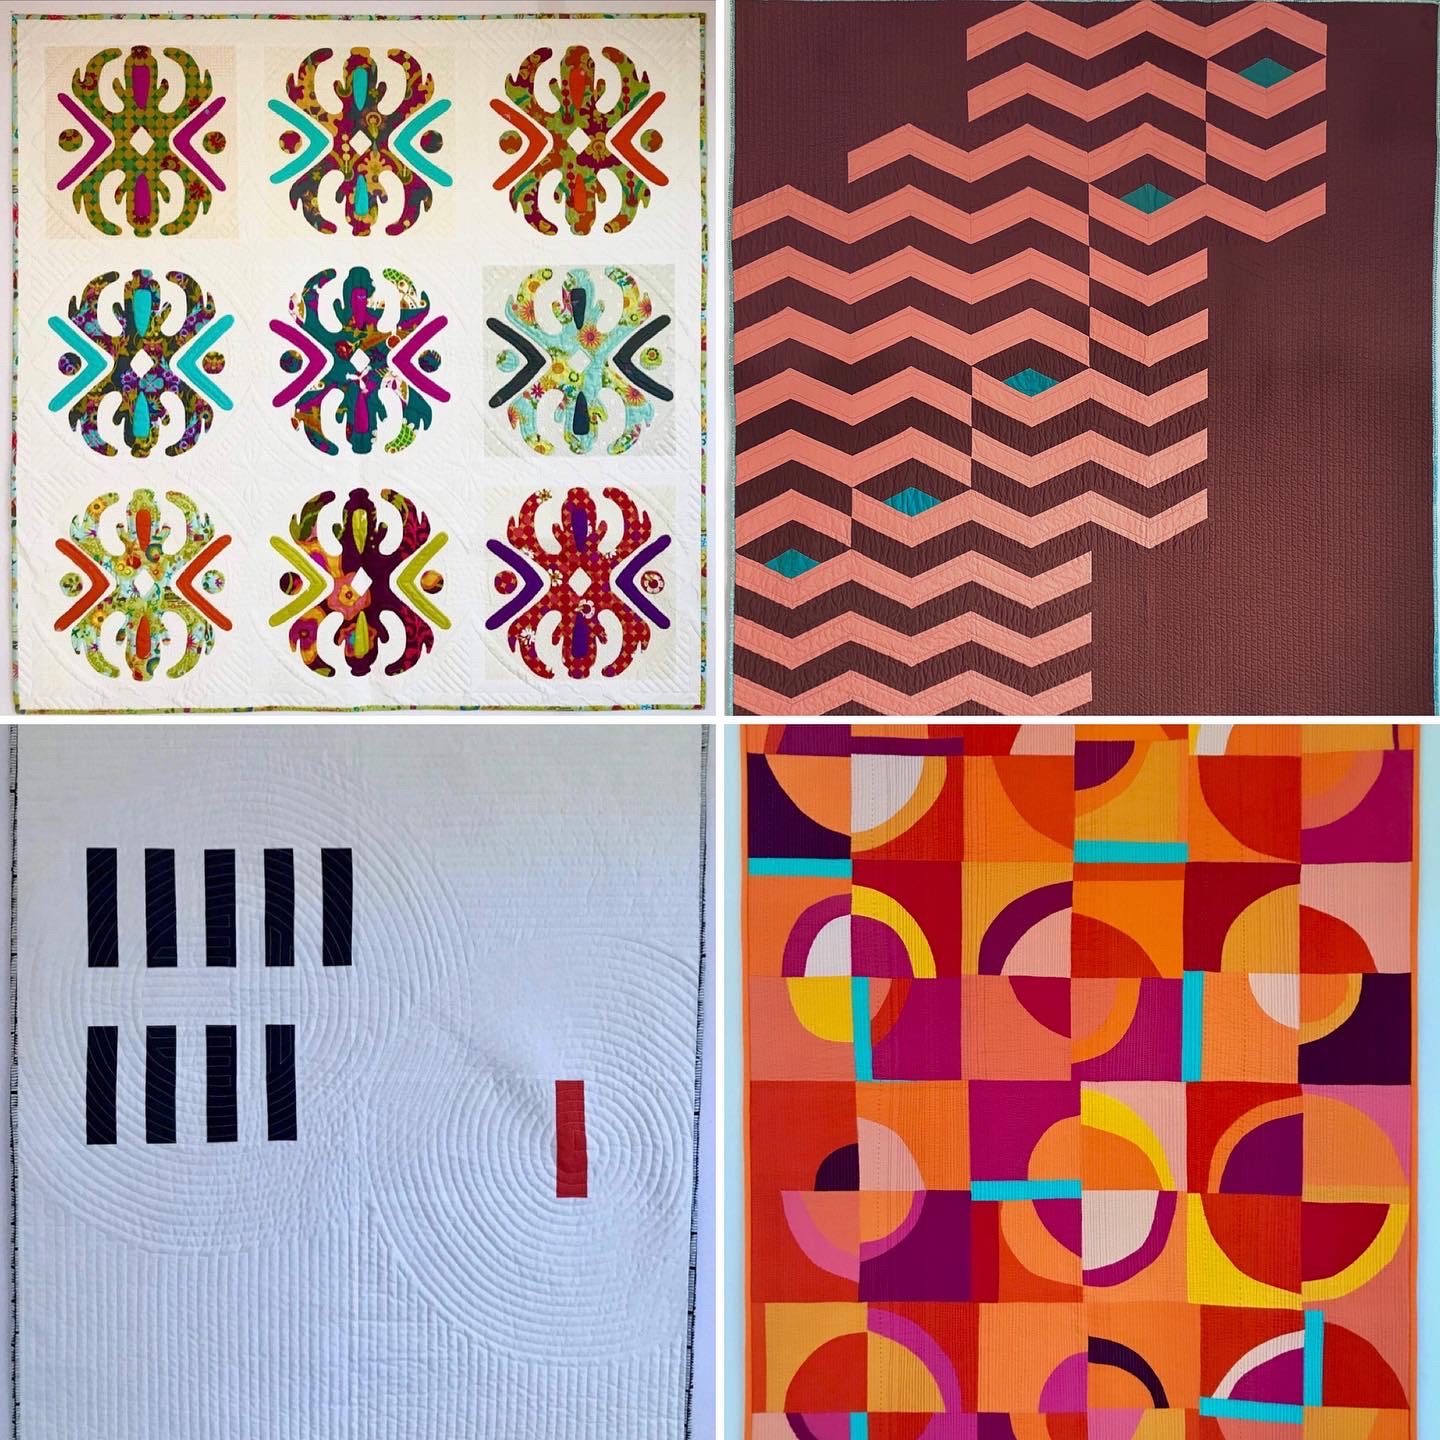
This year, I set a goal to move more into the art world and seen as a textile artist. I don’t know why but I was not expecting much of a difference. I was so wrong. There is a lot to navigate in the art community that is not the same as in a quilting community (for me a modern quilting community). I thought I would start sharing my experiences now that I am finding my feet. Over the last 12-18 months, I have been learning a lot and have been successful by:

  • included in two exhibitions
  • sold a couple of pieces
  • selected in an art auction event for NC Museum of Arts
  • accepted to a 2 week winter residency program at Penland School of Arts and Crafts
  • and invited for a solo exhibition July 2023.

One of the hardest things I found, was where to start. The best things I found were:

  • Find local art community spaces that aligns with your interests. It is a great way to meet people. I found Artspace North Carolina who offers studio’s for artists, exhibitions and classes (both adult and children). They have a monthly fiber meet-up, First Friday events which is an open house to walk through studio’s and see the current exhibitions, volunteer opportunities to help out. They have an artist membership which you get local community information and calls for exhibitions, studios and artist jobs.
  • Diversify my Instagram (or social media accounts) to include artists in different medium (painters, printers, knitters, and sculptors as examples), local and regional art groups (SAQA (Regional), Durham Art Guild (NC), Artstigators (NC)) , art schools (John C Campbell Folk School (NC), Penland School of Arts and Crafts (NC), Madeline Island School of Arts), galleries/museums (CAM Raleigh, NC Museum of Arts, McColl Center) , art magazines (Create Magazine, Fiber Art Now, Where +What Woman Create), and web-based art curators (Artrepreneur). These resources helped with getting to know other artists and also when calls were for exhibitions, residencies, studio space and teaching opportunities.
  • There are several places you can join for calls for entry. These calls are how to find out of there are shows/exhibitions or publishing opportunities. My favorite due to the variety is Cafe (Call for Entry).

I still struggled with how and where to sell work and pricing; what do I need to submit to an exhibition and how to apply for residencies. Next post, I will share how I have applied for an exhibition (both a group/themed exhibition and a solo exhibition) and what you need. I’ll share the content I submitted. Stay tuned for part 2.

If you have any questions, let me know below and I will do my best to answer them based on my experiences.

Scrappy Star Blocks {Tutorial}

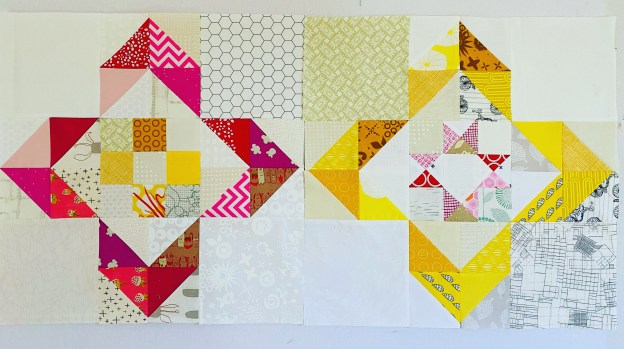
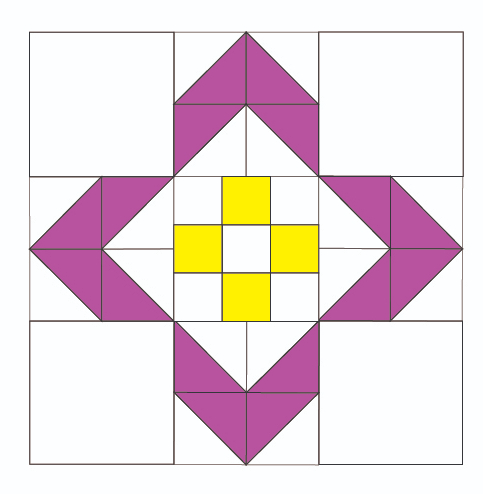
These blocks were inspired when looking at some vintage block combinations. I was thinking about making a gift our of scraps, specifically pink & yellow fabrics with scrappy low volume backgrounds. My goal is to alternate the blocks and make a twin sized quilt (4 x 5 blocks)

Block 1 is made with a simple 9-patch center. Block 2 is made with an Ohio star center. They measure 18″ finished (18 1/2″ unfinished).

Notes:

HST = Half Square Triangle
RST = Right Side together
All seam allowances are 1/4″

Cutting Instructions for each block

Block 1 (9-patch center):

  • Five (5) 2 1/2″ low volume squares
  • Four (4) 6 1/2″ low volume squares
  • Eight (8) 4 1/2″ low volume squares
  • Eight (8) 4 1/2″ pink squares
  • Four (4) 2 1/2″ yellow squares

Block 2 (Ohio Star center):

  • Five (5) 2 1/2″ low volume squares
  • Four (4) 6 1/2″ low volume squares
  • Eight (8) 4 1/2″ low volume squares
  • Two (2) 3 1/2″ low volume squares
  • Eight (8) 4 1/2″ yellow squares
  • Two (2) 3 1/2″ pink squares

Construction of the Center Blocks

Block 1 (9-patch center):

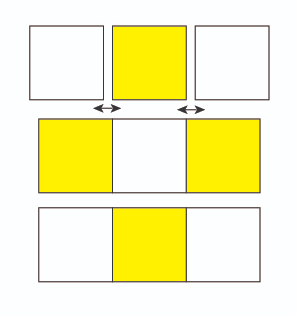
  1. Layout the 9 patch square by using the five (5) 2 1/2″ low volume squares and the four (4) 2 1/2″ squares. The low volume and yellow squares should alternate starting with a low volume square in the corners and center of the block.

  2. Stitch together each of the rows of three blocks. Press seams.
    Note: I press open as it lays flatter and I find it easier to match the seams.

  3. Once all three rows are stitched, sew them together matching seams and pinning in place while stitching. Press seams.

Block 2 (Ohio Star center):

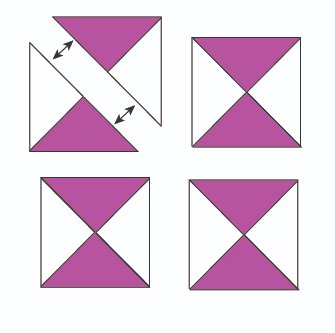
  1. Start by making quarter triangle squares. Take the two (2) low volume and on the back side, draw a diagonal line between one set of corners.
  2. Place the low volume square and the pink 3 1/2″ squares RST.

  3. With the low volume back facing upwards, so you can see the line, stitch a seam on either side of the line.
    Note: I chain piece these, and do all one side first and then the other.

  4. Cut along your drawn line with a ruler and rotary cutter. You should now have two (2) HST from each set of 3 1/2″ squares. Press seams.

  5. Using a ruler and rotary cutter cut these squares in half along the opposite diagonal that is pieced. You should have 8 half pieces.

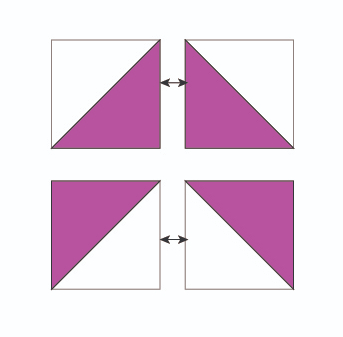
  6. Match up the halves from all the blocks so that the color triangles are diagonally lined up. Put triangles RST, match the seams in the middle (along the longest length) and pin. Stitch together to make 4 blocks. Press seams.

  7. Lastly, trim the blocks to 2 1/2″.
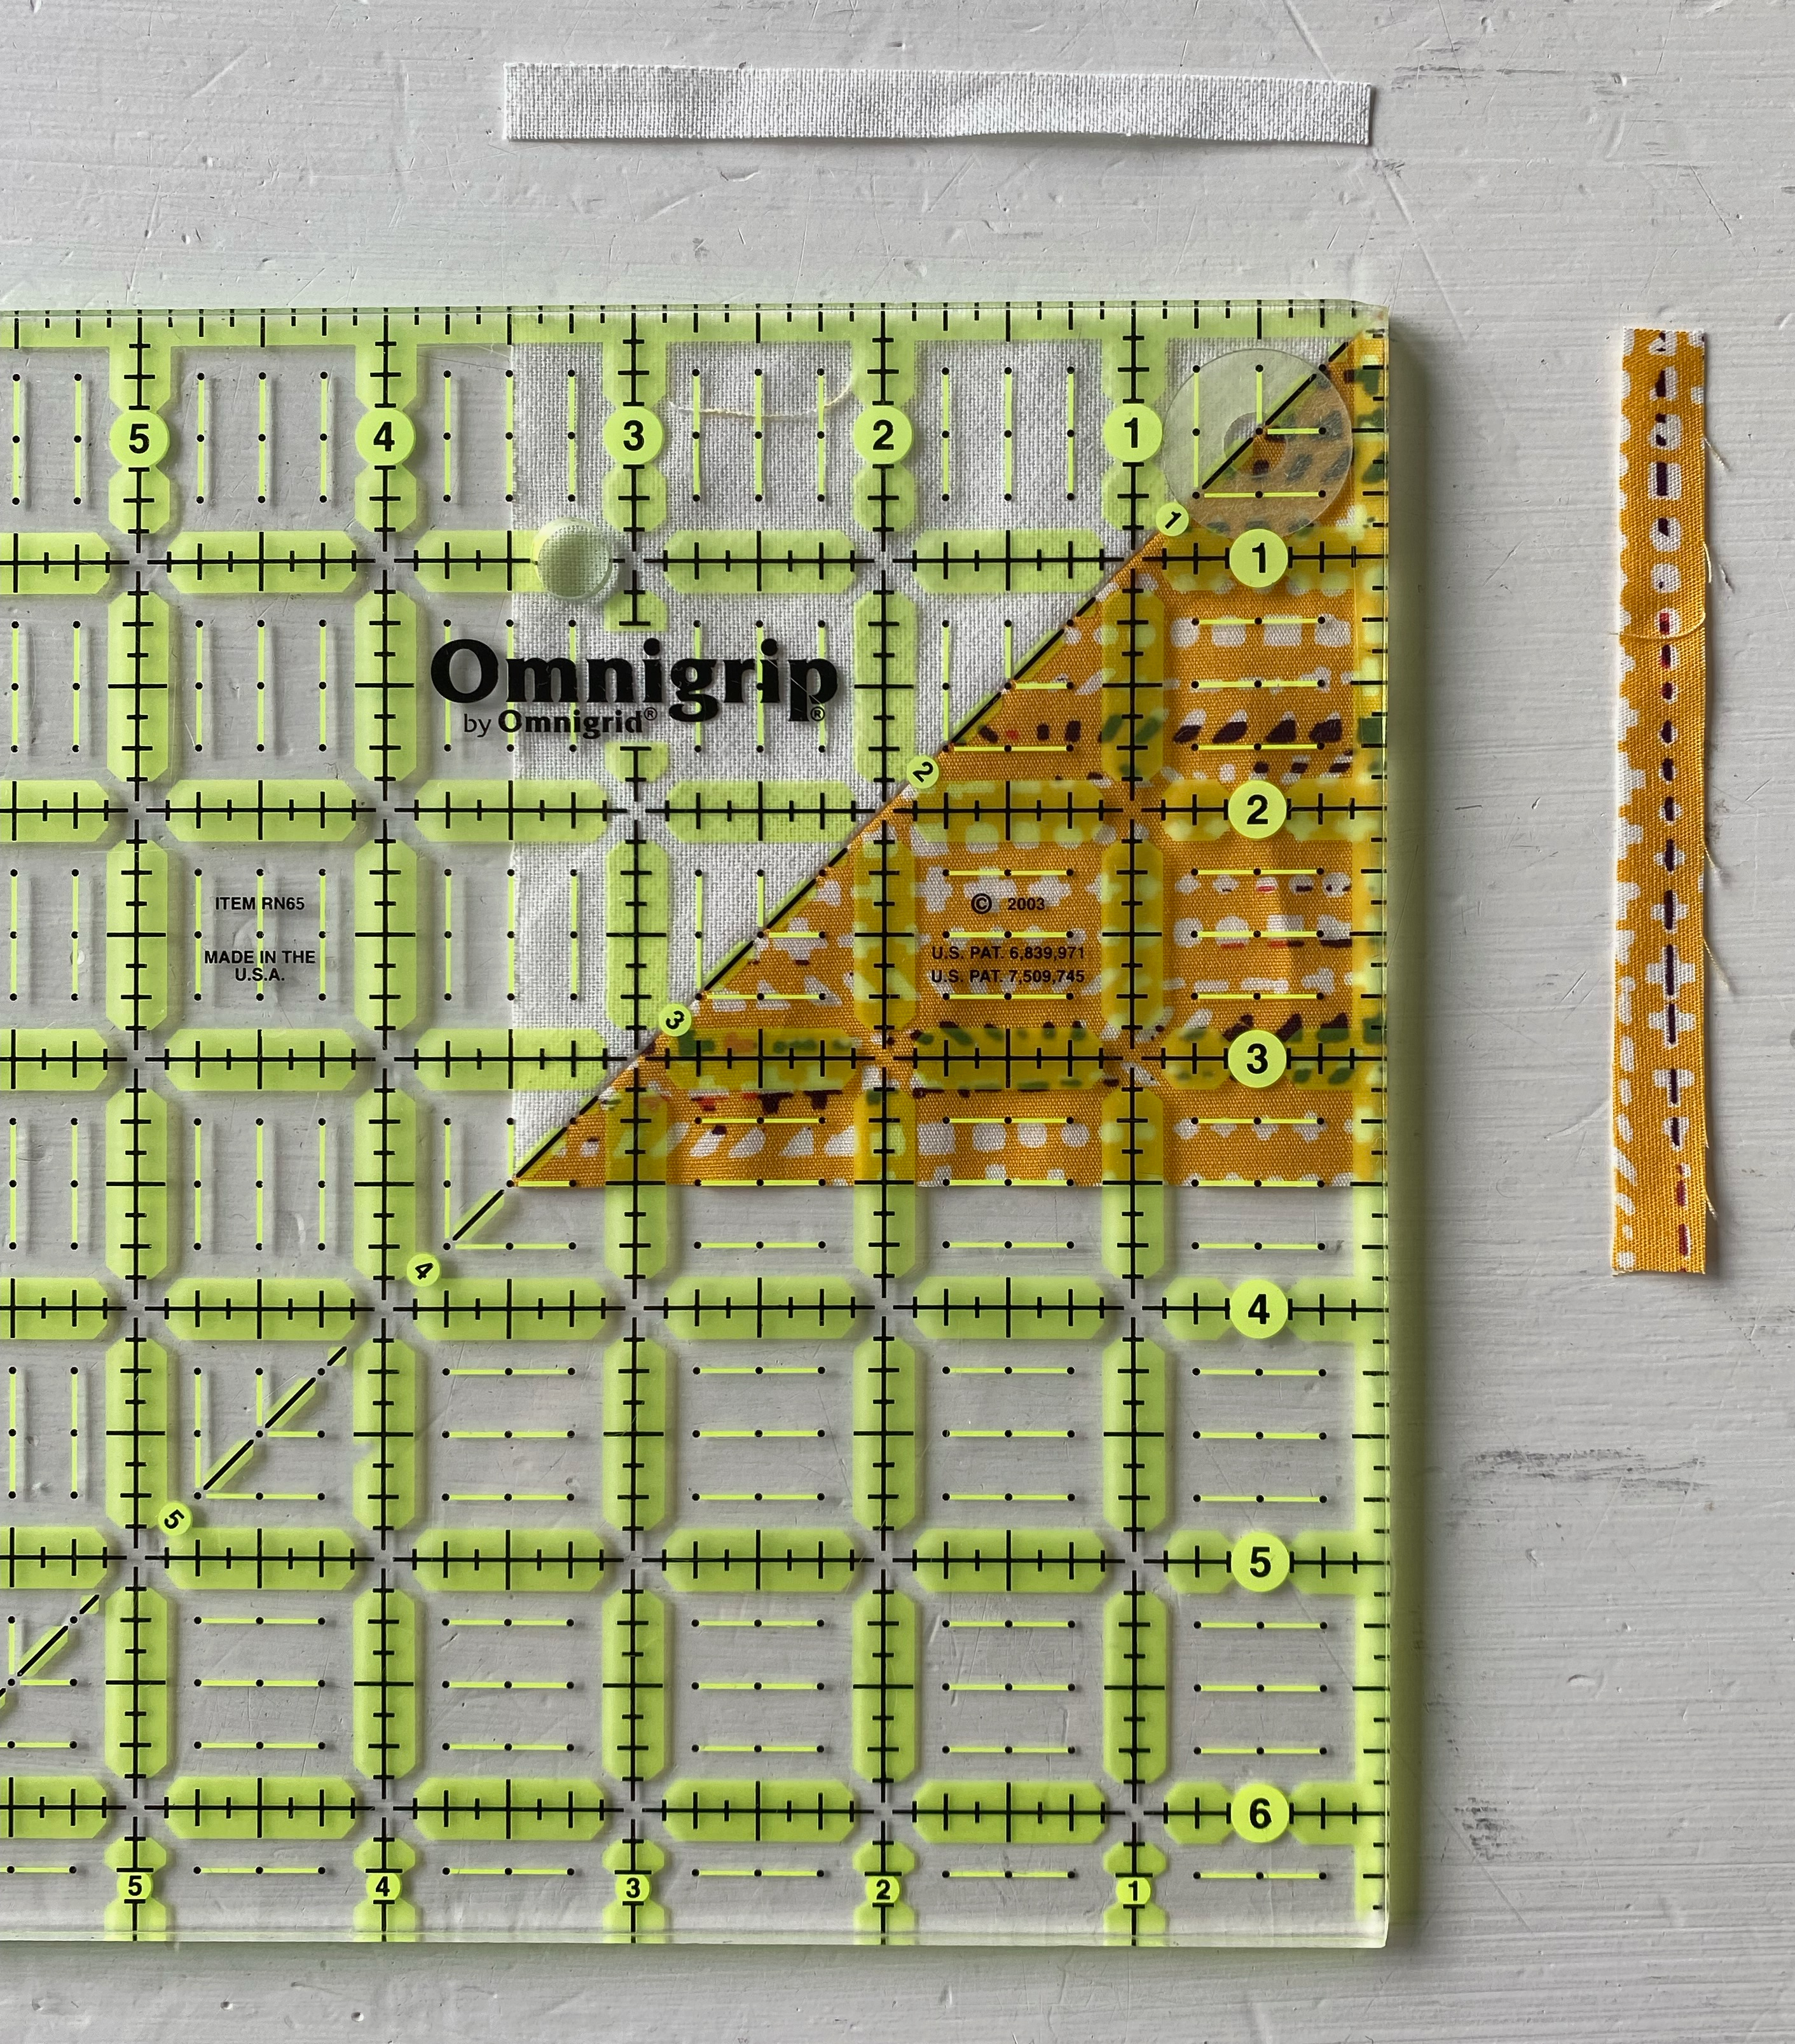
    Note: I use a square ruler with a 45 degree angle line (see image below in next section #5). I line up the 45 degree line with one of my seams and trim all 4 sides (2 at a time), making sure I don’t cut it smaller than 2 1/2″ (you should have at least 1/8 inch to trim for each side).
  8. Follow the steps above for Block 1 to now make a 9-patch (instead of yellow use the pink quarter square triangles). The layout, I use, is as follows.

Construction for HSTs

  1. Take the eight (8) 4 1/2″ low volume squares and on the back side, draw a diagonal line between one set of corners.
  2. Place the low volume square and the pink or yellow 4 1/2″ squares right side together.

  3. With the low volume back facing upwards, so you can see the line, stitch 1/4″ seam on either side of the line.
    Note: I chain piece these, and do all one side first and then the other.

  4. Cut along your drawn line with a ruler and rotary cutter. You should now have two HST from each set of 4 1/2″ squares. Press seams.

  5. Trim all HST to 3 1/2″.
    Note: I use a square ruler with a 45 degree angle line. I line up the 45 degree line (as shown below) with the seam and trim all 4 sides (2 at a time), making sure I don’t cut it smaller than 3 1/2″ (you should have at ~1/4 inch to trim for each side).

  6. You will now be making flying geese with the HST’s. Four will be with low volume in the middle and the colored print on the outside, and four with the color print in the middle and low volume on the outside.

  7. Once you have laid out your squares, put them right side together and stitch them together using a 1/4″ seam. Make sure you know which side to stitch. Press seams open.
  8. Final step, is to make four (4) 6 1/2″ squares using one of each of the flying geese (white and colored middle triangles). Place the flying geese RST, along the long side, match the middle seam, so that your colored squares are forming an arrow. Stitch together.

Construction for Final Blocks

  1. For the final construction you are essentially making another 9-patch square. Place the four (4) 6 1/2″ low volume prints at each corner, in the middle place the center block (smaller 9-patch or Ohio Star) and then in the space place the arrow block (the pink or yellow HST block).
  2. Stitch together each of the rows of three blocks. Press seams.
  3. Once all three rows are stitched, sew them together (with RST) matching the two seams and pinning in place while stitching. Press seams as you go.


Enjoy the tutorial and let me know if I need to clarify anything. I would love to see your blocks if you make any. Tag me on Instagram @ml_wilkie and use #scrappystarblocks when you post or share.