
This is the second pattern I am releasing here as a free pattern, as it is no longer available on Sew Mama Sew (published 2014). Mod Squares is basically using a traditional 9 patch block, where I played with both size and color placement of the pieces.
This was an early quilt I had made (so not perfect), I think it was the first time I tried free motion quilting. It is, however, one of the most loved lap-quilts and lives in my son’s room. I hope you enjoy the pattern too, as it would make a great baby gift.
How it started…
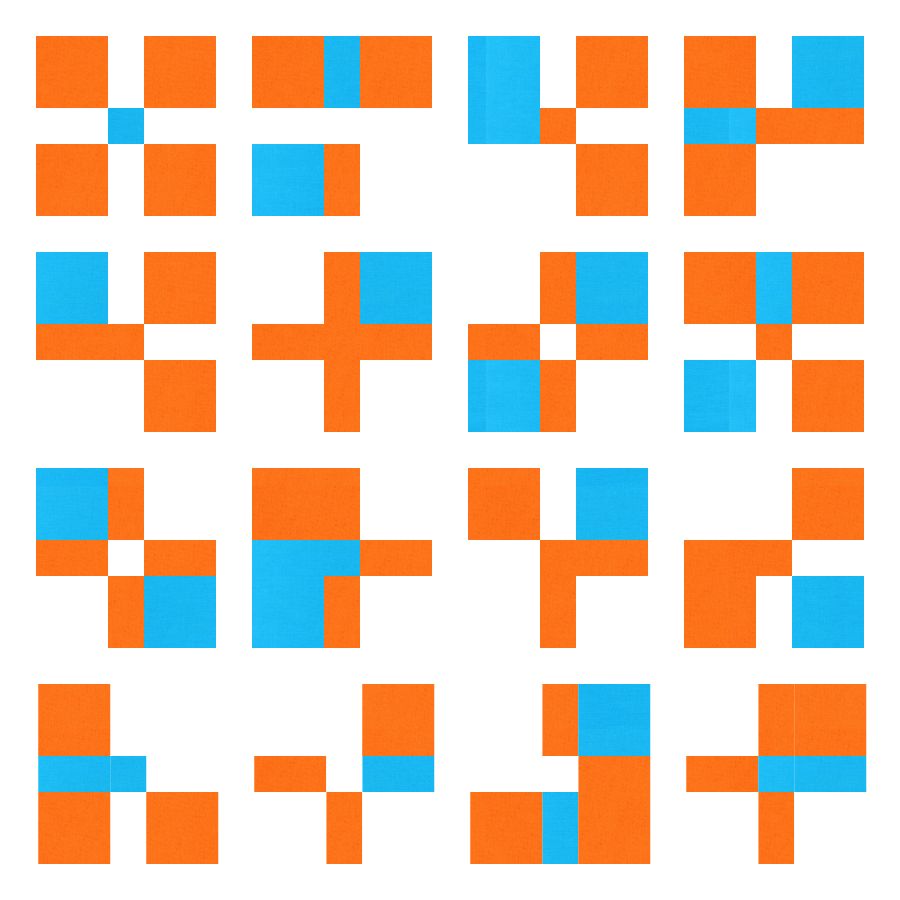
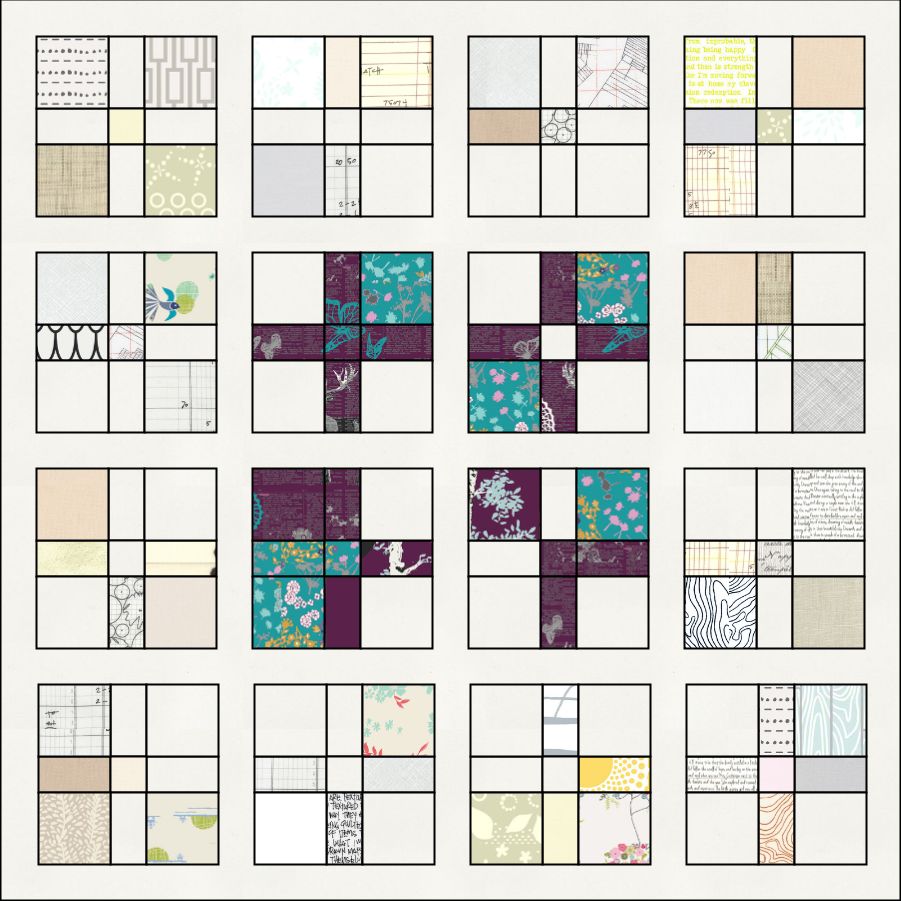
The original color palette (Design Seeds) was very vibrant and strong, but highlighted different ways color can be used to make a block very different.
For this quilt though, I wanted a softer look. After playing with the fabric selection and introducing the use prints, low volume prints and several neutral solids, the look of the design completely changes.

Quilt Details
Size: 54” x 54”
Terminology
WOF – Width of Fabric
RST – Right Sides Together
Seam Allowance: 1/4” seam allowance
Fabric Requirements
Fabric A (Variety of Low Volume Fabrics): 1 yard (largest 2 pieces must be 24″ square)
Fabric B (Variety of Neutral Fabrics): 1 yard (eg. Kona Cotton inBone, Parchment, Silver, Stone, White PDF, largest piece must be 24″ square)
Fabric C (Kona Oyster): 2 yards
Fabric D (Doiland Gloss in Plum, Indelible, Katarina Roccella): 1 yard
Fabric E (Floret Stains in Tealberry, Indelible, Katarina Roccella): 1/2 yard (18″ x WOF)
Backing fabric and Batting: 60” Square
Binding: 226” (of your desired binding width, I use 2 1/4″) 1/2 yard
Cutting Instructions
| Fabric | Cutting Instructions |
| Fabric A | Twenty-four (24) 5” squares |
| Five (5) 2 1/2″ squares | |
| Fifteen (15) 2 1/2” x 5” strip | |
| Two (2) 24” square (for the Back) | |
| Fabric B | Nine (9) 5” squares |
| Three (3) 2 1/2” squares | |
| Eight (8) 2 1/2” x 5” strip | |
| One (1) 11 1/2” x 24” strip (for the Back) | |
| One (1) 24” square (for the Back) | |
| Fabric C | Twenty-four (24) 5” squares |
| Five (5) 2 1/2″ squares | |
| Twenty-seven (27) 2 1/2” x 5” strip | |
| Two (2) 2 1/2” x 54” strip (for sashing) | |
| Five (5) 2 1/2” x 50” strip (for sashing) | |
| Twelve (12) 2 1/2” x 11 1/2” strip (for sashing) | |
| One (1) 11 1/2” x 24” strip (for the Back) | |
| One (1) 24” square (for the Back) | |
| Fabric D | Two (2) 5” squares |
| Two (2) 2 1/2” squares | |
| Thirteen (13) 2 1/2” x 5” strip | |
| One (1) 24” square (for the Back) | |
| One (1) 11 1/2 ” x 23 1/2” strip (for the Back) | |
| Fabric E | Five (5) 5” squares |
| One (1) 2 1/2″ squares | |
| One (1) 2 1/2” x 5” strip | |
| One (1) 11 1/2” x 24” strip (for the Back) |
Preparation
It is important to plan your layout for your blocks. You can also available for download your own planning map here. Once you have your placement as you want it, take a picture.

TIP: Once you cut your blocks and decide on placement, pin and label all block pieces until you are ready to sew them together.
Block Assembly
- Each block consists of four (4) 5” squares, four (4) 2 1/2” x 5” strips and one (1) 2 1/2” square. The layout for all the pieces is represented below.
- Sew the pieces of each row together. Press your seams. NOTE: My preference is to press my seams open.

- Sew the rows together (Row 1 to 2, Rows 1,2 to 3). Align the seams and pin in place to hold the alignment. Press seams. NOTE: To hold seam alignment in place, an alternative pinning method is glue.

- Repeat steps 1-3 for the other 15 blocks, keeping in mind placement of fabrics for each block.
Quilt Top Assembly
- Add the 2 1/2” x 11 1/2” sashing strips to the 11 1/2” blocks as depicted below. Press the seams.

- Add the 2 1/2” x 50” sashing strips to each of the block rows. Press the seams.
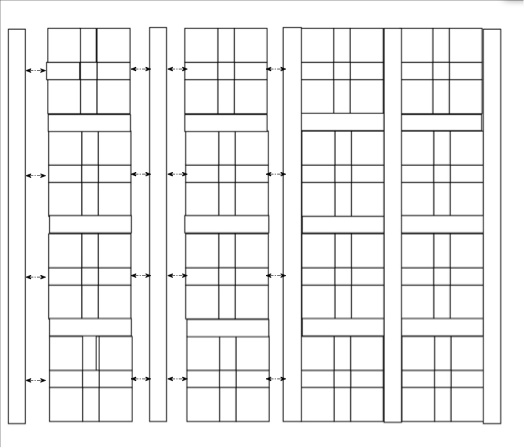
- Final step is to add the top and bottom 2 1/2” x 54” sashing strips to finish the top.

Quilt Back Assembly
- The quilt back is a larger version of the smaller blocks that are used in the quilt top. The back consists of four (4) 24” squares, four (4) 11 1/2” x 24” strips and one (1) 11 1/2” square.
- To construct this block follow steps 1-3 above in section Block Assembly.

Final Quilt Assembly
When the top and back are completed, baste and quilt your sandwich as desired. Square your quilt and bind it to finish your quilt.
This is a great quick quilt top to put together, perfect quilt for your sofa or for a kids blanket. Also, you can have fun with the fabric choices, color and placement. I would love to see the final quilts on Instagram, so feel free to share with #modsquaresquilt. Have fun!!

Thank you for the pattern. I love the deconstructed look of the plus’s and am excited to make this!
Yay!!! I love the deconstructed feel too. I might actually have to make one too, maybe this time in solids 👍