Author Archives: mlwilkie

Unknown's avatar

About mlwilkie

Software Developer, Mother, Wife with keen interest in art, design and crafts of all kinds.

Introducing “Colour: A Blog Series” + Giveaway

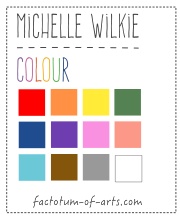
ColorWidget

I am so excited to announce, this year-long blog series on Colour, specifically for quilters. I hope to make the series an interactive and practical study of color. Our goal is to provide you with resource tools, tips, ideas, processes, fabric selections choices, etc. Hopefully, making it easier for you to start playing and becoming more comfortable with color when creating your quilts.

What will the format be for the blog series?
We will have two posts per month.

The first post that will appear in the first week of the month, will be introducing the color, my view on using this color and a task/assignment for those interested in participating.  It will include some color specific examples but also include more general content that we plan to build on each month.

The second post of the month, coming out the third week of the month will be and introduction from our guest + linking to a post from our guest (see schedule below), exposing  you to a variety of processes from different people.

What is the schedule and who are the guests?
We have an amazing line up of guests that will be sharing their process, tips and/or resources.

Month Colour Guest/s
  January Orange  Myself http://factotum-of-arts.com
  February  Yellow  Melanie Tuazon http://melintheattic.com
  March  Blue  Daisy Aschehoug  http://antstosugar.com
  April  Green  Anne Sullivan http://play-crafts.com
Giuseppe Ribaudo https://www.instagram.com/Giucy_Giuce/
  May
 Coral/Peach  Heather Jones http://www.heatherjonesstudio.com/blog
  June  Purple  Sandi Sawa Hazlewood http://craftyplanner.com
  July
 Brown  Alison Glass http://alisonglass.com/
  August
 Pink  Alyce Blyth  http://blossomheartquilts.com
  September
 Black/White  Christa Watson http://christaquilts.com
  October  Aqua/Teal  Katarina Roccella http://likeflowersandbutterflies.com
  November
 Grey  Nicole Daksiewicz http://modernhandcraft.com
  Nydia Kehnle  http://www.nydiakehnle.com/
  December  Red  Nancy Purvis http://owensolivia.blogspot.com/

How do you participate?
There will be two ways in which you can participate. Firstly, we will provide an activity at the being of the month that will help you on your color journey. There will be a link-up on the second post of the month, in which you can add your link and share with others.  Secondly, there will be an opportunity to add comments anytime based on prompts (or in general).

Will there be prizes/giveaways, if I participate?
There will be prizes for each monthly link-up and then a single giveaway once a quarter for those who leave a comment. Please check out our Sponsors Page (which will be updated as sponsors come on board).

How do I catch up on the information if I miss anything?
A summarized view of the blog posts, resource tools, tips etc will be maintained here, so you can catch up anytime.

What does this series not cover?
This series is not going to go in-depth in the theory side of colour, as it aimed at more practical application. However, we will provide resources where you can read up on it and there will be reference to how selections work and why.

What’s Next?
Up next is the post on Orange. You will find content including:

  • fabric pulls around the color Orange (with links to sellers)
  • examples of a couple of projects I have made with Orange
  • general tip of the month relating to using fabric for inspiration
  • we will start building the resources for you to use with some reading resources.

Giveaway: Your task for this month

Let’s start with a simple task for this month. Just leave a single comment below that is either:

  • a question that you would like answered during the series
  • or you provide a link to a resource that you use that helps you with selecting colours for your quilt projects.

I will randomly choose a winner, 21st January, who will win a $20 gift card to the Fat Quarter Shop.

FQS-logo
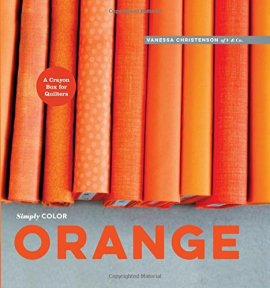
A copy of “Simply Color: Orange: A Crayon Box for Quilters”
SimplyOrange
and a collection of 5″ Charm Pack of the Orange Fabrics, I feature in the next post.


Blog Series: Colour

ColorWidget

I love colour. I enjoy choosing different color palettes across multiple mediums and using then in quilt designs, paintings / drawings or interior design. My favorite part is pulling fabric for a particular colour palette.

I am in the process of planning a blog series, starting January 2016, where we can focus on a particular colour each month. The blog series will include:

  • fabric pulls using the focus colour of the month (include name, designer, manufacturer)
  • color theory
  • inspiration sources
  • reference / research material (across multiple disciplines)
  • guest posts
  • Link-ups for activities

I hope we can have a lot of discussion, share, learn and have fun together. I am excited to get started. Stay tuned, more details to follow.

If you are interested in doing a guest post, please contact me at ml_wilkie (at) hotmail (dot) com.


Tutorial: Fabric art blocks

For Christmas gifts for my colleagues, I needed something quick but handmade. I had a couple of designs in my head, I needed to get out (they were keeping me awake at night). I had an idea to make those blocks into hanging art blocks.
FabricArtBlocks

I had a few folks ask about how I mounted the blocks. Here are the steps I used.

Materials

  • One (1) Canvas Frame (eg. 12 x 4″)
  • One (1) Fabric Block (eg. 16 x 8″)
  • 1 1/2″ Fusible Batting Tape
  • Staple Gun

Instructions

  1. When making your block, add two inches to each side (allowance for wrapping around the canvas).
    FinishedBlock
  2. Cut four (4) pieces of batting tape the length of each side. The batting tape will be used to stabilize and finish the edges of the block.
    BattingTapeFinishing
  3. Fold the batting tape over each edge (one at a time). Iron to adhere the batting tape and hold it in place. Take the pre-made canvas board and place it on the back of the block face down.
    Frame_Placement
  4. Take the first long edge of the fabric block and fold over the frame. Staple in the middle, in place. Repeat on the opposite side, stretching the block flat. Fold the corners (try folding a 45 degree angle), pull lightly to stretch the block smooth, staple in place. Repeat with each corner. If needed, add additional staples to provide the appropriate even stretch over your frame.
    Staple_Print
    NOTE: Check as you add the staples, that the block is laying flat and have smooth edges with each addition of a staple.

  5. Turn your block over….your block is all done. This block is a 12 x 4″.
    Pink_Art_Block