Category Archives: Project Finishes

News + Finish {Sunday Best}

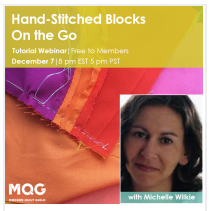
It has been a busy 30 days or so but for super exciting reasons. First off, I did my first quilting webinar last night. It was about the skill I learned this year – hand piecing (hand stitching blocks). If  you are an MQG member you can check it out here. I had a lot of fun doing it.

screen-shot-2016-12-08-at-5-14-28-pm

Also, I published my first Article for the MQG “Inspirational Sources for Quilt Designs”. If you are an MQG member you can read it here.
img_7963

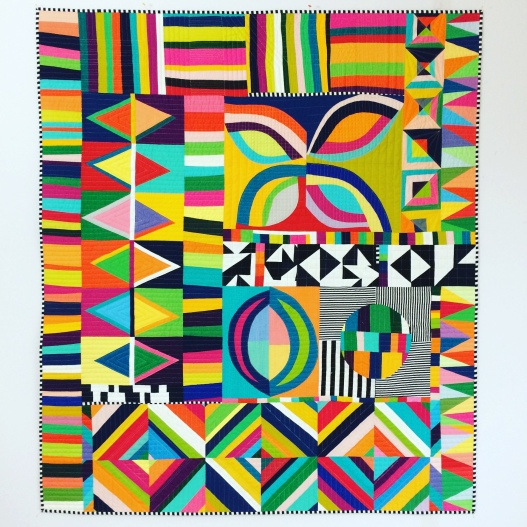
Best of all, I also have a finish in time for Quiltcon submissions – Sunday Best.   It took me forever to start quilting this one, as I just was not inspired by anything. Finally, I had an idea on how to quilt the orange peel block….and the long quilting journal began. I used a domestic sewing machine and walking foot for all the quilting.
sundaybest_quiltingblock1

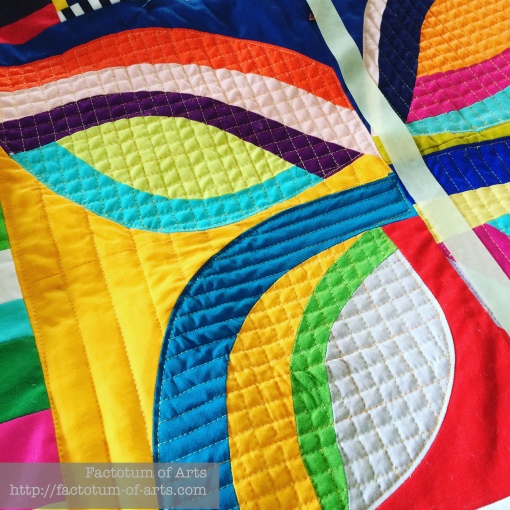
My goal for quilting, was to add interest, while ensuring it complemented the top and did not distract the viewer. For the stripes up the top of the quilt I used straight lines with varying widths from matchstick quilting to 1/2″.
sunday-best-quilting2

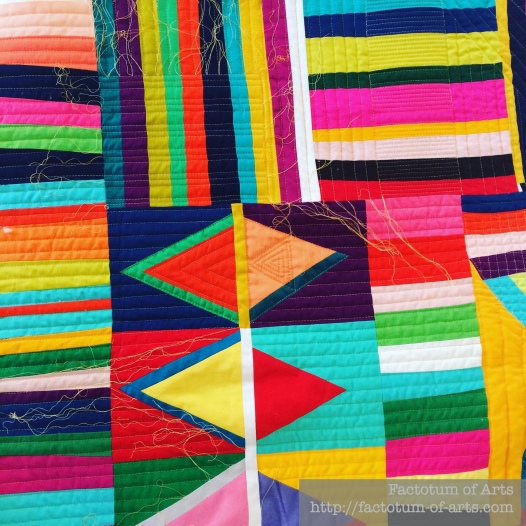
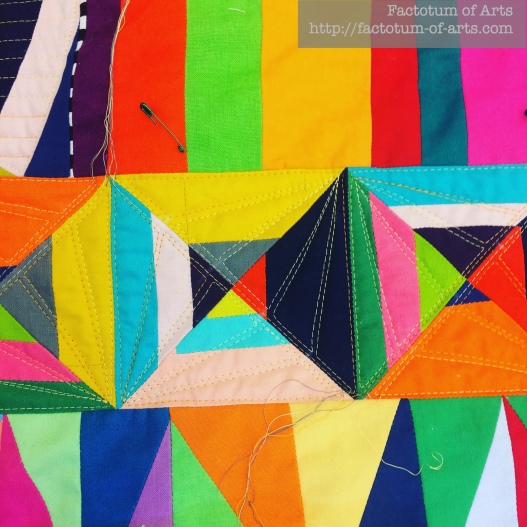
I decided to choose two different designs for each of the main triangle patterns. The design above on the left (with nested triangles) I used for all of these triangles in this section. For the next set of triangles, featured below, I used a sectional design like slices of an orange. It makes this cool pyramid effect.
sunday-best-quilting-2a

For the black and white sections of the quilt, it reminded me of a checker’s board so I used a 1″ grid design.

sunday-best-quilting4

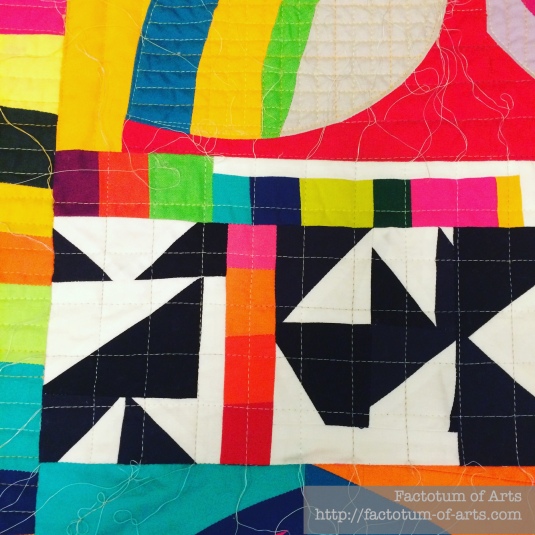
With using the matchstick quilting at the top, I felt that I needed to balance the dense quilting somewhere else. I decided to use it in this block, the background fabrics, that reminded me of a seed pod.

sunday-best-quilting3

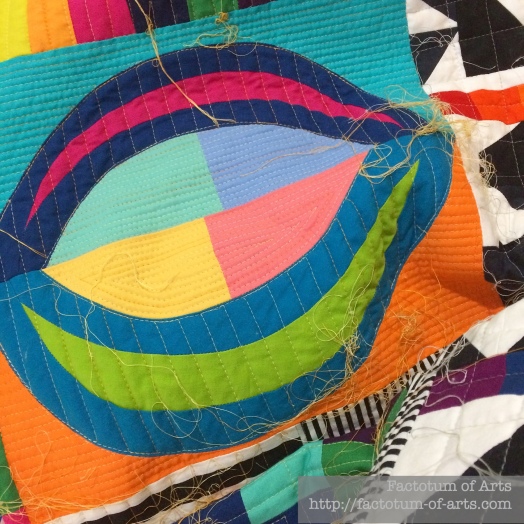
And yes, all those thread ends, did need burying. It took around 9 hours for this task but I did it over 3 sessions. For those that are interested in how to bury threads, I learned from this tutorial from @ crazy mom quilts.

I finished off the quilting with 1/2″ black and white binding. I can’t tell you how in love I am with this quilt.

sunday-best

Details

Name: Sunday Best
Design:
Original Design – Improvisation
Fabric: Various Solid from my scrap bins, Black and white stripes
Backing: Lecien Fabrics (Black and white), scraps from the front
Binding: B+W Striped Binding (1/2″ white stripe)
Dimensions: 46 x 53″
Quilted: Various designs, domestic sewing machine with a walking foot. Used Aurifil #4658 and #4060 wt. 50

Just in case, you can find the design decisions and the information about the top, in this post.

What Shade Are You: Rails {a finish}

REPOSTING from RJR Fabrics “What Shade are You” Blog post today.
—————————————————————————————————-

Today, on “What Shade are You” I would like to share with you on my design journey and inspiration for my quilt “Rails”.

img_7386

I am Michelle Wilkie. I can be found on Instagram @ml_wilkie, or on my blog Factotum of Arts.

I was so excited to be participating in What Shade are you, and when I received my bundle in the mail a multitude of ideas came to mind. The colors are so vibrant.
img_6774

My original bundle, had a couple additional colors but the final fabrics I chose were:

Cotton Supreme Solids:
Optical White
Black
Turks & Caicos
Night
Electric Blue
Anemone
Citron
Sunny Delight
Tangerine Dream
Chilli Pepper
Grape
Shell pink
Raging Ruby

Additionally, I used some C+S fabrics to add some interest within the solids:
Sprinkle in Corduroy
Dottie in Fedora
Dottie Cousins in Natural

I get inspired all the time from the world around us. For this quilt, it was no different. My husband is from Mannheim Germany, where we both lived for a few years before moving to the US. My inspiration for this quilt came from the Neustheim Train Junction.

img_0215

The lines fascinated me. I loved the idea of using improvisation strip piecing to try and mimic these strong direction lines. It was an interesting experience bending the fabric to make the gentle curves. Some tips:

  1. I started this quilt at one end and added in one direction, using strips to mark out where I was adding curves that would intersect with other lines.
  2. Use a lot of starch to get the pieces to lay flat and press often.
  3. Make sure you trim your threads and additional fabric as you go, especially when using white.
  4. Lastly, I glue basted this quilt while it was on my design wall. I pressed each layer to fix it to the one beneath. This technique was important as it helped the top to adhere flat to the bottom layers and hold in place as it stretched out some of the puffy areas.

Here’s a close-up of the quilt top. The predominant colors are blues, yellows and white, however as I stepped back with each addition, I decided to add pops of colors. This adds balance and richness to this quilt that helped also break up the stark bands of color. You can see the use of red, purple, pinks, and orange.

img_7389

For the quilting, I used Aurifil 2410, 2021, 2120, and 2783. I used irregular-spaced wavy lines that flowed with the fabric strips, to complement the colors and design of the quilt. In the binding, I also added some interest and continued the flow of color by inserting a piece of C+S print and a small blue strip to my white binding.

img_7385

This was so much fun to play with such vibrant colors. I loved the overall finish that the Cotton Supreme Solids provided. Thanks to RJR fabrics for the opportunity and to you for stopping by.
——————————————————————————————————————————————

Stop by my RJRFabrics and ml_wilkie (on Instagram) for a giveaway later today.

Mad Dash {Pattern Release}

Today I am releasing my Mad Dash Quilt Pattern. It is now available in my payhip and craftsy shops.

mad-dash-quilt

Over some time, I had started to collect a significant amount of scrap and panels of Maze and Vale low volume, hand printed fabrics. Saving them for the perfect quilt. After playing around with dashes, inspired by the lines in a text document, I came up with this design.

10feb_20162

In my head, I could envision the recently released Art Gallery Fabrics soft Denim for the dashes, and the Maze and Vale prints for the backgrounds.

mad-dash-quilt_boy

I love how this quilt turned out. I have two layers of batting and denim on the back as this is now our picnic blanket.mad-dash-back
The pattern includes 3 alternative sizes. The pattern testers did an amazing job. I love their choices.

mosaic7e0aa0057d08a83dbdd373b59f0172ed67d8950a
Photo Credits to each of the testers:
1. Debbie's Pillow (IG: @aquilterstable); 
2. Katherine's Lizzie House quilt (IG: @katgraycraft);
3. Jacqueline's quilt using solids (IG: @jskarritt); 
4. Molly's in a great woodsy palette (IG: @lane33andhalf)

Details

Name: Mad Dash
Design:
Original Design (Payhip or Craftsy)
Fabric: AGF Denim Studio, Maze and Vale Low Volumes
Backing: AGF Denim Studio
Binding: AGF Textured Denim
Dimensions: 60 x 60″
Quilted: Sarah @ Crinkle Love

I would love to see any makes with the pattern. Tag me on Instagram (@ml_wilkie) or use the hashtag #maddashquilt