Category Archives: Improvisation

Floating Squares 2022 {a finish}

I decided to catch up on some of the finishes over the last couple of years that I haven’t posted here on my blog. First up, is this group quilt that was made from remnant blocks of our 2017 Triangle MQG charity quilt (quilt top shown here)

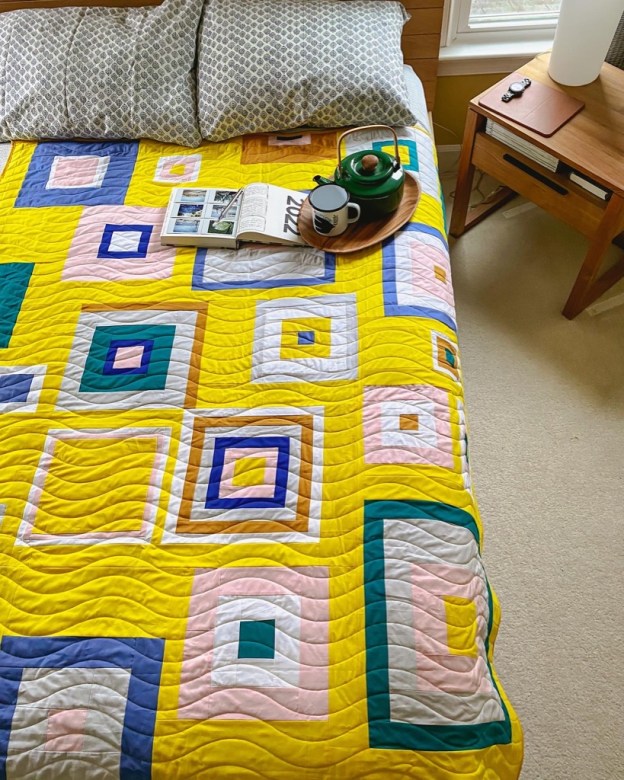
I have been meaning for a long time to get this done and finally had the motivation to do so. First I had to decided on the the layout of these random squares. Thankful for my design wall, I was able to lay them out and see which solid background I was going to use. I decided on this cheery and bright yellow.

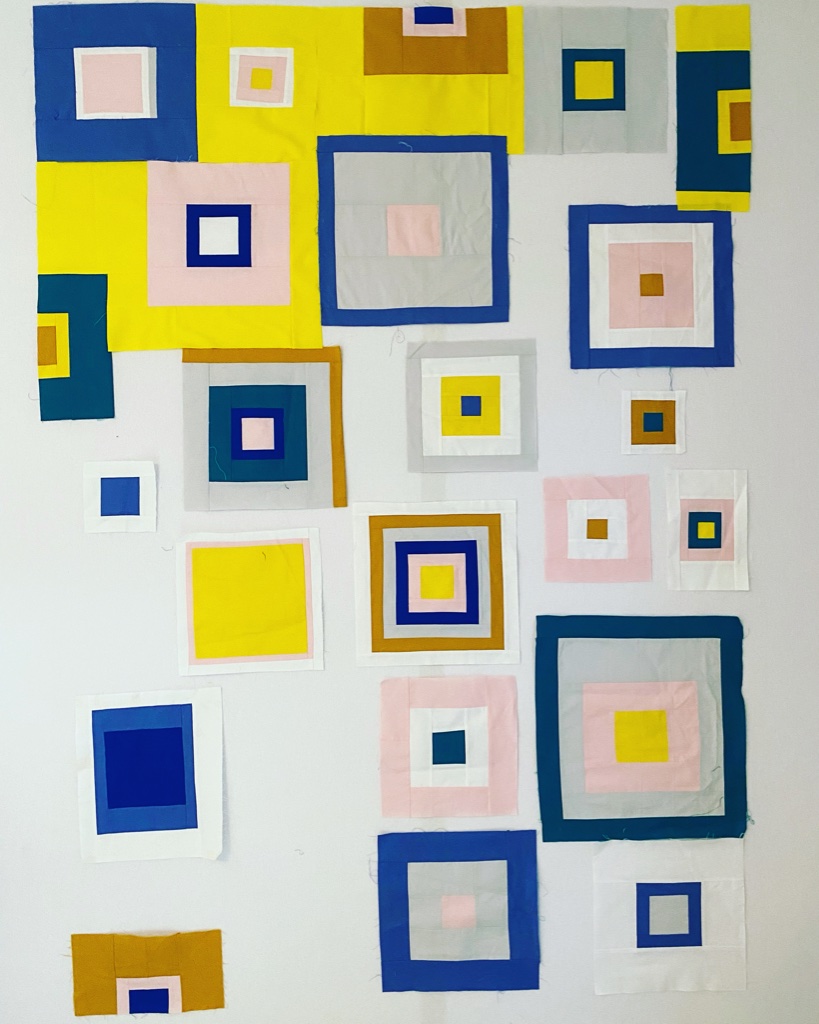
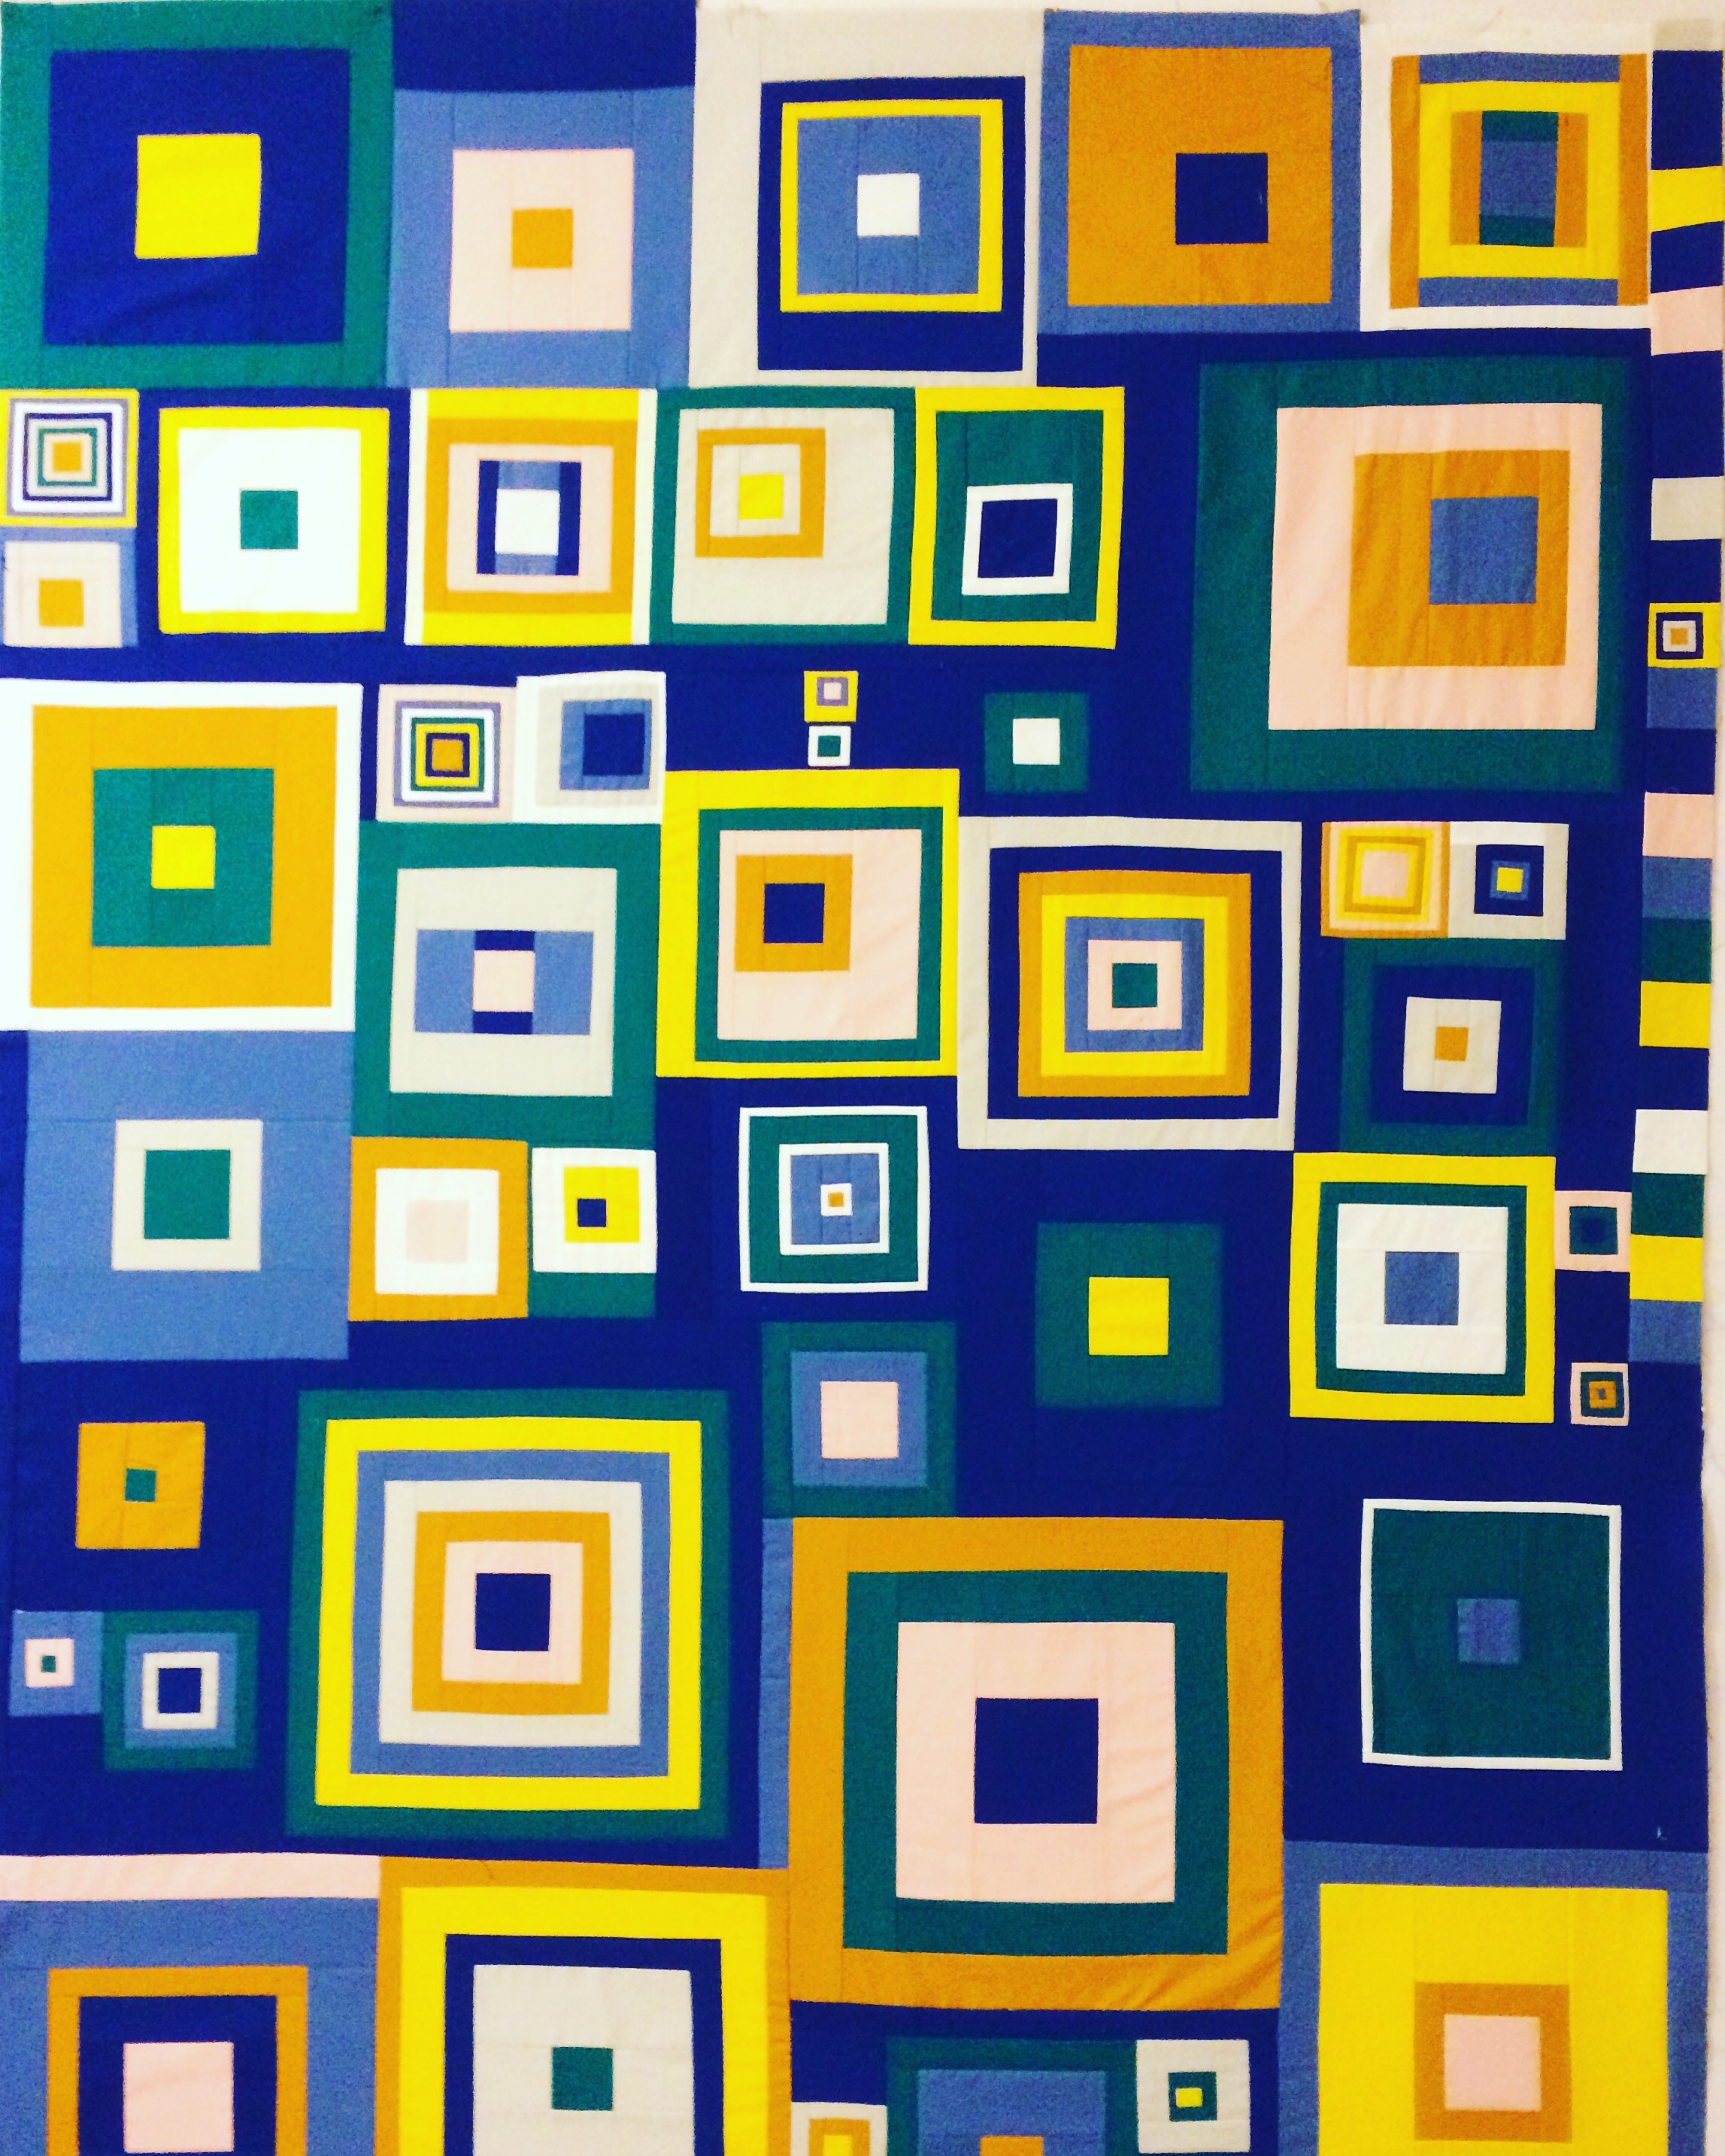
I did realize that I might need some more blocks in the bottom to make sure it was balanced throughout the quilt. To add the backing, I really did it in an improvisational manner, measuring between each block and adding as I went. There were a lot of partial seams. I really liked this less dense version of the floating squares and while I like the blue background of the first, this yellow makes me happy.

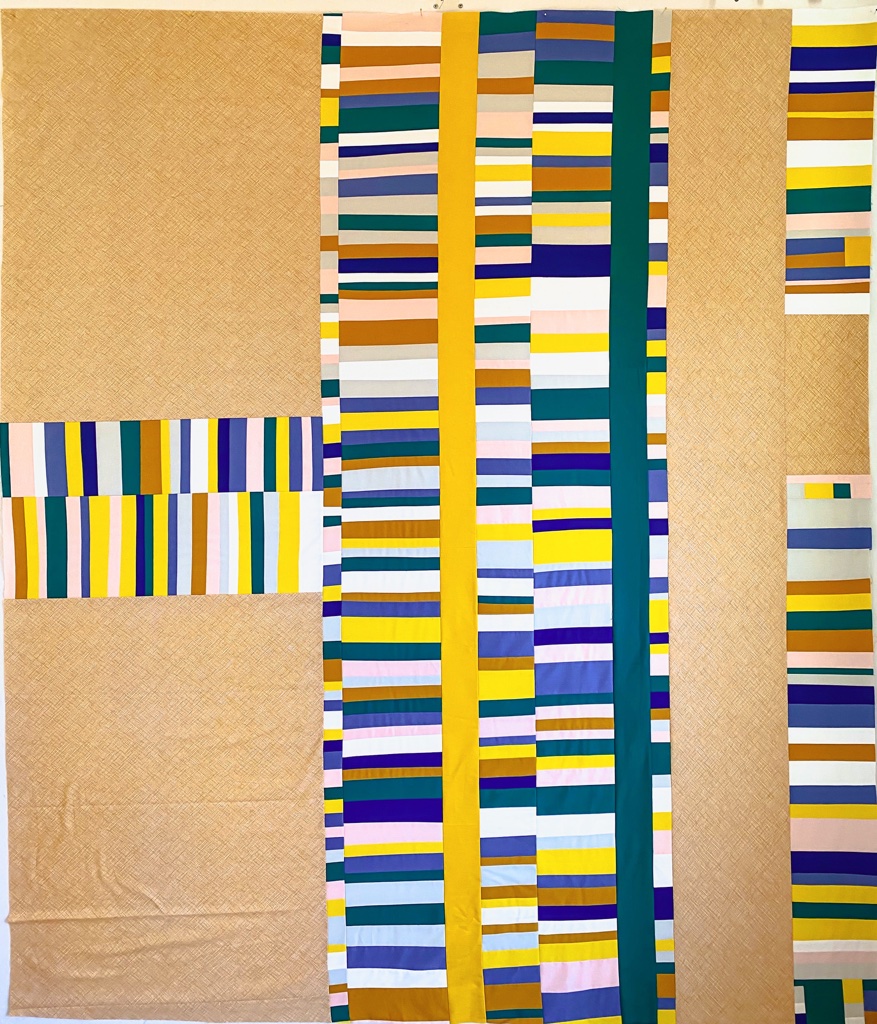
When complete, I still had some of the original fat quarters left over and some 108″ Carolyn Friedlander crosshatch fabric that I decided would be used for a pieced back. It was a little more work but was happy I was able to use what I had on hand. Also, when I took it to the long-armer, I found out I was a couple of inches short in length so I went home and added more.

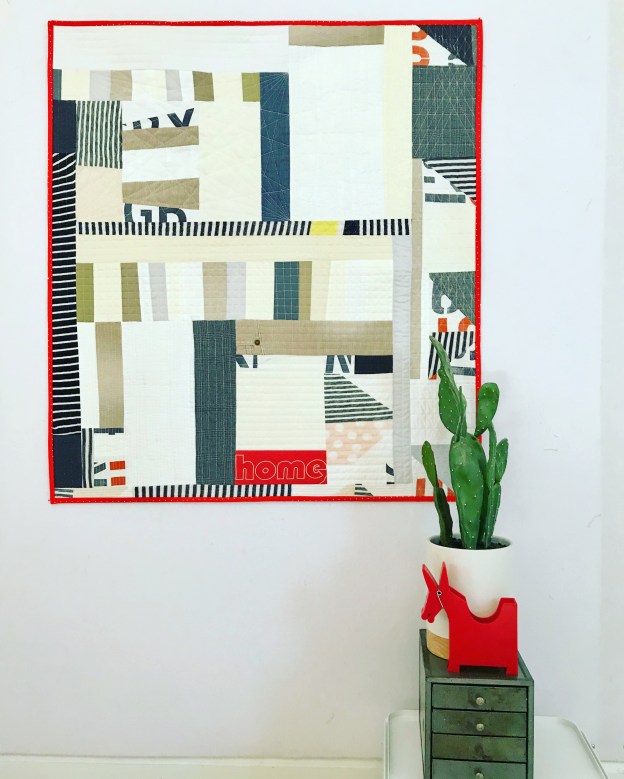
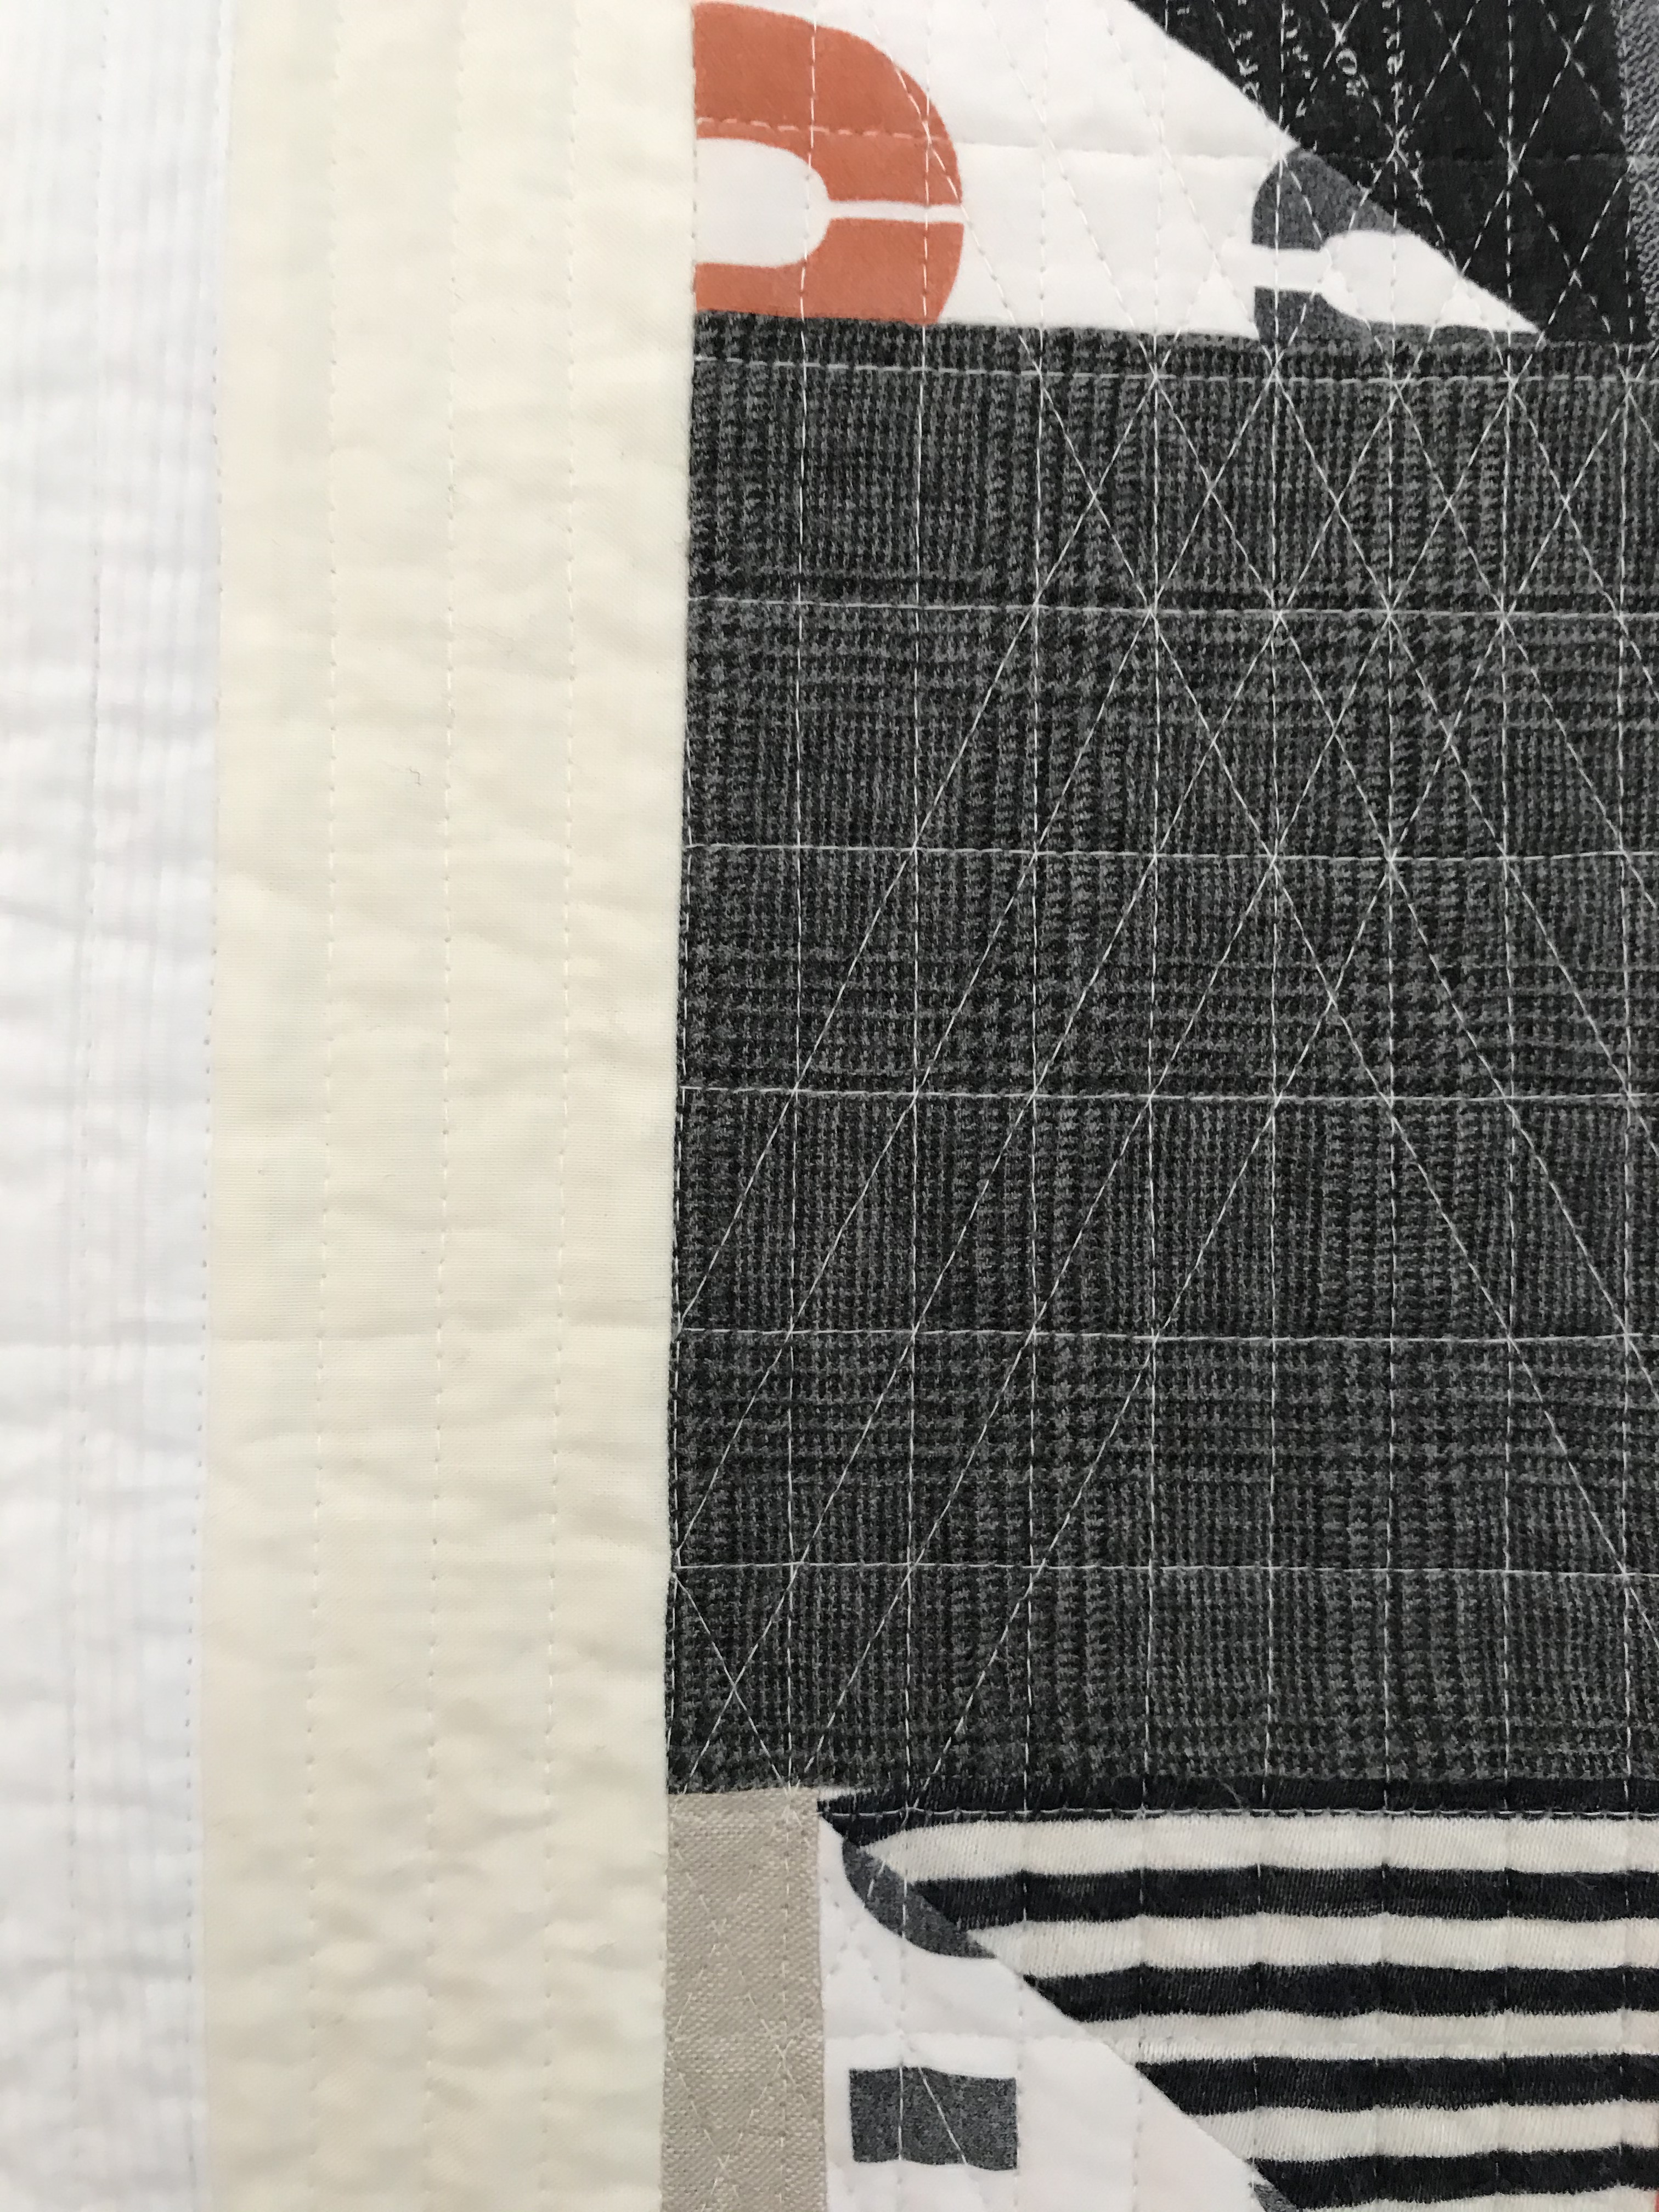
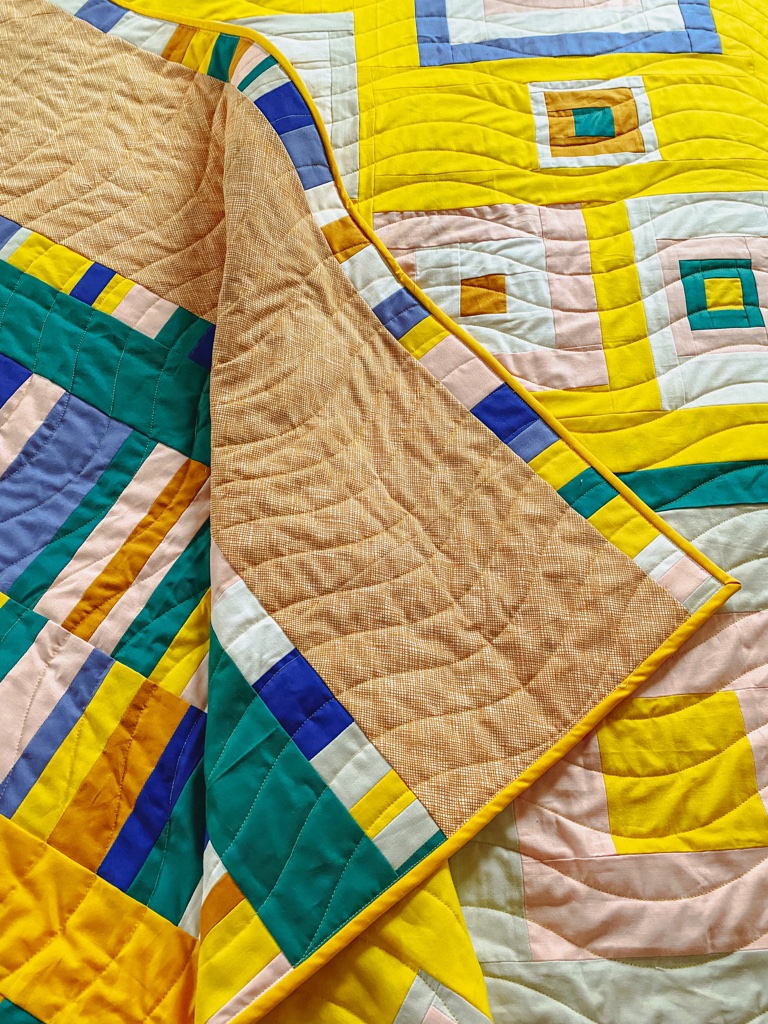
I choose a simple wave quilt design which I think landed up being perfect for this quilt finish. I am really happy that this too was donated, and will find a home with a kid who really needs it.

Details

Name : One of these things
Design:
 Group quilt, I asked for blocks of a certain size so they would fit together well.
Fabric: Kona Cotton (color palette from the MQG)
Backing: Kona Cotton + Carolyn Friedlander
Binding: Kona Cotton
Dimensions: 
60 x76″
Quilted: Cary Quilting Company
Start date: 11 October 2021
Finish date: 16 January 2022

Stay tuned, I will post a finished quilt each week until I have caught up on posts.

Rails II {Aerial Railroad – a finish}

I am not sure why but I was so apprehensive making a second Rails quilt. A few years ago now I created Rails for RjR Fabrics with Fat Quarter bundle they supplied. The quilt was made with 1-1.5″ strips and I bent them into shapes as I sewed to make it represent the railroad junctions. There was little planning and the whole quilt took a couple of days (I procrastinated so much with the idea in my head to the point that I had no choice but to make it quickly so I wouldn’t miss the deadline).

I landed up selling this quilt to a company art collection, in fact it hangs in my husband’s building. A couple of years later, I decided I wanted to teach a class using the same strip piecing techniques. The only problem was I had no sample for the class. To be honest, I was not sure I could really reproduce a similar quilt using the techniques I pulled together last time. When the class was canceled due to COVID, I decided to let it sit a while.

I found an Anna Maria Horner print in my stash, which was rust with pops of yellow and blue. This was what I wanted the palette for the next Rails quilt to be. The bundle then sat on the floor for another year.

Finally, I decided that the worse that can happen is it doesn’t work, so I started out with a plan of 3-4 areas of color.

I was pleasantly surprised how well it came together. This one was a much larger quilt but still based on Neuostheim Railroad junction in Germany.

Once the top was complete, I had a very clear direction I wanted to take to the quilting. All the areas of colored strips, I wanted hand quilted/ embroidered with “X”s (like railway crossing signs), with the crosses forming a diagonal 1/2″ grid pattern. In the neutral areas, I had machine quilted variable grid lines – 1/2″ to 1” lines.

This meant color matching all the strips and switching thread colors often. In total 15-16 colors were used. The back has amazing texture as well from making these crosses.

The hand quilting took a long time, so this quilt also became a travel project. It saw a lot of NC, Germany and Morocco. In someways it made it easy to work on being a travel project.


When making the top, I had assumed I would square up this quilt and have straight edges. Through making and quilting it though I loved the uneven quality of the final edges and wanted to maintain the shape as much as I could. I decided to face the edges of my quilt (using Cotton and Bourbon Facing Tutorial). I did change things up a little as I couldn’t cut the edges without making sure I had secured the hand stitches. So before I cut, I stitched the binding to the front, then cut at the 1/4″ edge with scissors, then zigzagged the edge securing the thread. It seems to have worked well.

The finally finished the quilt almost a year after starting. It was a lot of work all those hand stitches. I love the colors. I love the texture. I am thrilled that I was able to push through and repeat the technique.

Details

Name : Rails II (#aerialrailsquilt)
Design:
 Original Design
Fabric: Oakshott Cottons and Kona Cotton
Backing: Scraps and Carolyn Friedlander Print
Binding: Faced with Neutral
Dimensions: 
~52″ x ~45″
Quilted: Hand Stitched Crosses and Machine Quilted Grid
Start date: 12 February 2022
Finish date: 8 February 2023

Home {a finish}

What do you do when some of your favorite clothes are no longer useable due to wear? This quilt started as my favorite New Zealand t-shirt (red with map of NZ and the word “Home” on it), two striped t-shirts that I associated with my mum, and my favorite work trousers (a pair of woolen plaid trousers) had holes and had worn thin in places that could not be mended.

I really did not want to part with these four items, in particular. I don’t know why but I had an emotional attachment to these pieces of clothing but I did. I had been following Sherri Lynn Wood and her artist in residence program at Recology in San Fransisco, where she focused on reusing fabric that had been thrown out. Watching her work develop, made me realize I could reuse these clothes in a quilt, and hang onto them forever.

Close-up of fabric selections + my Home t-shirt

I added corduroy’s and a rugby shirt as well into the mix. As I was cutting my clothes up and looking at placement, I really wanted to have the a balanced composition. I found as I placed and auditioned fabric on my design wall, I needed to include more negative space. I really enjoyed the final placement and happy with the mix of solid fabrics (or ones that read as solid), stripes, prints and text fabrics and then the light, medium and dark tones of the fabric. I think the word home is placed well too, towards the bottom and really happy its offset than in the middle. It helps you move from top to bottom and then back up again as you look at the details.

Note: most of the t-shirt’s I used Pellon 911F interfacing to stabilize the shirts before cutting and piecing, making that process much easier.

Once I felt the top complete, I was so excited about the quilting (which is not normal for me as this is my least favorite part of quilting). I decided to do some of my usual straight line work but also experiment with some of Jacquie Gering’s Walk & Walk 2.0 designs.

IMG_1052
Example of straight line and grid quilting work.
IMG_1048
Experimenting with Crosshatch mash-up (pg. 46 Walk)
Quilting_home_quilt
Experimenting with Four Corner Radiating (pg. 52 Walk)

Finally to finish up the quilt, I auditioned several bindings and this Cotton + Steel dot print landed up being the best red and framed the quilt well.

IMG_1053

Details

Name : Home
Design:
 Original Design
Fabric: Variety of up-cycled clothing and scraps of Kona Cotton
Binding: Cotton + Steel, Kicks, Cleats Red
Backing:
 Moda, Zen Chic, Modern Backgrounds Paper
Dimensions: 30″ x 35″
Quilted: With 50wt Aurifil #2021, using domestic machine walking foot, straight lines.