Book Project: Group {a finish}

As part of my book, I want to show people how to work together as a group designing a quilt. So, I have a couple of projects that highlight a couple of ways of doing that. The first group project is all finished and counts as my last finish of 2018.

img_5369

I had some amazing people contributed. A big thank you to all those that volunteered.

Lynne @monkeyneedle
Paige @quiltedblooms
Tania @iamgingerq
Nicole @mamalovequilts
Sophie @lunalovequilts
Jenn @jennrodriguez1
Melissa @meliherboth
Louise @imfeelincrafty
Valerie @valbetweenquilts
Rebecca @creativeblockquilts
Abigail @cutandalter
Sharon @sharonhollanddesigns

Check out who made what on my instagram feed (@ml_wilkie).

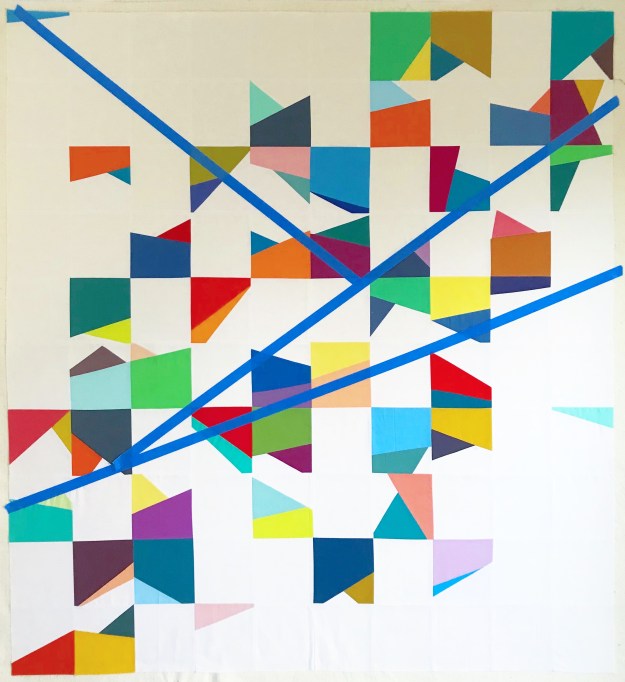
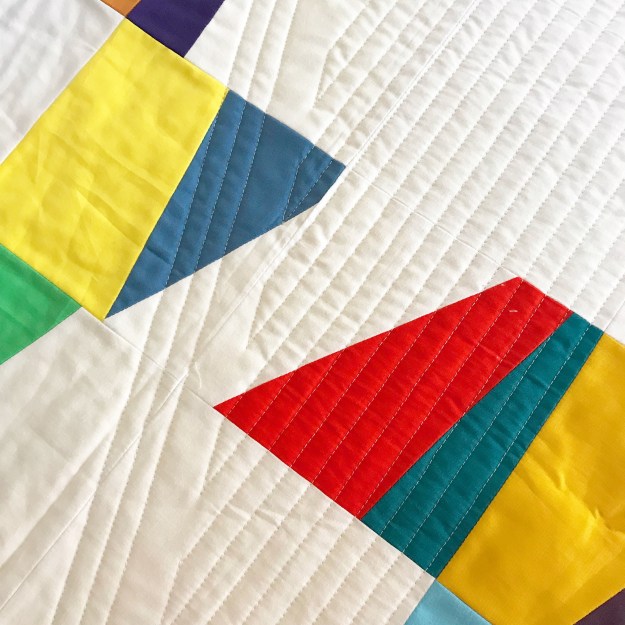
Once I received the blocks I decided that I did not want them all straight and very grid like, and wanted to add some wonkiness. This was accomplished with the sashing between blocks. The other thing I decided I wanted to do was add a color key of the palette used in the quilt. This was accomplished with the flying geese addition on the bottom right.

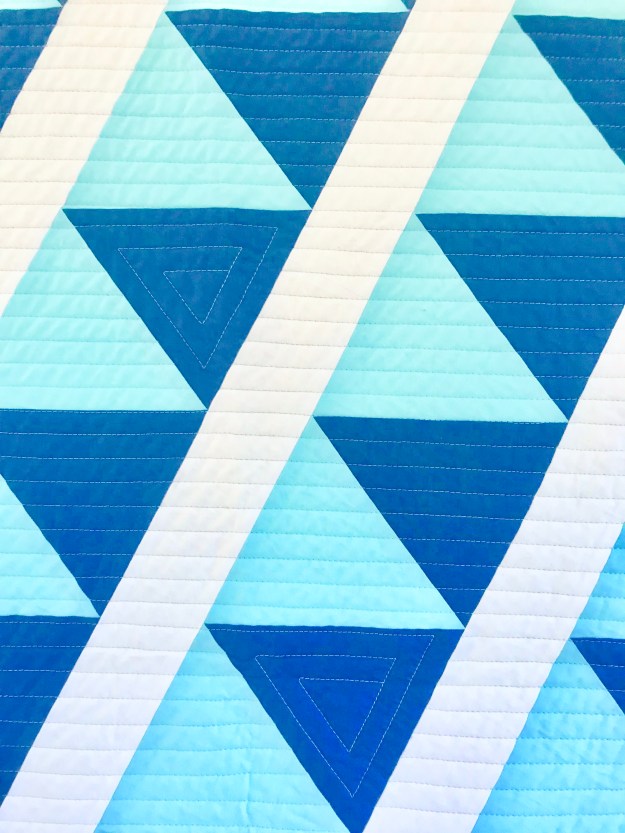
I had decided early on that most of my quilts for my book, I will be paying for someone else to quilt. It is not my favorite part and if I waited for me to quilt them all, we would never be finished. Luckily, in the quilting community there are lots of people who love this part of quilting. Krishma (from @krishmaquilts) is one such person and does amazing work. I have watched Krishma on social media grow over the last few years and her quilting skills are impressive. I asked her to quilt this one for me. She did an amazing job.

img_5368

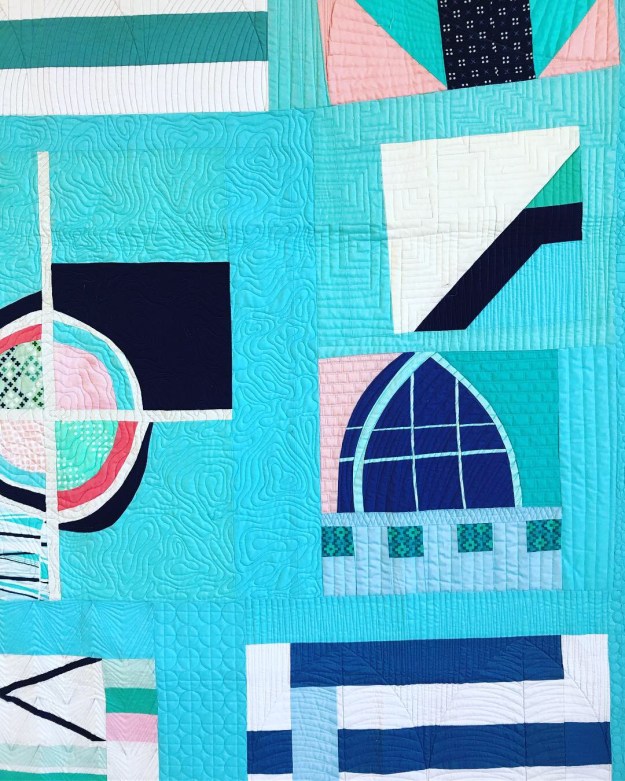
Lastly, the binding I added was to ground and frame the quilt. Navy blue was an obvious choice, however, this particular C+S print was perfect. I loved the grid look but the small  surprises were in the colors that matched the quilt…white and pink/coral. A perfect finish.

Details

Name : ??? still needs a name – open to suggestions. 
Design:
 Design as a group
Fabric: Defined color palette use of solids and prints; whatever was in stash
Binding: C+S
Dimensions: 
Quilted: By Krishma from Krishma Quilts

The quilt is done but I don’t have a name for it. If you have any ideas, please leave a comment?


Mt. SohCahToa {a finish}

When designing a new quilt design, I am usually inspired by things around me and what I have seen. This time was no different. This past year (April 2018), we had the most amazing road trip in Utah and a smidge in Arizona. We visited 7 national parks and a couple of other parks in 7 days (Arches, Canyonlands, Natural Bridges, Monument Valley, Glen Canyon Dam, Horse Shoe Bend, Antelope Canyon, Zion and Bryce Canyon @ml.wilkie_adventures).

mosaicee143ba37843aaf84393a4b4e9bcdde41040cda7

More images of our trip you can check out my other Instagram account (@ml.wilkie_adventures)

It was such an inspiring trip. One of the images that made me think of a quilt design was one of the La Sal Mountain range seen from Arches National Park. The continuous looking peaks lead me to a design using lines of angled triangles. The color’s represent the snow-capped peaks and rock base. These colors are also inspired by the color of the mountains from a distance.

30515994_10156490407837625_5960721326111981568_o

I submitted the design to the MQG for a Quilt of the Month and it was released in December (lucky last of the year).  Knowing that I had to make a pattern from this, meant I actually needed to consider repeatability and provide measurements that when making  I wouldn’t normally worry about.

fullsizeoutput_a50

After some trail and error, I paper pieced the triangles as accuracy of those triangles were important to the overall design. In a hilarious conversation with friends on working out the length of those rows, I broke out my math skills. As these are isosceles triangles, I divided a single triangle down the middle and worked out 1/2 Base using the right-angled triangles using some geometry (Soh-Cah-Toa). This gave me enough to calculate the length of those rows for you all but more importantly a few laughs with friends. When it came to naming the quilt, this conversation lead to the name.

fullsizeoutput_a85

For quilting, I used a light blue grey Aurifil thread for some 1/2″ straight line quilting. I used the horizontal lines of the triangles as a guide. As a surprise, adding more interest, some echoed triangles were stitched randomly into the quilting lines. You’ll find these not only within the triangles but also echoed in some of the negative space.

fullsizeoutput_abe

Lastly, I wanted to highlight that last horizontal lines (the base of the snow line). I did this using two different colors in the binding and color blocked it to match the fabric color palette in the design.

fullsizeoutput_abf

Details

Name : Mt. Soh-Cah-Toa
Design:
Design by myself
Fabric: Paintbrush Studio’s Painters Palette Solids.
Binding: Paintbrush Studio’s Painters Palette Solids
Dimensions:  60″ x 60″
Quilted: Straight Line 1/2″ with inset echoed triangles

If you are an MQG member, you can get this free pattern from the resources web page here.

Correlation {a finish}

I am not very good at following through on activities that require something every day, whether its following a diet and tracking, or doing a 30 day or 100 day challenge. However, I was given an opportunity to participate in a 100 day showcase, and decided to take it. I had this idea that had been percolating for a while.

fullsizeoutput_aa8

The idea and initial limits were:

  • Use a variety colored angled blocks together in one quilt
  • Use of two colors and white per block
  • Angles for each color were cut without planning (improvisation).
  • Use my Denyse Schmidt Free Spirit solids box that I had been saving in a draw for years.

The process of creating blocks was very interesting and a few additional design decisions were made along the way:

  • By day 20, I already felt overwhelmed by the angles and color and thought it needed more balance. So, single white blocks were incorporated into the design to provide much needed negative space. I think this is a great example of how to use negative space and how it can interact and be part of the overall design.
  • I added two additional block modifications. I included 3 blocks with one color and white, more as accent pieces. I also included 3 blocks with just two colors and no white.
  • I alternated the direction of the blocks to create some great negative space designs.
  • I also started positioning them on a diagonal gradient like a scatter plot / correlation (hence the name and relates to my day job).

I loved how it turned out. I love the color, the balance and the fact there’s always something to find in the blocks. Check out #100daysofcoloredangles for progress shots.

IMG_5116

For the quilting, I knew I was going to use straight line quilting. I also though about the quilt as a single block, so the quilting was done at angles like one of the original single block designs. I taped out the angles I was going to use, and leveraged the 1″ think tape as border lines for the 1/2″ quilting lines. In each area the lines follow various angles. IMG_5156

The binding was matched to one of the accent pieces, which I am super pleased with how that turned out.

I have multiple ideas now for additional quilts of this nature and will probably make one or two more. It was fun and very happy to add the easier negative space blocks to the quilt. It made the 100 days much easier to complete.

Details

Name : Correlation
Design:
Design by myself
Fabric: Kona White; Denyse Schmidt, Modern Solids, Free Spirit
Binding: Kona Aruba
Dimensions:  55 x 60″
Quilted: Straight Line 1/2′ quilting with Aurifil 2021.