In the Works {Update}

Keeping it real…I have made progress since my last post, though not as much as I hoped. At least its moving in the right direction.

So what’s happening…

From the releasing pattern front, I have managed to release the 3 pattern of 4 patterns (Abstract Triangles, Daughters Love and Altitudinal Ecosystem) with Mad Dash coming the first week in October. So overall completed all that I set out to do in September. YAY!!!

From a project perspective, they have all moved forward.

Sew Ready to Play Blog hop – The mastermind project, completed and posted a tutorial on Monday.

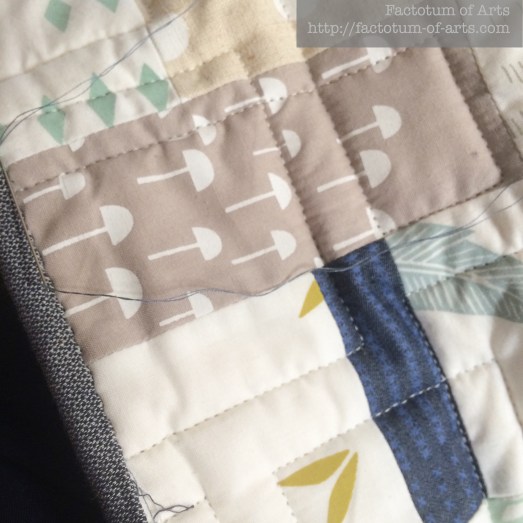
Mad Dash – binding is underway. I had some issues, with wonkiness when machine binding so switched to hand stitching it. I think its related to the pressure of the foot while stitching through 2 layers of batting. Only one side to go and this should be finished before the weekend.
maddash-binding
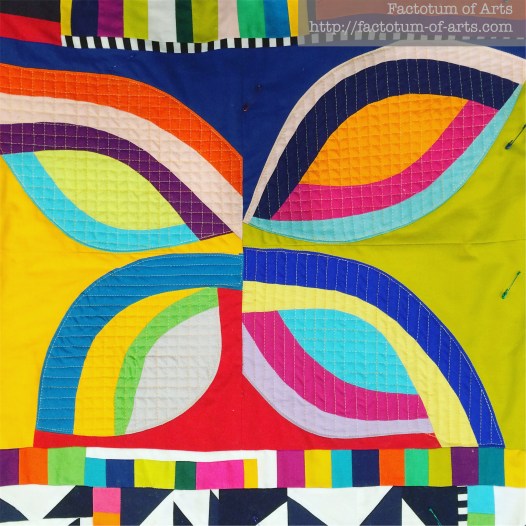
Sunday Best – My favorite project at the moment, and I finally got over the fear of what to do with the quilting and decided to just start. After all, a finished quilt is better than an unfinished one. Right??!! Here’s how I started…
sundaybest_quiltingblock1

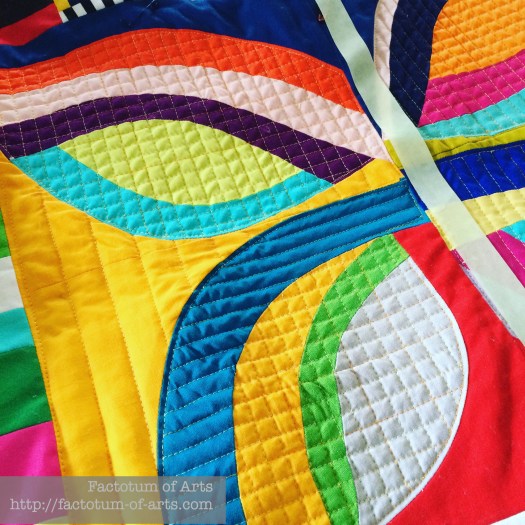
I really love this block as a whole:
sundaybestquiltingorangepeel

Orange Creamsicle – all the blocks for the top are now complete. All hand-stitched. I just need to hand-stitch all the straight seams. This is slightly modified from what I posted on Instagram (IG), as I changed one of the blocks backgrounds for more balance (top right).orangecreamsicle_top
Lastly…
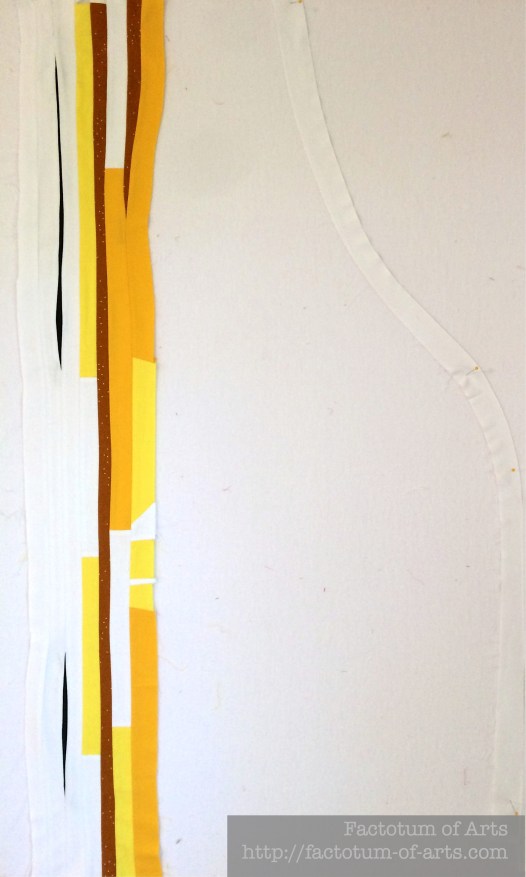
Directional Lines – Is a new project start but has a deadline of October 14th. It’s my #whatshadeareyou for RJR fabrics project. It is another improvisation project. Can I say I love this already and I have only done 8 lines.
directional-lines

Overall Project Plan

Here’s my overall project plan and recent changes.

Project Dates Current Status
 Mad Dash  September
(3rd FAL project)
TOP, BACK, BASTE, QUILT, BIND (underway)
 Sunday Best  September October
(4th FAL project)
TOP, BACK, BASTE, QUILT (underway), BIND
Sew Ready to Play Blog Hop  COMPLETED TOP, BACK, BASTE, QUILT, FRAME
 Orange Creamsicle  October TOP (underway) BACK, BASTE, QUILT, BIND
 Directional Lines  October TOP (underway), BACK, BASTE, QUILT, BIND
 Quilt Market Project  October TOP, BACK, BASTE, QUILT, BIND
 Fractions  October November
TOP, BACK, BASTE, QUILT, BIND
 NY High Line  November TOP, BACK, BASTE, QUILT, BIND
 Ode to Clothes  November December
TOP, BACK, BASTE, QUILT, BIND
 Beating Heart  November December
TOP, BACK, BASTE, QUILT, BIND

How are your projects going??

Save

Black + White: Guest Post {Christa Watson}

This month’s color for the Colour Blog Series is Black + White. Christa Watson (IG: christaquilts) is our guest this month.

Christa’s blog was one of the first blogs I started to follow, when I started on this quilting journey. I finally got to meet her at Quiltcon 2015, a highlight for me of the show. She has since showed her flare and brilliance with Domestic Machine Quilting with the following book releases : Machine Quilting with Style and The Ultimate Guide to Machine Quilting. Both of which I can highly recommend.

Today, on her blog she talks about her choices and makes using black and white. Her use of black and white is very graphical and she uses pops of color to add additional interest. It’s a great read.

I’ll be back later this week with my perspective of using black + white in quilts.

Sew Ready to Play {mastermind tutorial}

Louise over at I’m Feeling Crafty is hosting Sew ready to Play Blog hop. There have been some great projects created based on a game you play.  Check out other posts:

srtp2016button_small

Sept 9th- Liz and LiZ  from Simple Simon and Co
Sept 14th- Stacey from Boy, Oh Boy, Oh Boy Crafts
Sept 16th- Narelle from Threadistry
Sept 19th- Debbie from A Quilter’s Table
Sept 21st- Louise from I’m Feelin’ Crafty
Sept 23rd- Al from Shaffer Sisters
Sept 26th- Michelle from Factotum of Arts (today)
Sept 28th- Ashley and Emily from Frances Suzanne
Sept 30th- The Recap!

One of my favorite games, since I was a kid, is mastermind.  I decided for this game I played with my husband, using the attempts as a framed quilted block. It will be art for a kids room or playroom.

img_7257

Tutorial: Kids Framed Quilt Block

Finishes at 16 x 20in.

img_7267

Materials

  • 3 1/2in strip Kona Titanium
  • 3/4in strip Kona White
  • 4in strip Kona Citrus, Kona Sour Apple, Kona Red, and Kona Astral
  • 1/2 yard Kona Sliver
  • 16 x 20in Batting (Cotton)
  • 16 x 20in Muslin (backing fabric)
  • One (1) 16 x 20in Picture Frame (White)
  • Olfa Circle Rotary Cutter
  • Glue Stick
  • Ruler
  • Hera Marker
  • Spray Glue

Cutting Instructions

Fabric  Finished cut
Titanium  One (1) 3 1/2 x 13 1/2in Strip
White One (1) 3/4 x 13 1/2in Strip
Two (2) 3/4 x 4in Strip
Silver Two (2) 3 1/2 x 2in Rectangle
One (1) 1 1/2 x 16in Strip
One (1) 15 1/4 x 16in Rectangle
Citrus
Sour Apple
Red
Astral
Four (4) 2 1/4 Circle

Terminology

RST – Right Sides together
All seams are assumed to be 1/4in.

Background

  1. Take the titanium strip and the white 13 1/2 in strip, place them RST. Stitch a 1/4in seam along the long edge of the rectangles. Press seams open.
  2. Take the two short white strips and sew them to each short end of the titanium rectangle. Press seams open and trim as appropriate.
  3. Again, on each of the short sides of the titanium rectangle use the one (1) 3 1/2 x 2 in rectangle of silver Kona. Press seams open.  Trim evenly on both sides, so that the finished block is 16 in.
  4. Take the silver 1 1/2 x 16in strip and sew the bottom of the titanium strip (the white strip used in step 2 is the top of the block).
  5. Place top of the block and the large silver rectangle (15 1/4 x 16 in) RST, matching the two 16in sides. Pin and sew the pieces together. Press seams open.

Circles and Placement

  1. To cut out the circles I used a Olfa Circular rotary cutter. It works pretty well, you just need to ensure a smooth motion while cutting. Layer no more than two pieces of fabric.
    Note: I cut a couple of extra so I could choose the better ones for this piece.img_7262
  2. Start within the titanium colored rectangle for marking. Using a ruler and a Hera marker, mark half way on the height of the titanium strip (this should be 1 1/2in).
    img_7265
  3. To place the circles, I used this center line and eye ball the middle for each circle. Placement starts at the left by measuring 1/2in. Fold the Astral circle in 1/2 press with fingers. Use the glue stick on the back of the dot and press down with warm fingers. Place the astral circle centered with the left edge against this 1/2in starting placement.
  4. Each additional circle is 3/4in apart. Repeat the glue process with each. You should land up with 1/2in at the right side of the sour apple (green) dot. Once all circles are on the row, press with an iron.
  5. Now that the first row are attached, use the ruler and Hera marker to draw the vertical lines through the center of these circles to the top. This will be used for placement of the upper circles and quilt lines. Note: the lines will be approx. 3in apart.
  6. For top horizontal lines, that will be used to also center the circles and quilt lines, measure 3 1/4in from the top of the silver fabric. Use a Hera Marker along this line for row 1.
  7. Repeat with a Hera Marker every 3 in. until you are approx. an inch from the bottom row “box”.
  8. Fold each circle in half and then in quarters. Press with your fingers. Place glue to the back of the circles. Use these hand pressed lines to match up with the Hera Marker lines.  Hold the circle down with your hand as the glue adheres. At the end of each row, press with an iron.
    Placement of the circles for each of the rows are as follows (L–R):
    Top (Row 1): Red, Astral, Sour Apple, Citrus
    Top (Row 2): Astral, Sour Apple, Citrus, Red
    Top (Row 3): Sour Apple, Citrus, Red, Astral

img_7266

Quilt Construction

  1. To make your quilt sandwich, spray glue the batting to the muslin (preferably outside or in an open space). Press with an iron.
  2. Spray glue the batting and carefully align and place the top to the batting. Smooth with hands. Press the top to the batting.
  3. Quilt your sandwich as you desired. I used the Hera Markings as guide for 3in gridded quilt lines. Trim if needed.
    Note: I matched my thread to the silver background fabric.
  4. Place your quilted block/ mini quilt inside the frame and it’s now ready to be hung in a room.
    Note: Remove all lint before placing into frame. Photo’s will be best without the glass.

img_7267