Tag Archives: Phased Circles

Bloggers Quilt Festival: Phased Circles

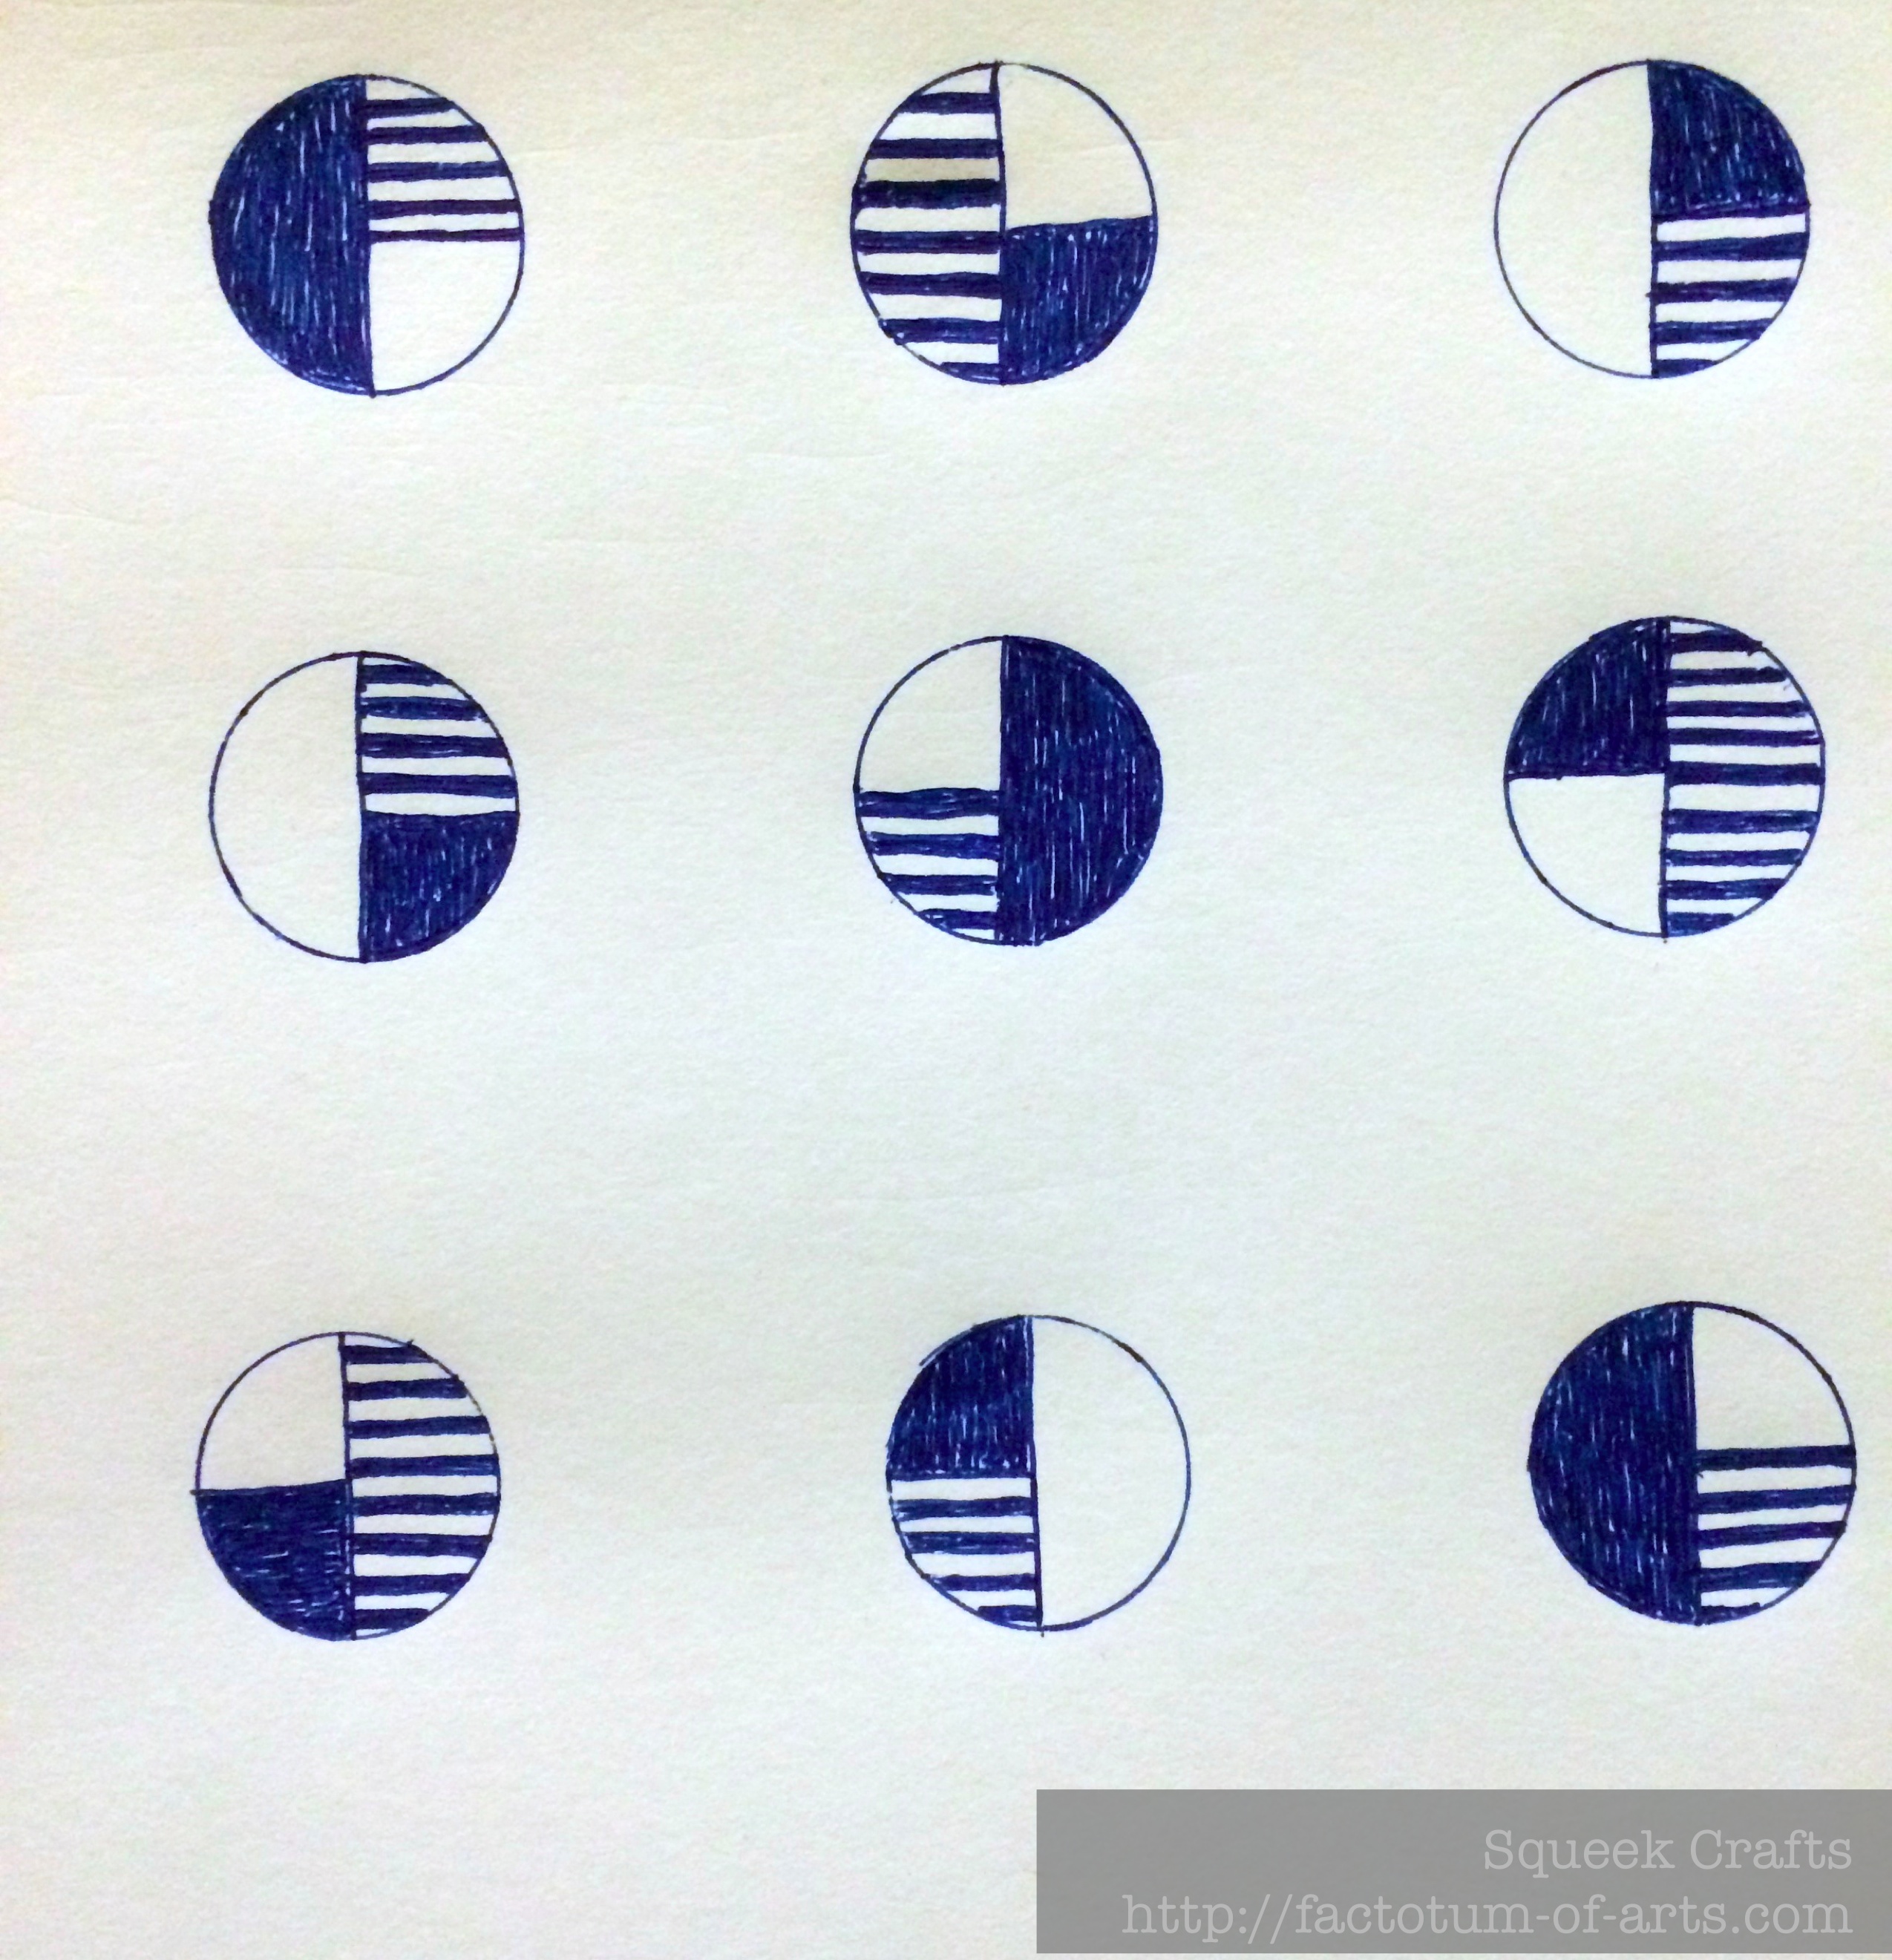
Late last year, I finished what is now my favorite quilt I have made so far. It was one of my first original designs, which started as a doodle on a piece of paper. After several design decisions, this is what I came up with for a finish. I think I might of cried for joy when I finished this….especially after an epic 80 hour quilting session (over a week).

PhasedCirclesComplete

This quilt has bought me so much joy and sense of accomplishment. I even got to see it hanging at QuiltCon, and had the most amazing time talking with folks about the design. It was so funny when people know you through something you have made vs. more your name first.
IMG_3491

Details:
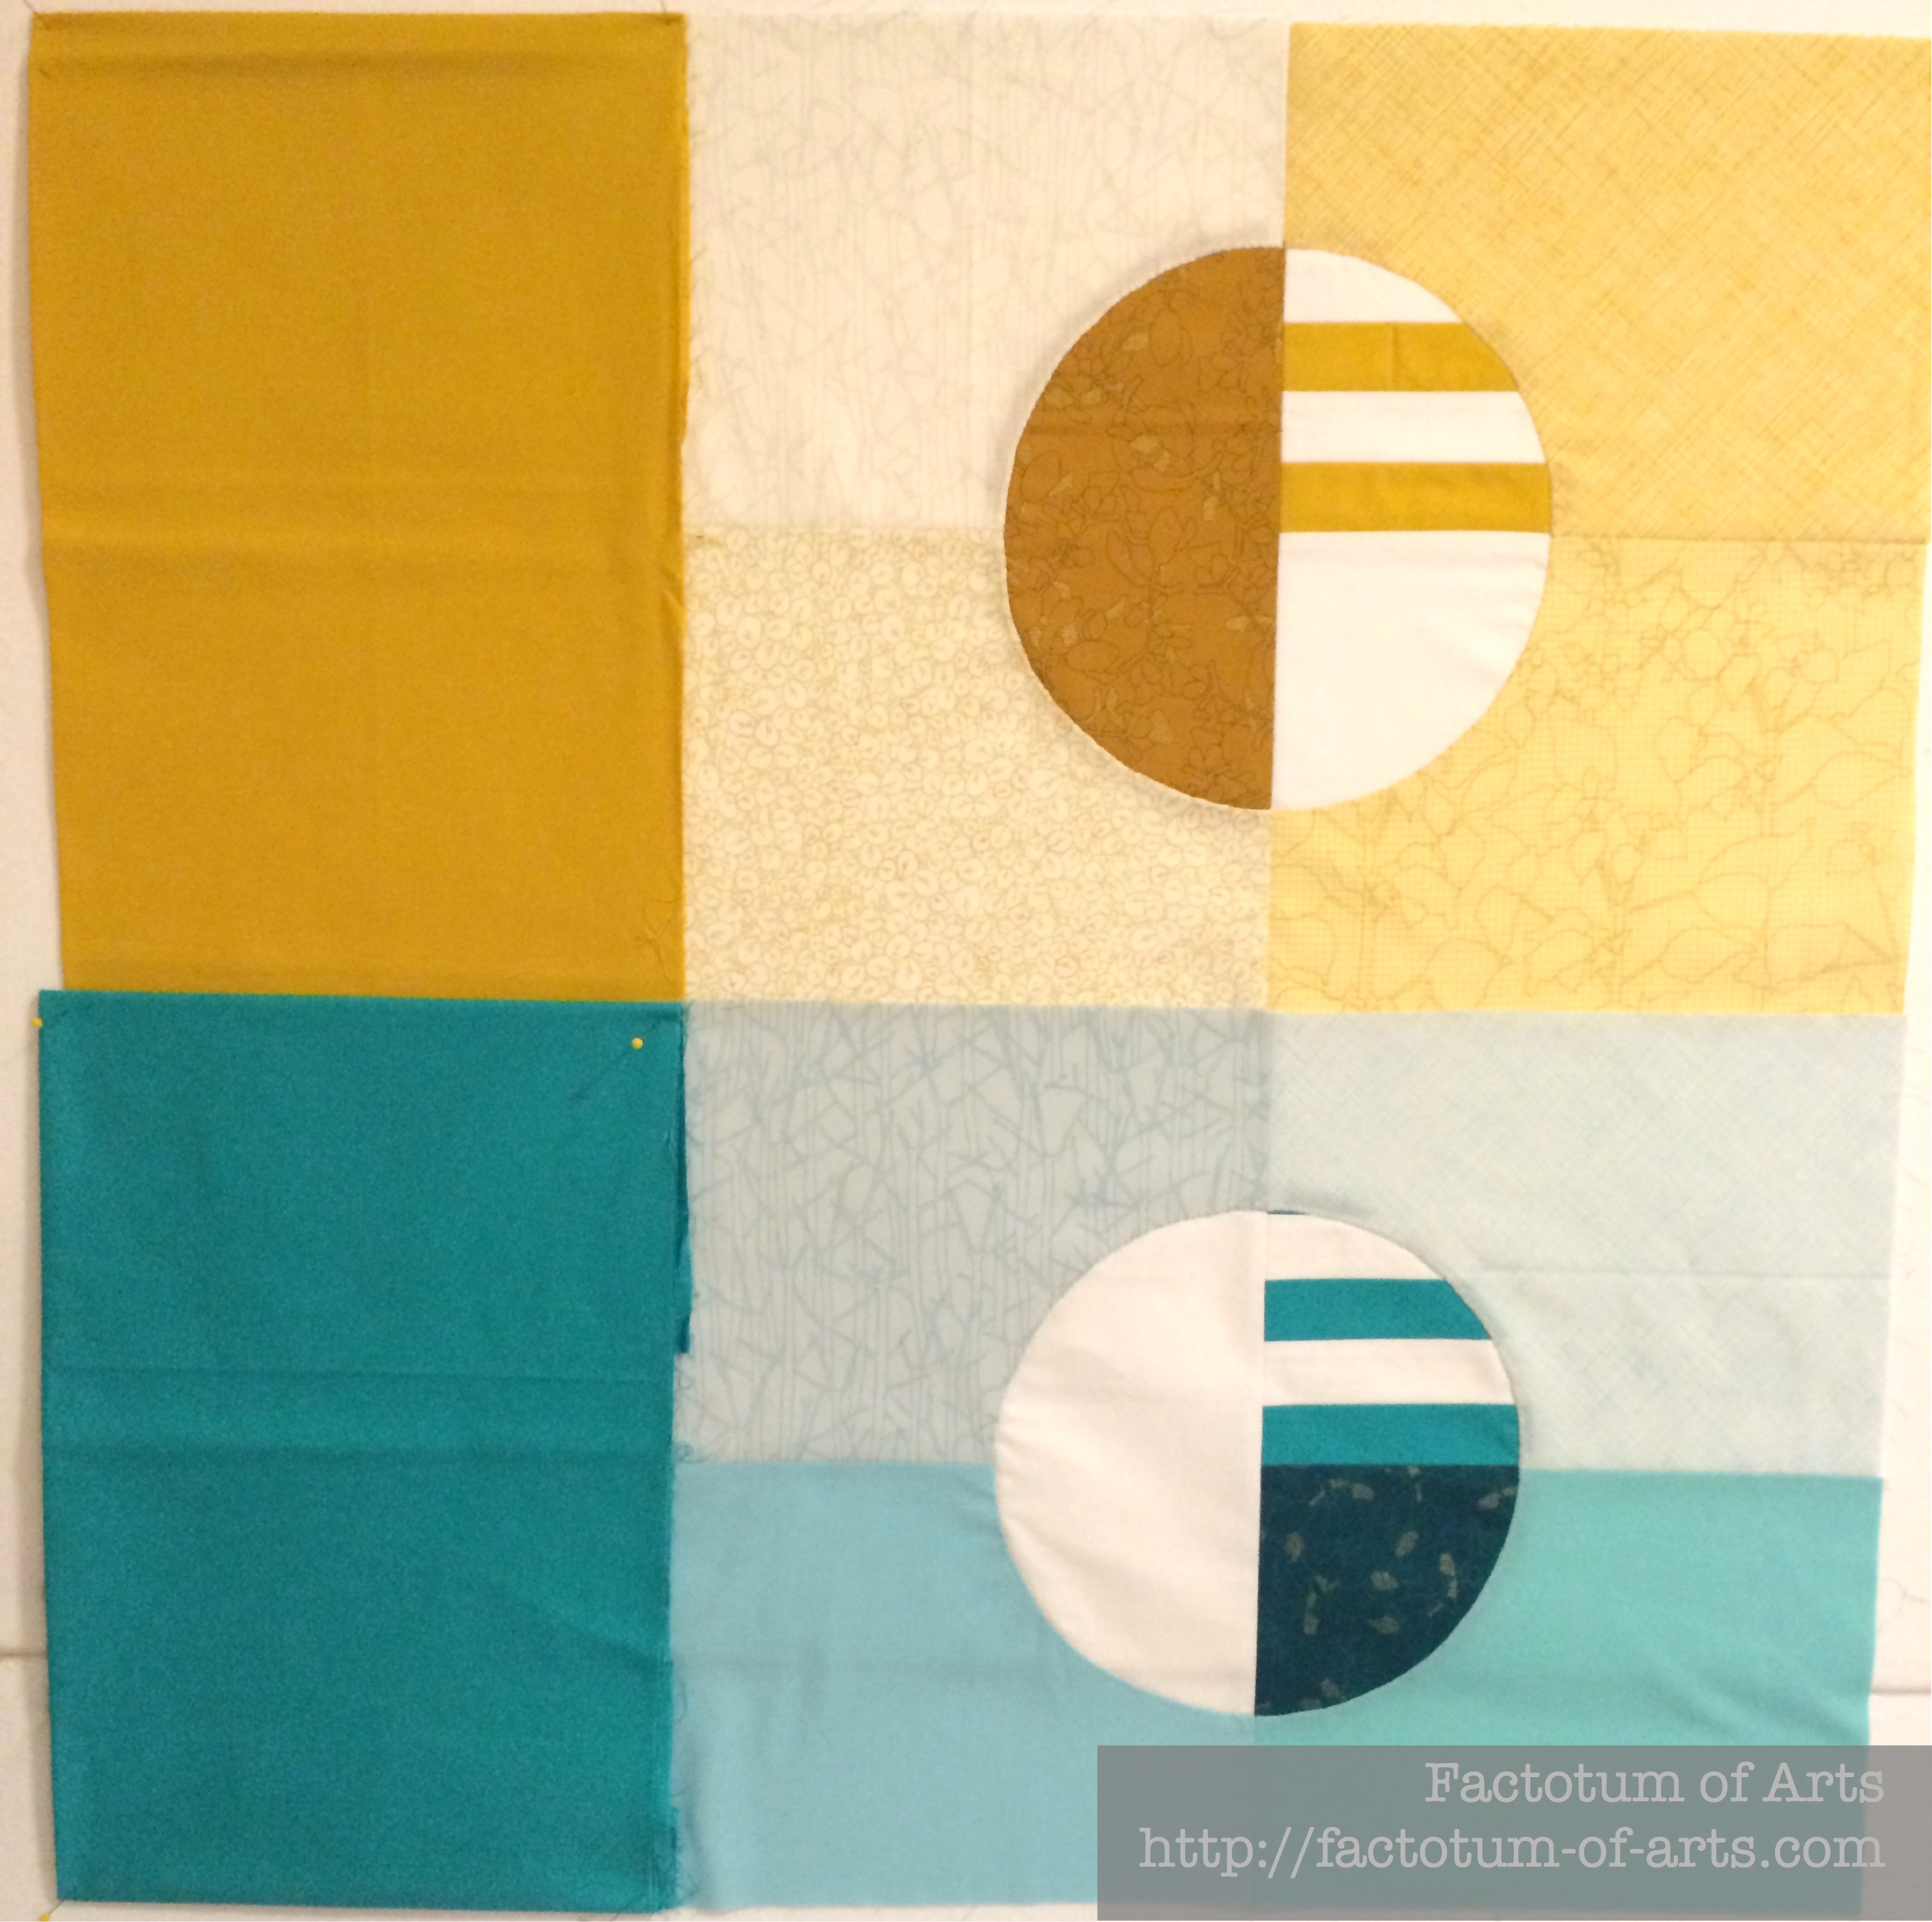
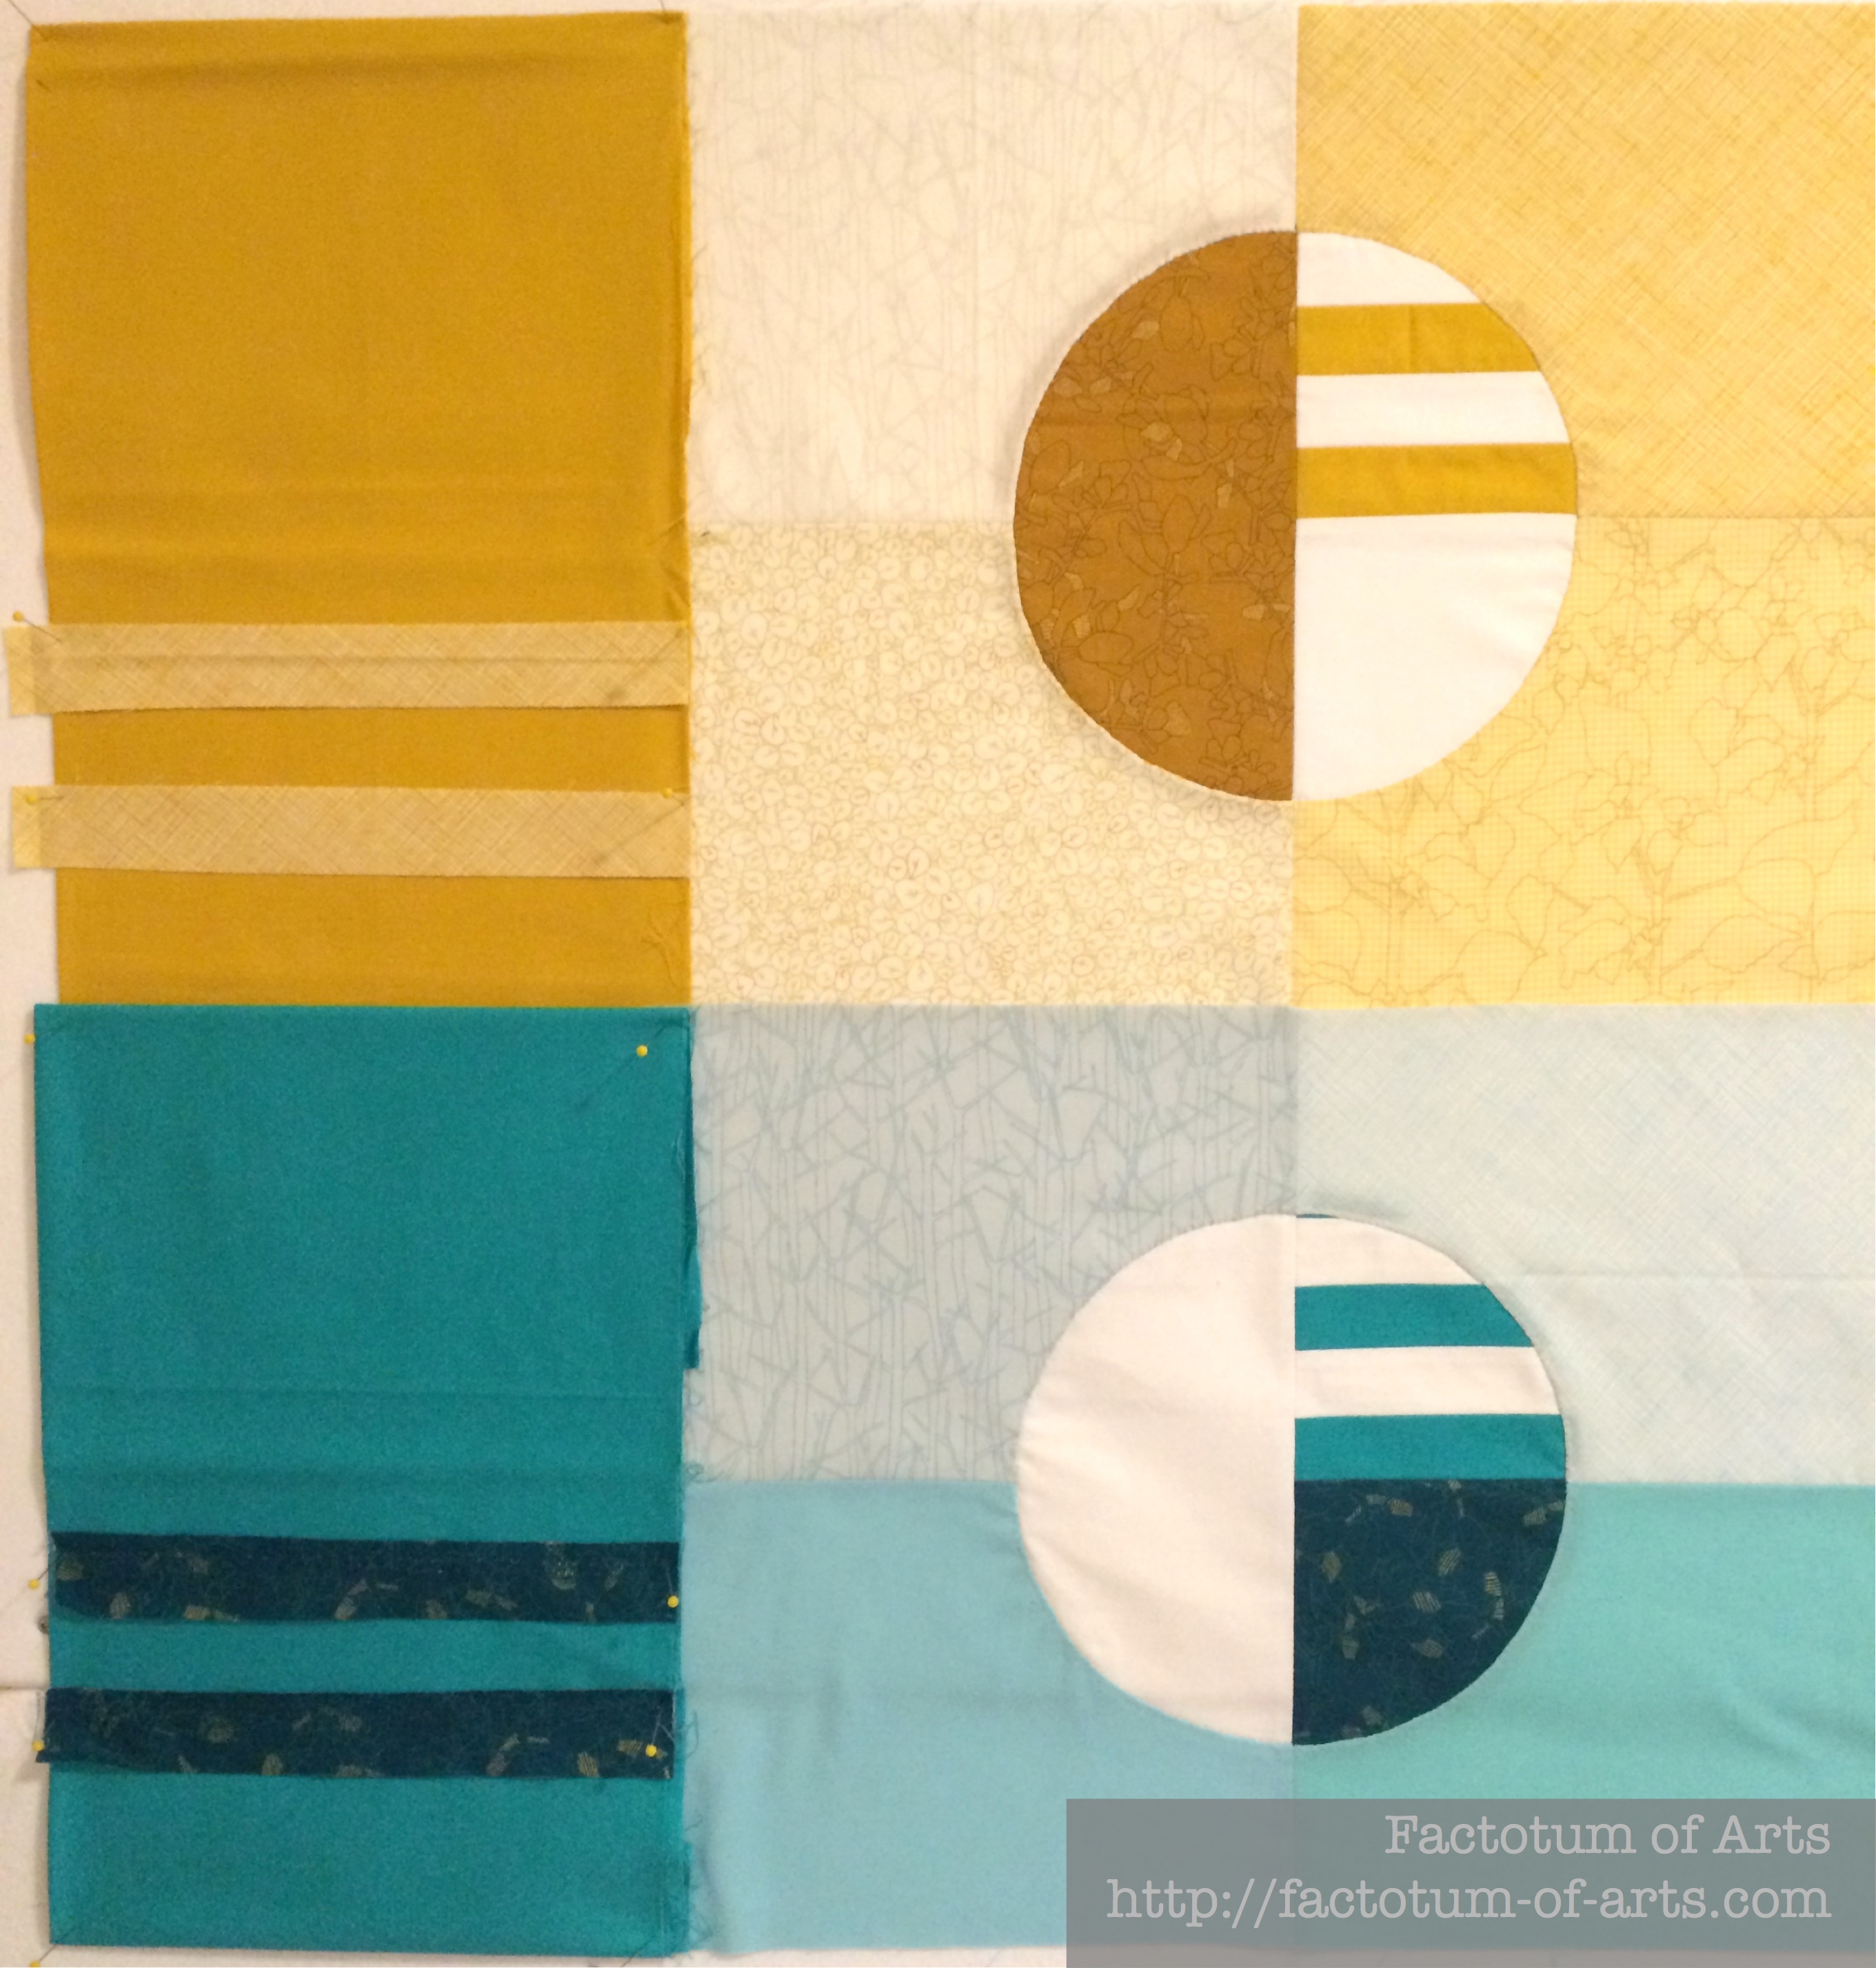
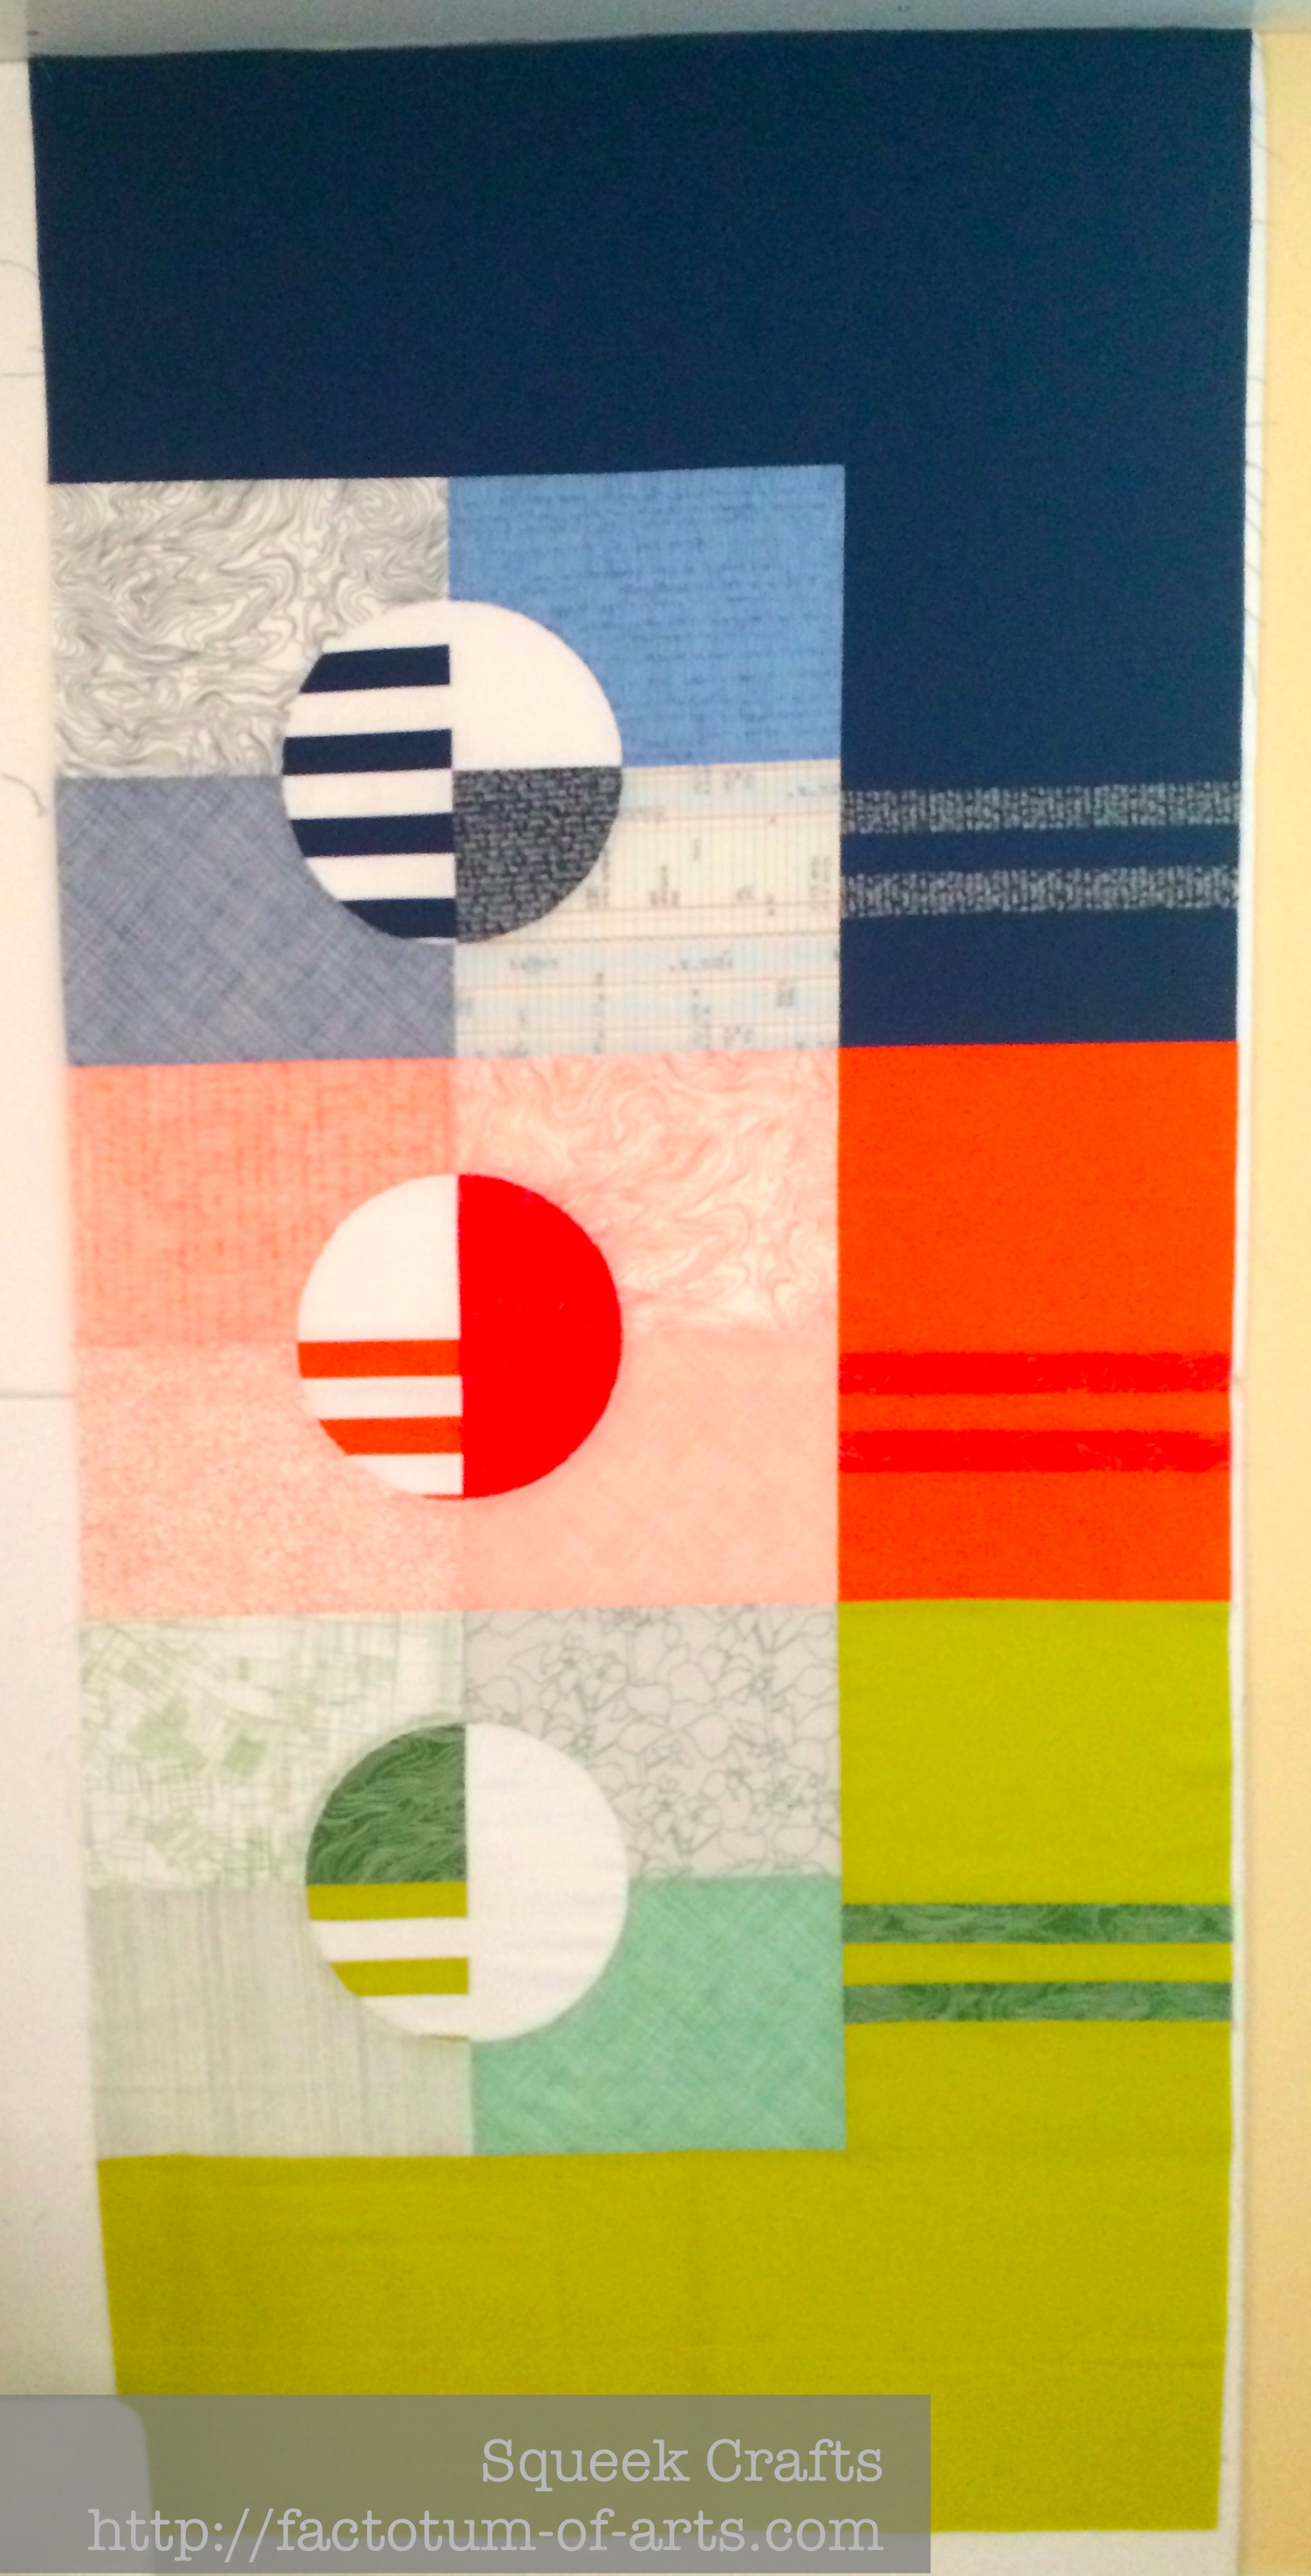
Name: Phased Circles
Dimensions: ~ 56″ x 60″
Design: Michelle Wilkie (inspired by a doodle)
Quilted: Walking foot

Blocks: Matchstick quilting (vertical and horizontal), Crosshatch quilting
Border: 1″ Straight Line quilting
Thread – Aurifil: A fantastic range of cottons that allowed me to match my fabrics perfectly, and made such a difference in textures. Blue block: 6738, 2725; Orange Block: 1133; Green Block: 2835, 5015; Pink Block: 1100, 2600; Jade: 2810, 5007; Gold: 5022, 2110 (not all colors shown in the picture below).

Fabric for Front: Carolyn Friedlander Architextures & Botanics, Kona Curry, Valentine, Breakers, Torch, Wasabi, Prussian, White
Backing: Black, White and Grey Carolyn Friedlander Architextures & Botanics, Kona White and Black
Binding: Matching Binding technique (matching prints/solids)

Here is a mosaic that shows some of the detail of the quilting and the back which is a strong contrast to the bright colors of the front….its all black, white and grey.

mosaic28491bd5b0ae3086c18072c732c823281fe8ba17

I have decided to share this in the Blogger’s Quilt Festival Original Design Category. I hope you all go over and either participate, look around and vote!! Have fun, be inspired.

spring-2015-BQF-Button

QuiltCon Entries

I thought about this post a lot today after reading several of the other posts on QuiltCon Quilt Show announcements made yesterday, and wondered whether I should write this or not.

Before I start, everyone should go over and read this post “Former QuiltCon Juror Tells All” by Latifah Saafir, it is very informative about how quilt show selection is made. Worth a read. I learned a lot.

There are so many amazing quilts out there that were entered to the QuiltCon Quilt Show. I think everyone deserves a pat on the back for completing their quilts, that you can be proud of your work and for taking the leap to submit your quilt into a show.

I know, personally speaking, this was a very hard step for me. I had to work hard to get my quilts finished. I worked hard to overcome the self-doubt, especially since I have only been quilting just over 2 years and this is my first show.  I am so thankful, for our quilting community and my IG friends, without the support you have all shown me I would not have submitted or finished anything (for that matter).

Here were my submissions into QuiltCon Quilt Show.

Phased Circles
PhasedCirclesComplete

Neighbourhood
Neighbourhood_Finished_Front_Closeup

I know a lot of quilts did not get in and so many of them I love!! So, I am so honored that both of my quilts did make it into QuiltCon.

Now, I am off to work out how to make and attach quilt sleeves, and how to make a quilt label. I am so excited about meeting so many people I chat to online or IG, volunteering, attending classes and lectures and also seeing all those quilts in person. This will be such a fantastic event!! See you soon.


Design Process for Phased Circles

So, how did I get to here?
PhasedCirclesComplete

From here?
OriginalDesign

There were surprisingly a lot of design choices, that I wanted to try to consolidate them here and share the questions/ideas I had through my process.

1. First off, deciding on fabric,  lead to the color choices for the circles and the design only being made with 6 circles.
I really wanted to use my Carolyn Friedlander Architextures and Botanics in this quilt. She has 6 main colors across these lines. The solids were chosen to match or complement these colors.
FabricPull

2. Placement of each color was the next decision.
After playing with the circles on my design board, I decided I liked a warm color placed with a cold color on each row. The other thing I had decided at this point was to switch out the light green print with the darker green topology print.
Circles_Complete

3. Background colors for the circle blocks.
At first, I was contemplating all grey prints, since I liked the grey background on my design board. Then what if I tried the low-volume or lighter Carolyn Friedlander prints that matched each of the key color of each circles. Yes, there were enough different prints that I could go this route except for the plum/pink…this one I stayed with low-volume grey prints.
PossibleBackgrounds

4. Stripes or no strips in the outer border.
Should the border be just solid or should I pull the prints from the circle out to continue the stripes?
BorderNoStripesBorderStripes

5. Size of the outer border
I had finished the first 1/2 started to think that the 10″ border I had chosen was too large and maybe I should cut it down to 5″. Well, I left it and decided that I needed the whole top before I could make that decision. The 10″ border was the perfect size with the whole quilt top, so it stayed.

Phased Circles_10in_Border  Phased Circles_5in_border 

6. The back
I really wanted the back to complement the front, which I could do either with fabric or with shapes. I still had most of Carolyn Friedlander Black, White and Grey prints left. Since there was so much color on the front, wouldn’t it be cool to use a lack of color on the back as a contrast to the front. I also liked that these prints could be used to give an ombre look.IMG_2067

7. The quilting design
The original decision for the quilting was going to be 1/2″ lines that moved around the circles and then the borders were going to have FMQ’ed straight line mixed border (similar to what you see in Carolyn’s quilts). The more I though about it the more this changed. Finally, I decided on matchstick quilting for the blocks at both vertical and horizontal directions, while the border was a simple 1″ straight lines.
Phased Circles Block1 Quilted Top

The crosshatch (gridded) quilting was introduced as I finished the second block….I decided I needed a break and that this would be a great complement to the overall design.Blocks2_3_quilted

8. The binding
The last design decision was the fabric for the matching binding. I wanted it to be color blocked from the start. All solid? All prints? In the end I chose a mix; I decided that the jade and the green blocks would be the solid color, since the print was dramatically different from the solid. The other 4 blocks were bound in the matching print used in the border and circles.
PhasedCirclesCompleteThey were the key decisions made in my design process. Obviously, they happen throughout the creative process, and I always try to stay open to changing my mind in the process.

Linking up with Lorna @ Sew Fresh Quilts for Let’s Bee Social.