Tag Archives: recycle

Recycling wine corks – Cork Boards

I got into making cork boards about 15 years ago. I saw this amazing framed wine cork board in a home goods store, but it was so far out of my price range (like $200-300). I went home and wondered how I could make the same thing for next to nothing.

I made some mistakes along the way, for example very stiff cardboard is not enough for a backing to glue on corks – yes, it buckles from all the glue. Second, you need a lot of friends that drink wine 😉 that was the only way I was collecting corks.

Today, what I do is use a backing board of some kind – similar to what you would use for backing furniture. I collect corks still, but I also go to my favorite cafe/wine bar who give me the corks for free!!! I also ordered used corks online – you can get them by the box….I mix the used with wine stains and the used from online to balance out the look.

NOTE: The used corks from online means they have been printed but not with the wine stains.

Also I switched from a craft knife (scalpel) to an electric knife – saves me from slicing my finger off….btw was a common occurrence (at least once per board).

NOTE: Using an electric knife, you will need to take breaks as the knife will heat up and you don’t want to start a fire.

Finally, I just use wood glue to glue the corks on the board.

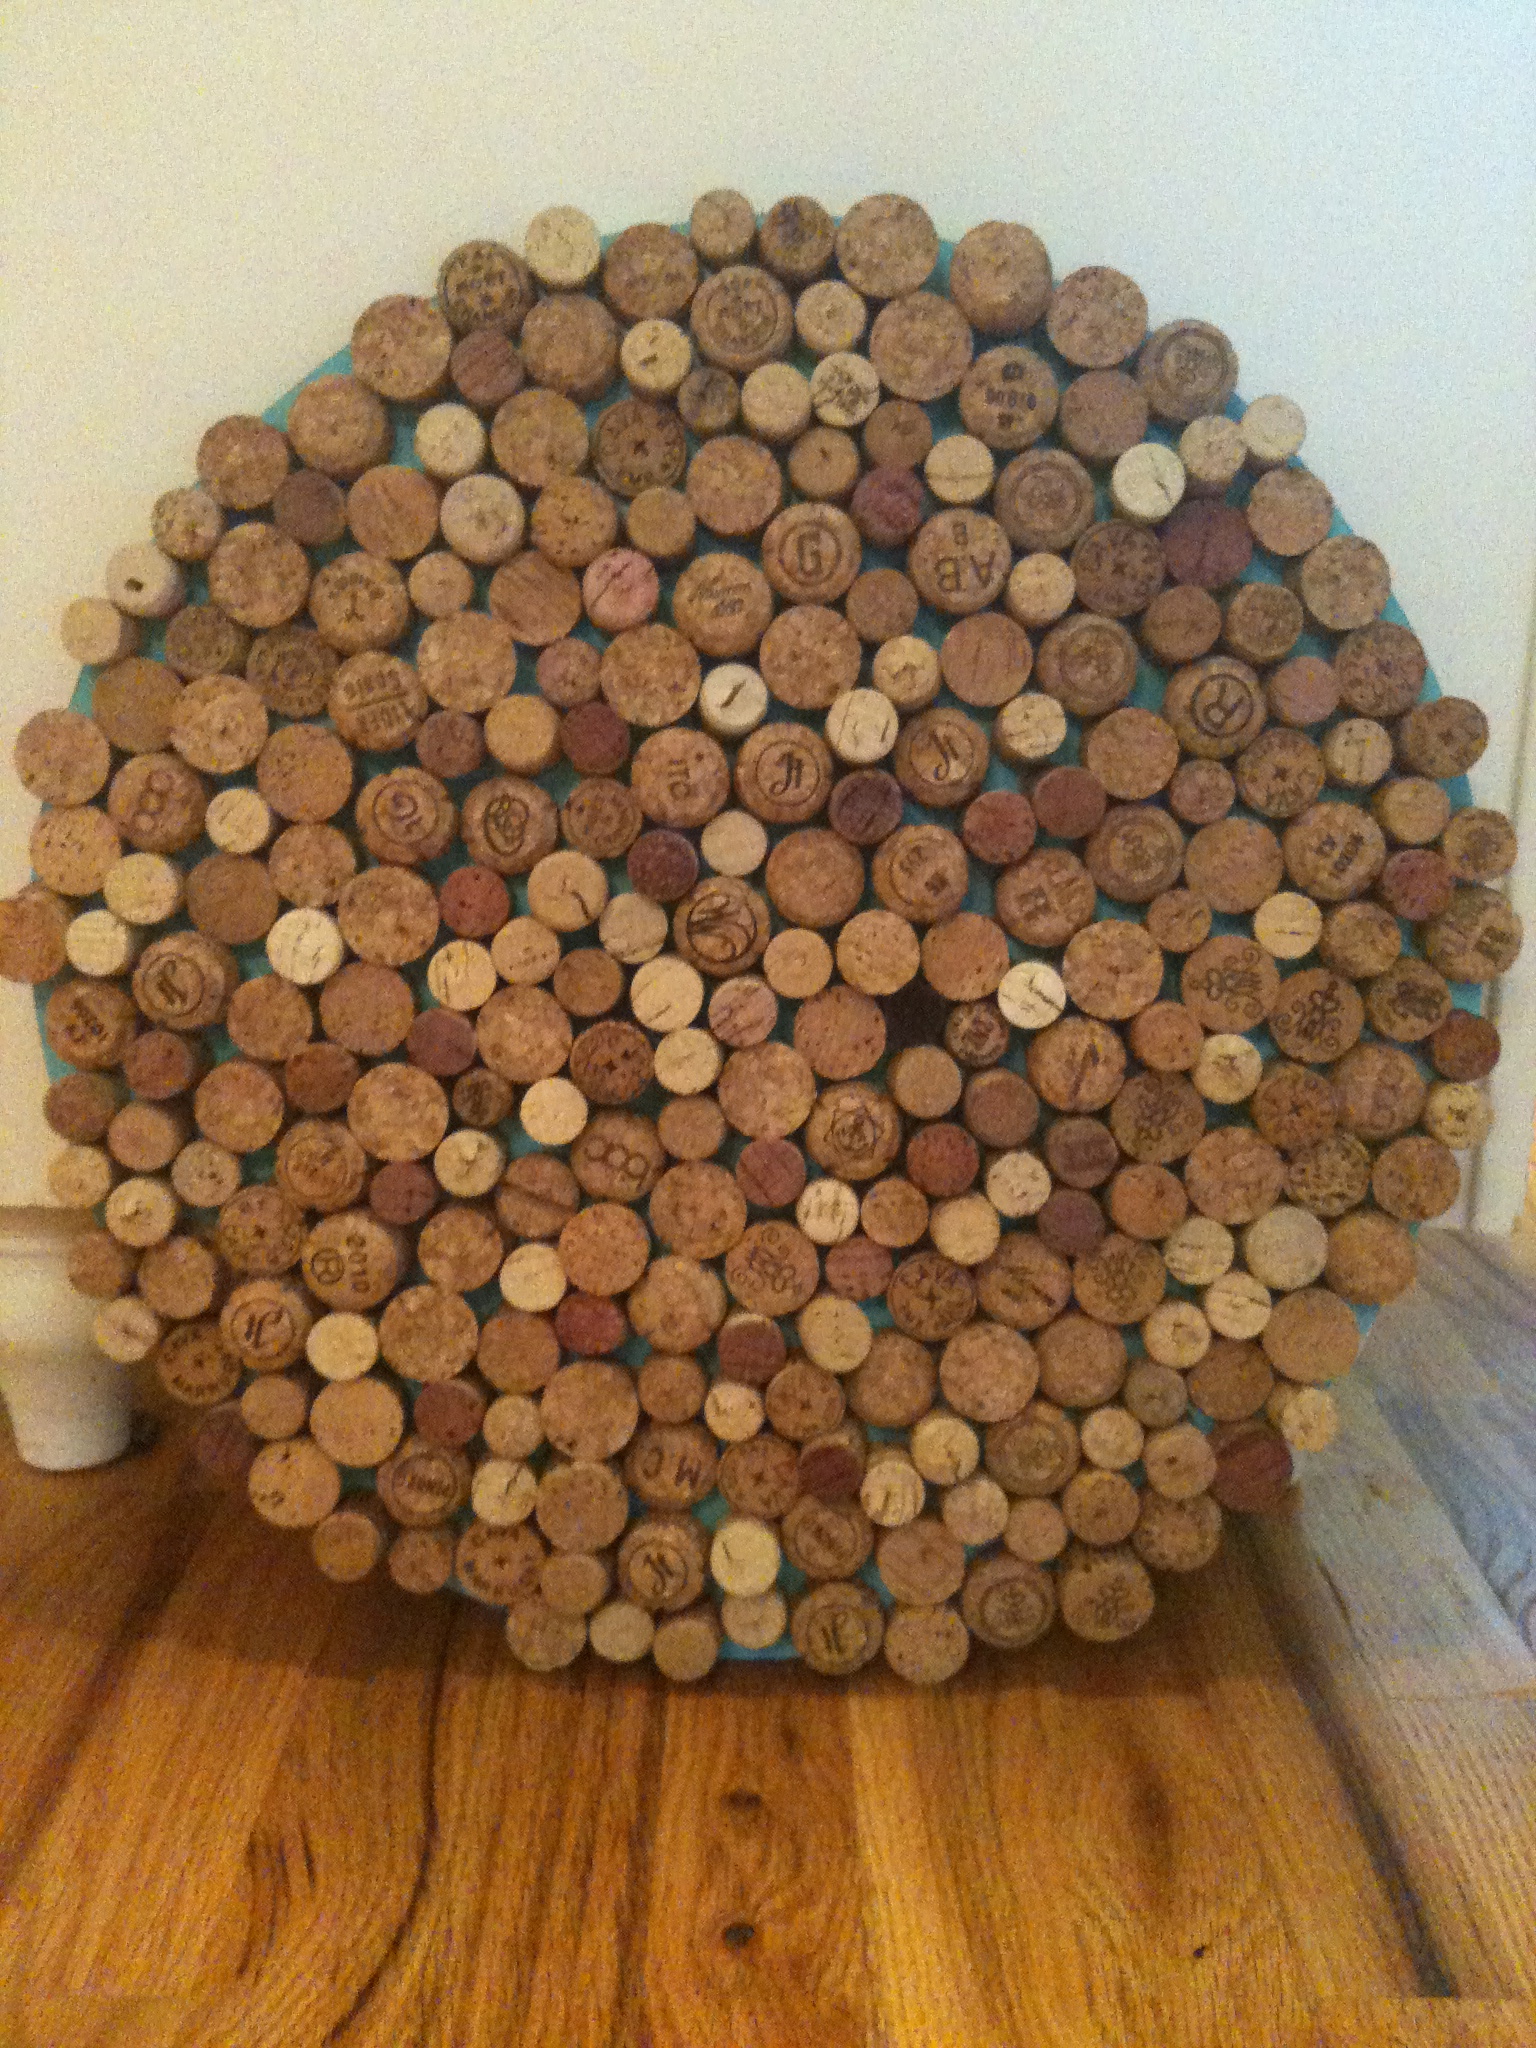
Here are two of the designs I do:The first, is more of a fun design – a circle using corks from the top/bottom, these allowed me to use the hundreds of champagne corks that I had, as they don’t work for design #2.I use a piece of string and a drawing pin (tack) to draw the circle on the backing board, and then my lovely husbands uses the sharp object to cut out the circle. Painting it some cool color and once it dries, I get into cutting the corks and glueing the corks on the board. Below are pictures of the first one I made, which my Mum received for Christmas.
Circular Cork Boards

This is a more formal looking cork board. It is framed – which, I either use second-hand frames or I make them and paint/stain them. The corks for this style are cut length-wise. I place the corks in various designs – no two are alike. Below is a picture of my cork board and matching blackboard (we use for a meal planner) that are in my kitchen.

Cork and Chalk Boards

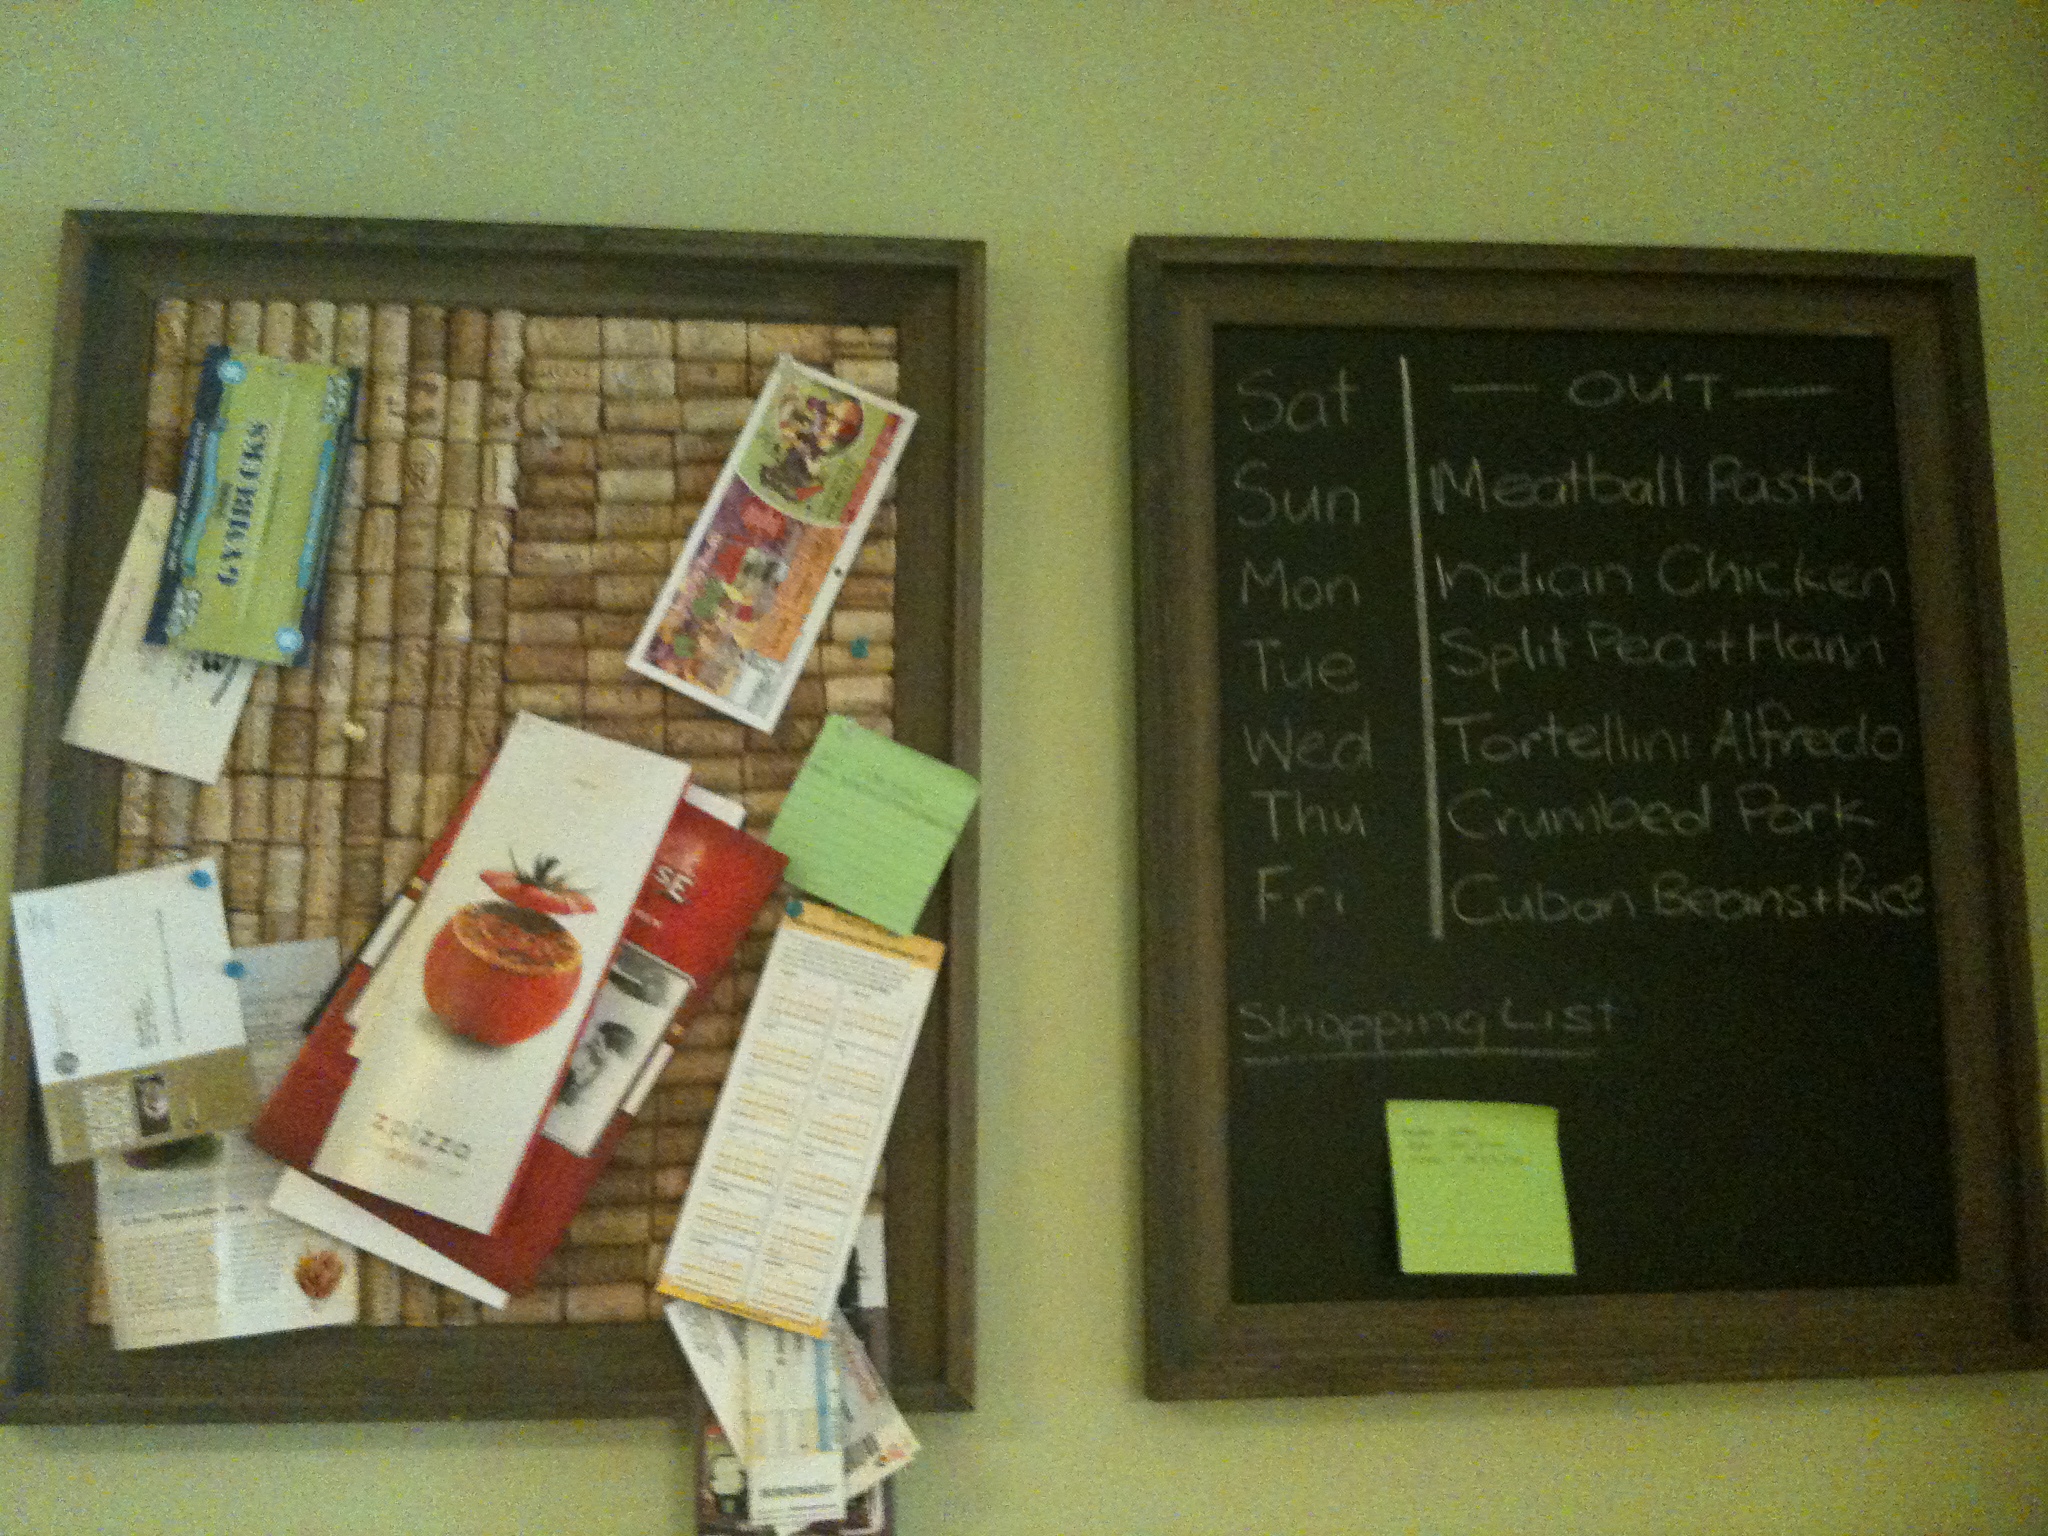
One of my favorite things about this cork board, I was able to incorporate a wine cork of a reserve wine my brother gave us for our wedding gift….I wrote the date of our wedding on it and now its a memory we have forever.

green tri2

Tea Towel Sofa Cushions

While vacationing in New Zealand, I found two great tea towel designs by New Zealand designer Ingrid Anderson (http://www.iatextiledesign.co.nz/showcase/index.html), that would make wonderful cushions for my kiwi green sofas.

I had the idea, but realized that I had not sewn since high school (over 20 years ago) and did not have a sewing machine. As projects stacked up, I bit the bullet ( so to speak) and purchased my first sewing machine a couple of months ago.

These cushions would make a great first project and I had the materials for 4 cushions, one set were red and the other green…..so here’s what I did.

Materials:
4x tea towels (I unpicked all the seams to give me as much allowance as possible)
2x 2 yards of solid colored fabric (I had 2 red and 2 green based cushions)
2x matching threads
4x 20 in. pillows
Cutting mat
Rotary Cutter

Dimensions for each solid fabric (2 x red, 2x green):
2x 13 in. by 21 in. pieces for the back of the cushion
4x  2 in. by 24 in. for framing edges on front of cushion

Dimension for each tea towel piece (x4):
18 in. by 18 in.


Steps for 1 cushion (repeat 4 times):

  1. First step was to sew the border pieces around the tea towel square which is to be the center. You will want to do each border one at a time; when you have two sewn on you will do a miter corner to connect the borders and give it a nice finish. Then add one border at a time and corner till finished. Make sure you iron the borders and corners. That’s the front side of your cushion and should measure 21 in. x 21 in.I found a great youtube video showing how to do easy miter corners for the borders – if I find it again I will update the blog.
  2. Now for the back…I took each of the two 13 in. x  21 in. pieces and on one of the long sides (ie. the 21 in.) I pinned about 1/4 in. over. I ironed this seam flat.  I folded over again 1/4 in. and re-pinned and ironed again. Now it is ready to sew a 1/4 in. seam starting and finishing with a few back stitches.
  3. The last step, sewing the cushion pieces together. Place the front piece tea towel up (so you can see the print). Now place one of the 13 x 21 in. pieces front down and line up the long rough edge to be at the top of the front piece. Repeat with the other 13 x 21 in. piece except the rough edge will line up at the bottom of the front piece. Pin in place – make sure you pin the overlap correct so that all pieces are seamed together.NOTE: If you have pinned correctly you will see all the inside of the cushion – no pattern should be seem. Remember you will be inverting the slip once sewn.
  4. Sew 1/4 in. seam around all 4 edges in one step. Start on one edge and when reaching the corner, pause, lift foot and change the direction of the fabric to sew the next edge…continue until seams meet.  Also as you sew the two sides – check that the seams of the overlapping edges are included.NOTE: I always start and end my seams with back stitches to avoid any unravelling of the seams later.
  5. Once complete iron all seams, invert your cushion slip and I iron again to get the look I want. Now slip in the cushion – and you are done.

I found that the cushion slip held fine without buttons but if you are feeling more creative add a button-hole on the outer most 13 x 21 in. piece and a button on the inner one.