Throughout the year, I have been working on 4 quilts for our Sisterhood of the Traveling Quilts. I have loved the process and have learned so much. I thought I would share some of my thoughts of the process, some realizations and some of my contributions.

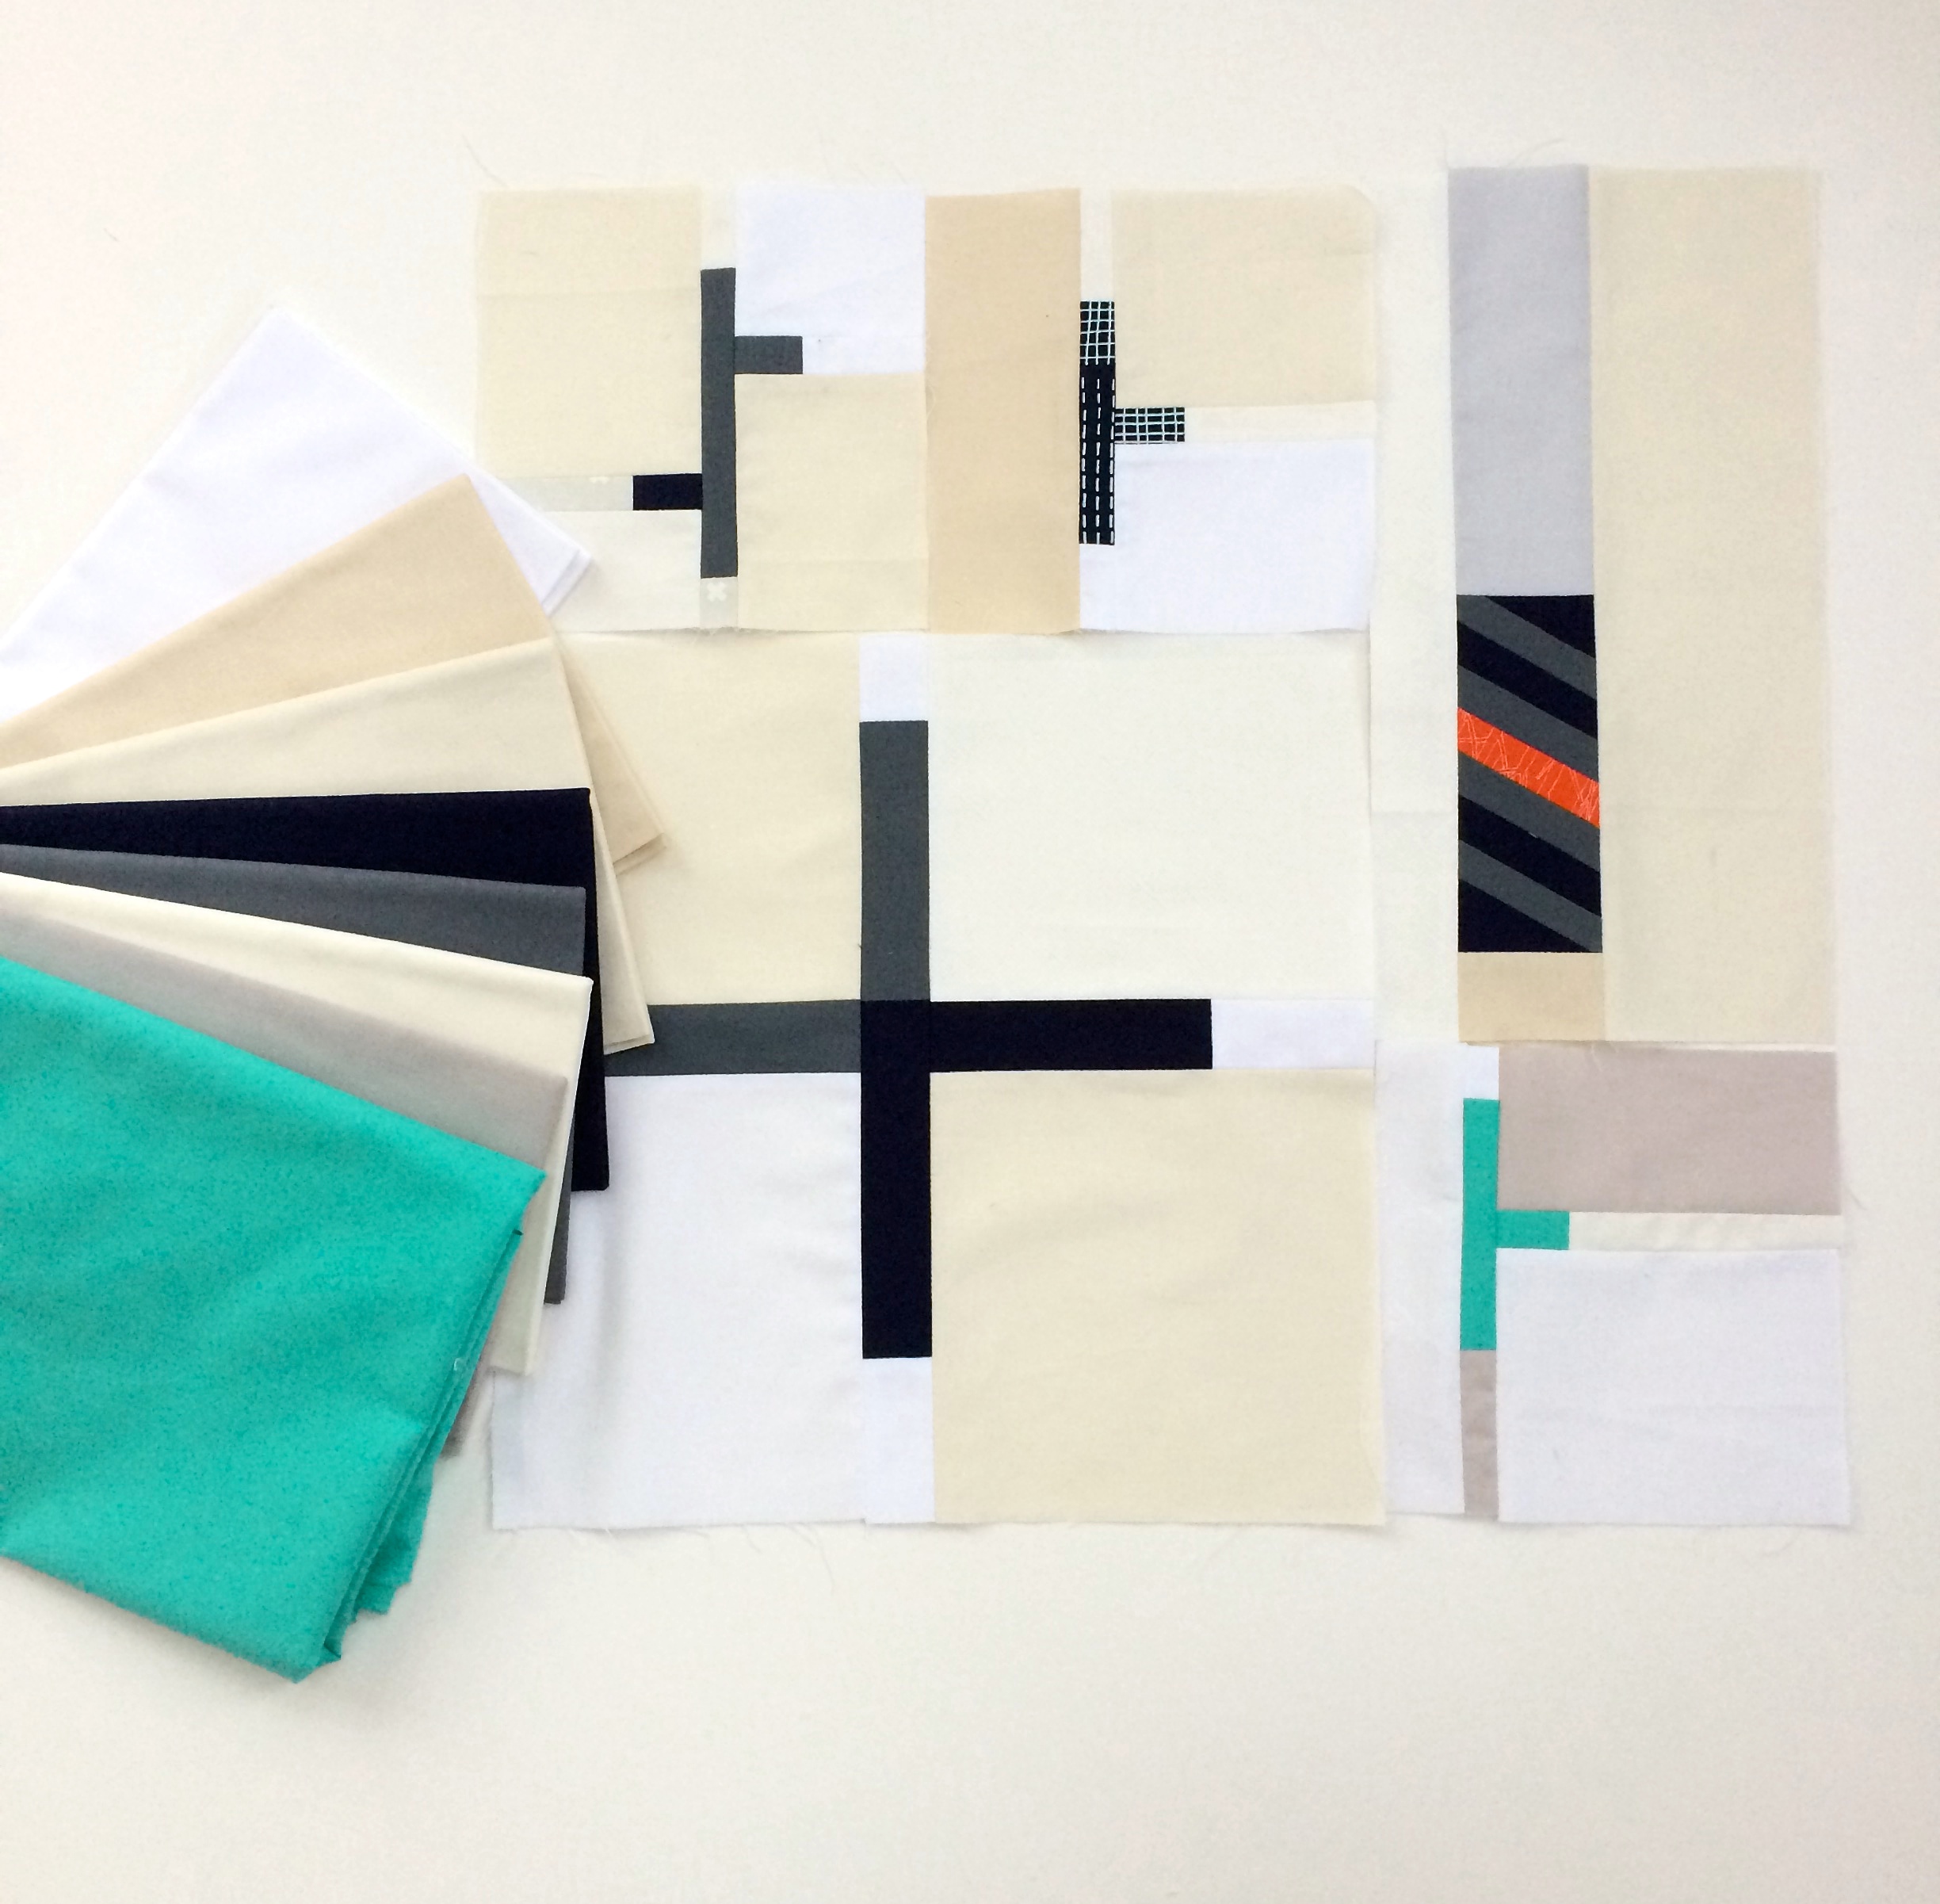
[My starter pack for my minimalistic road sign inspired quilt]
First off some background, a traveling quilt involves a small group of people. Each person creates a starter for a quilt which then gets passed systematically to the next person with guidelines and some fabric. You may be asked to add a row, a border for a medallion quilt or just blocks. The last person to contribute to the quilt, pieces the top together (if this is a row-based or block-based quilt).

[Renee’s quilt: my contribution – 1st border]
Usually each quilt will have a theme, for instance, in our group:
- Renee (quiltsofafeather) Started with this amazing center and asked that Bison to be the main background color. You can add solid purples but keep purple prints and oyster solid to a minimum
- Laura (littleandlots) asked for each person to add a row to her quilt, with the row containing rainbow colors.
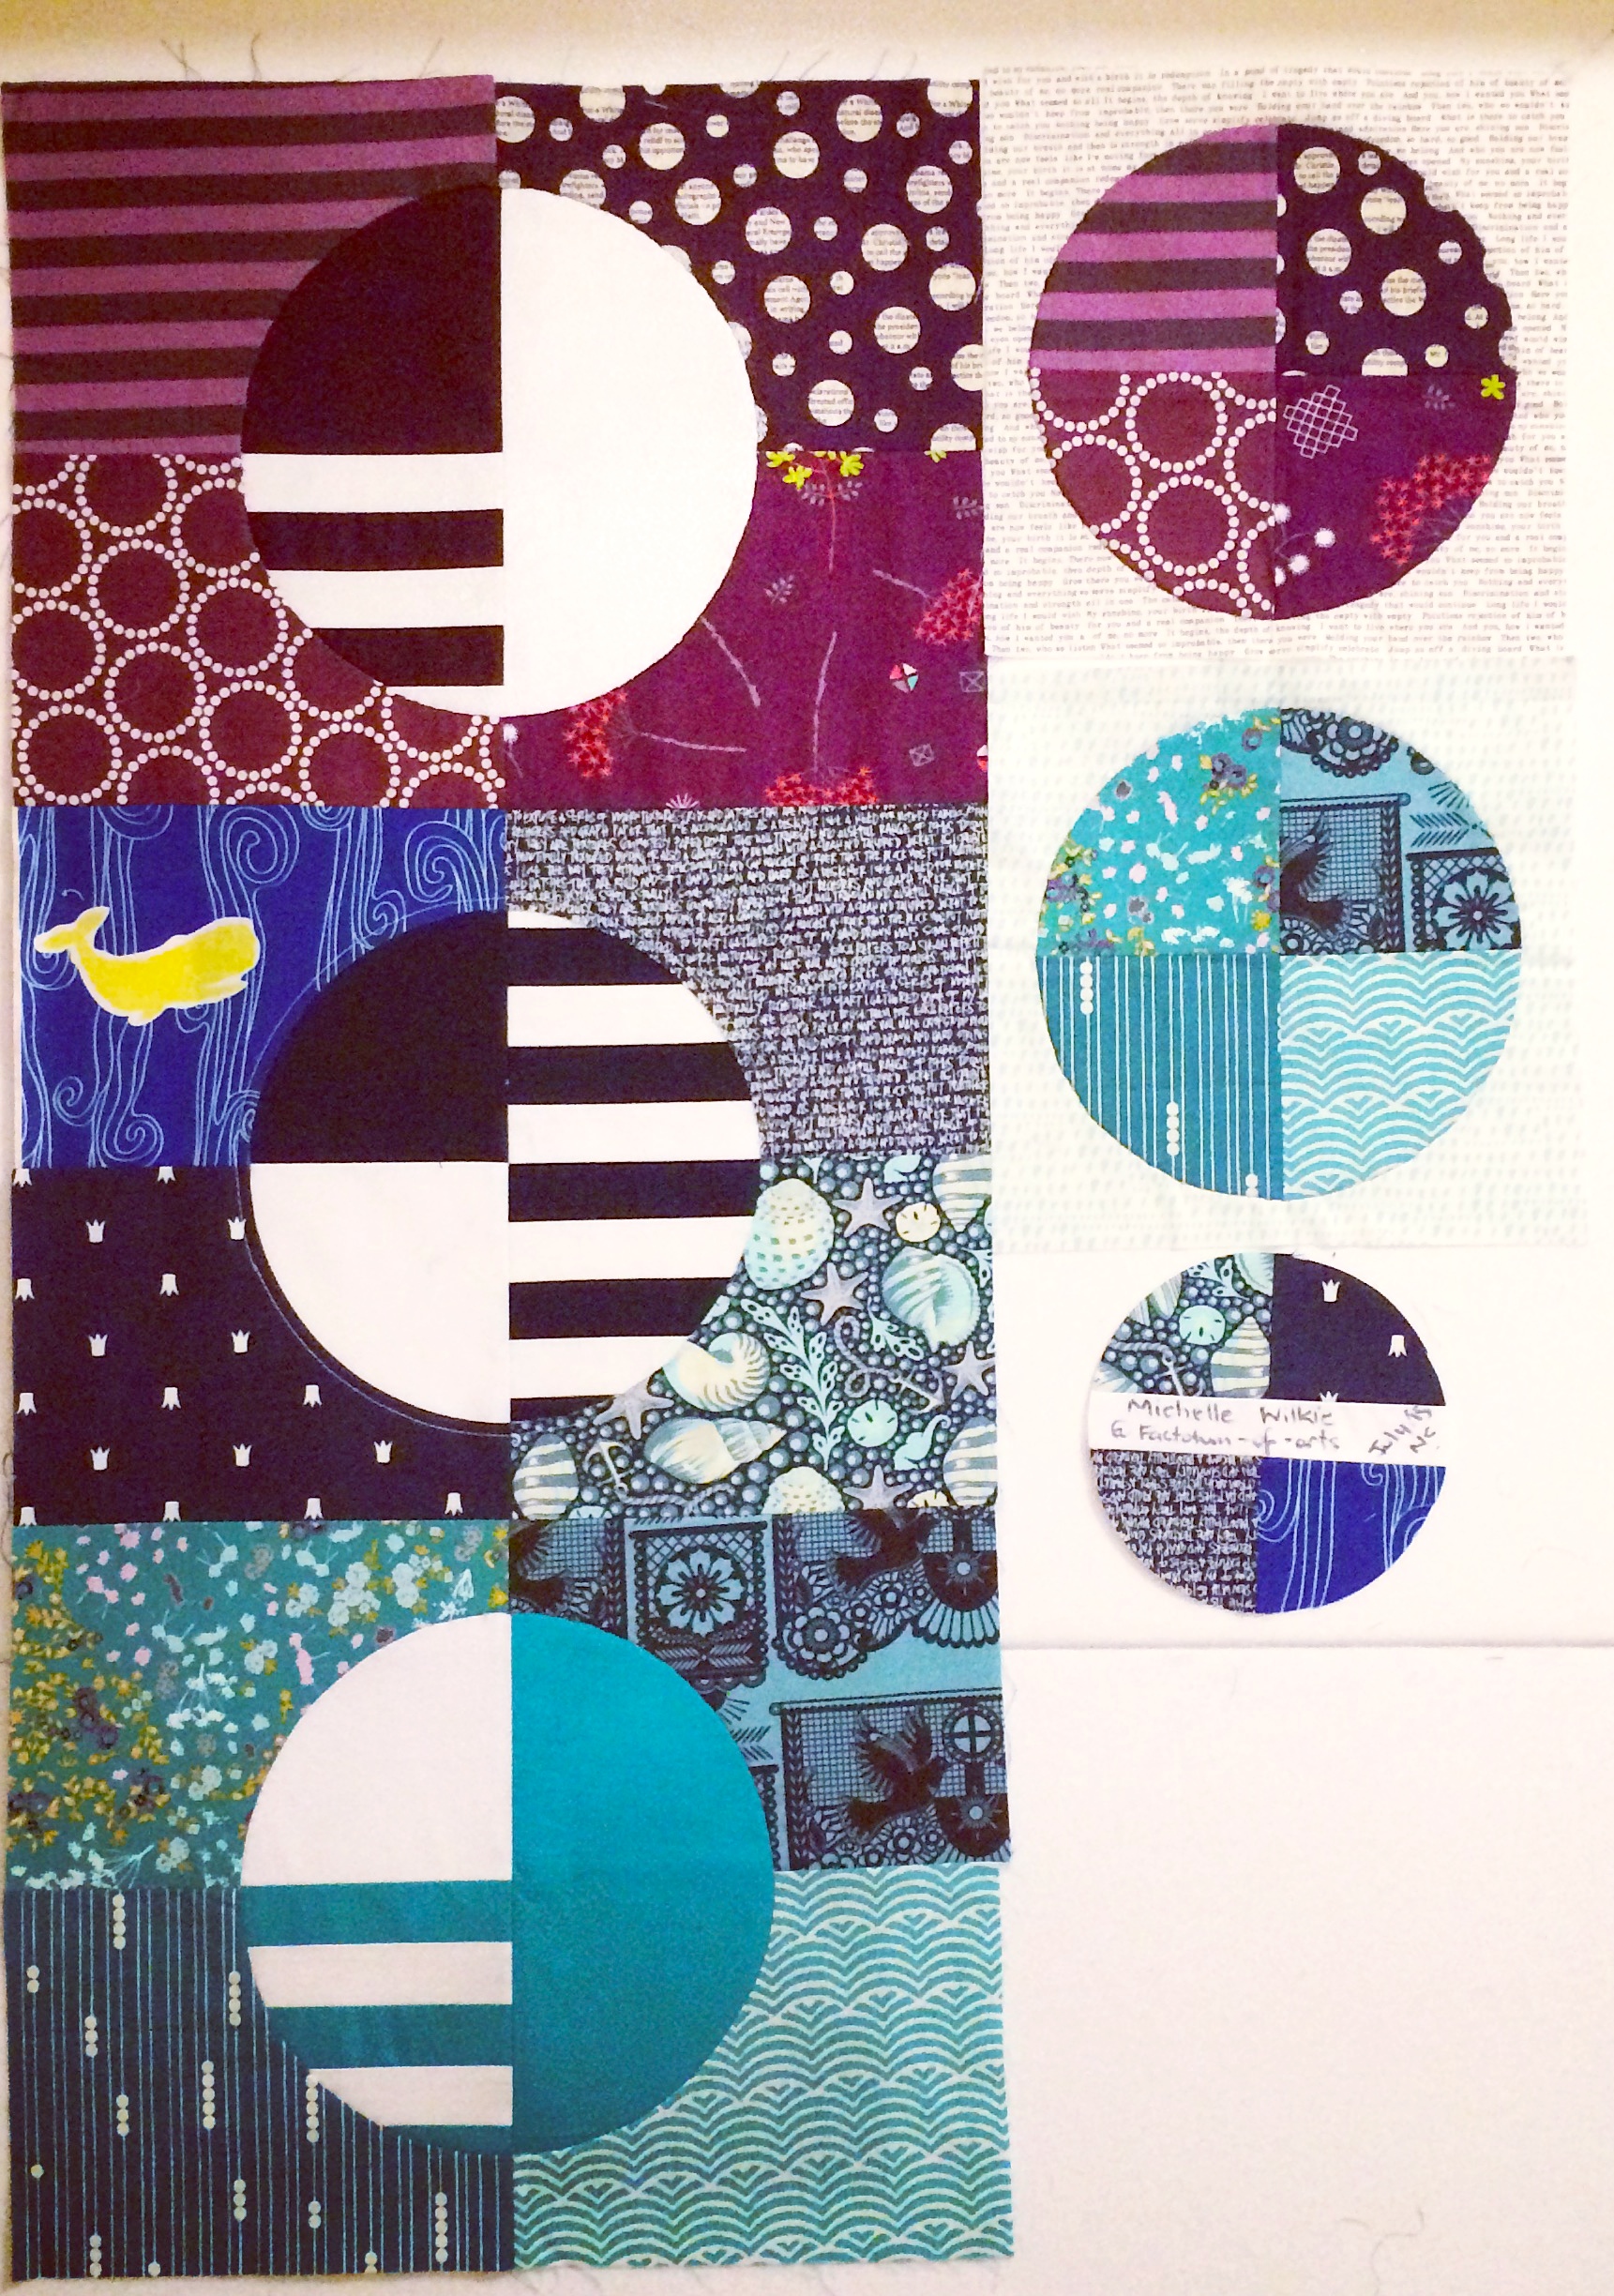
- Jess (quiltyhabit) asked for blocks that all had curves in it and she had a specific jewel color theme she wanted to use. With one of the colors, mustard/gold, Jess added additional details to ensure that the color matched her desired outcome.
- Ashley (wasntquiltinaday) had an idea for a rainbow quilt as well, but she wanted each row to be of a single color. Her initial starter kit was 72″ wide so the goal is to create a row of that length to add to the quilt.
- Myself: My thing was minimalism with a limited and heavily neutral color palette (pops of navy, aqua and orange). The theme was interpreting road signs.

[Laura’s quilt: My contribution of the Rainbow Chorus Line]
My goals:
- Adding “me” to another persons quilt and know that person will always know…”oh that was done by so-and-so”
- Making sure I produce a high standard as these ultimately are someone else’s quilts
- Be challenged by other people’s ideas and projects
- Have Fun and Enjoy!!
I think, I managed to meet all my goals. I have definitely had a lot of fun and enjoyed the overall process. The lessons I learned were more about me:
- I was definitely challenged. Renee’s quilt was a very different color palette than I would choose but I love the results.
Lesson learned: Don’t be afraid, embrace the challenge and it will surprise you
- I had fun with Laura’s, as I played around with fabric and worked out what combinations would work best.
Lesson learned: take the time to make the decisions that you need to make the product the best you can.
- I enjoyed adding my own block design to Jess’ quilt – definitely something recognizable as me.
- Now it’s my turn to actually make up Ashley’s top, as I am the last contributor. This has been fun working out the Math, adding various colors and designs for the 3-4 rows that I need to add.
Lesson learned: while making the final top check with the “receiver” what their final expectations are. In general, get to know the people in the group and use fabrics /blocks that you know they will like.
- As I wanted to contribute my best, many times I over committed and under estimated my time to the project. For my contributions on the first two quilts, I choose projects, that in total took over 30-40 hours to complete. This was usually for a single row or a border. Due to some of these project decisions, I was late by 2 weeks on one quilt and 4 weeks late on the other.
Lesson learned: this was unfair to the group, so this is something I improved for my 3rd and 4th contributions. Choose do-able projects in the time you have but still produce a high quality result. It should still be something you are proud of or you would be happy to receive.
- One of the things I enjoyed, most was watching how others were doing on their contributions and ideas by sharing on IG.
Lesson learned: sharing built our communication/ friendship, it also gave us all check points to see where people are etc.
- I loved getting to know folks through the process.
Lesson Learned take the time to get to know each other. Also, it’s really about communication, and being part of a team. You can’t let people down but most of the time if you communicate the situation people are usually understanding.
My recent finish, that is due end of August, was Jess’ quilt that incorporated the curves and jewel tones. I added 3 of my Phased Circle Blocks, that I designed. I also added two more blocks using the circle cut-outs as additional blocks added to a low-volume print in a like color.

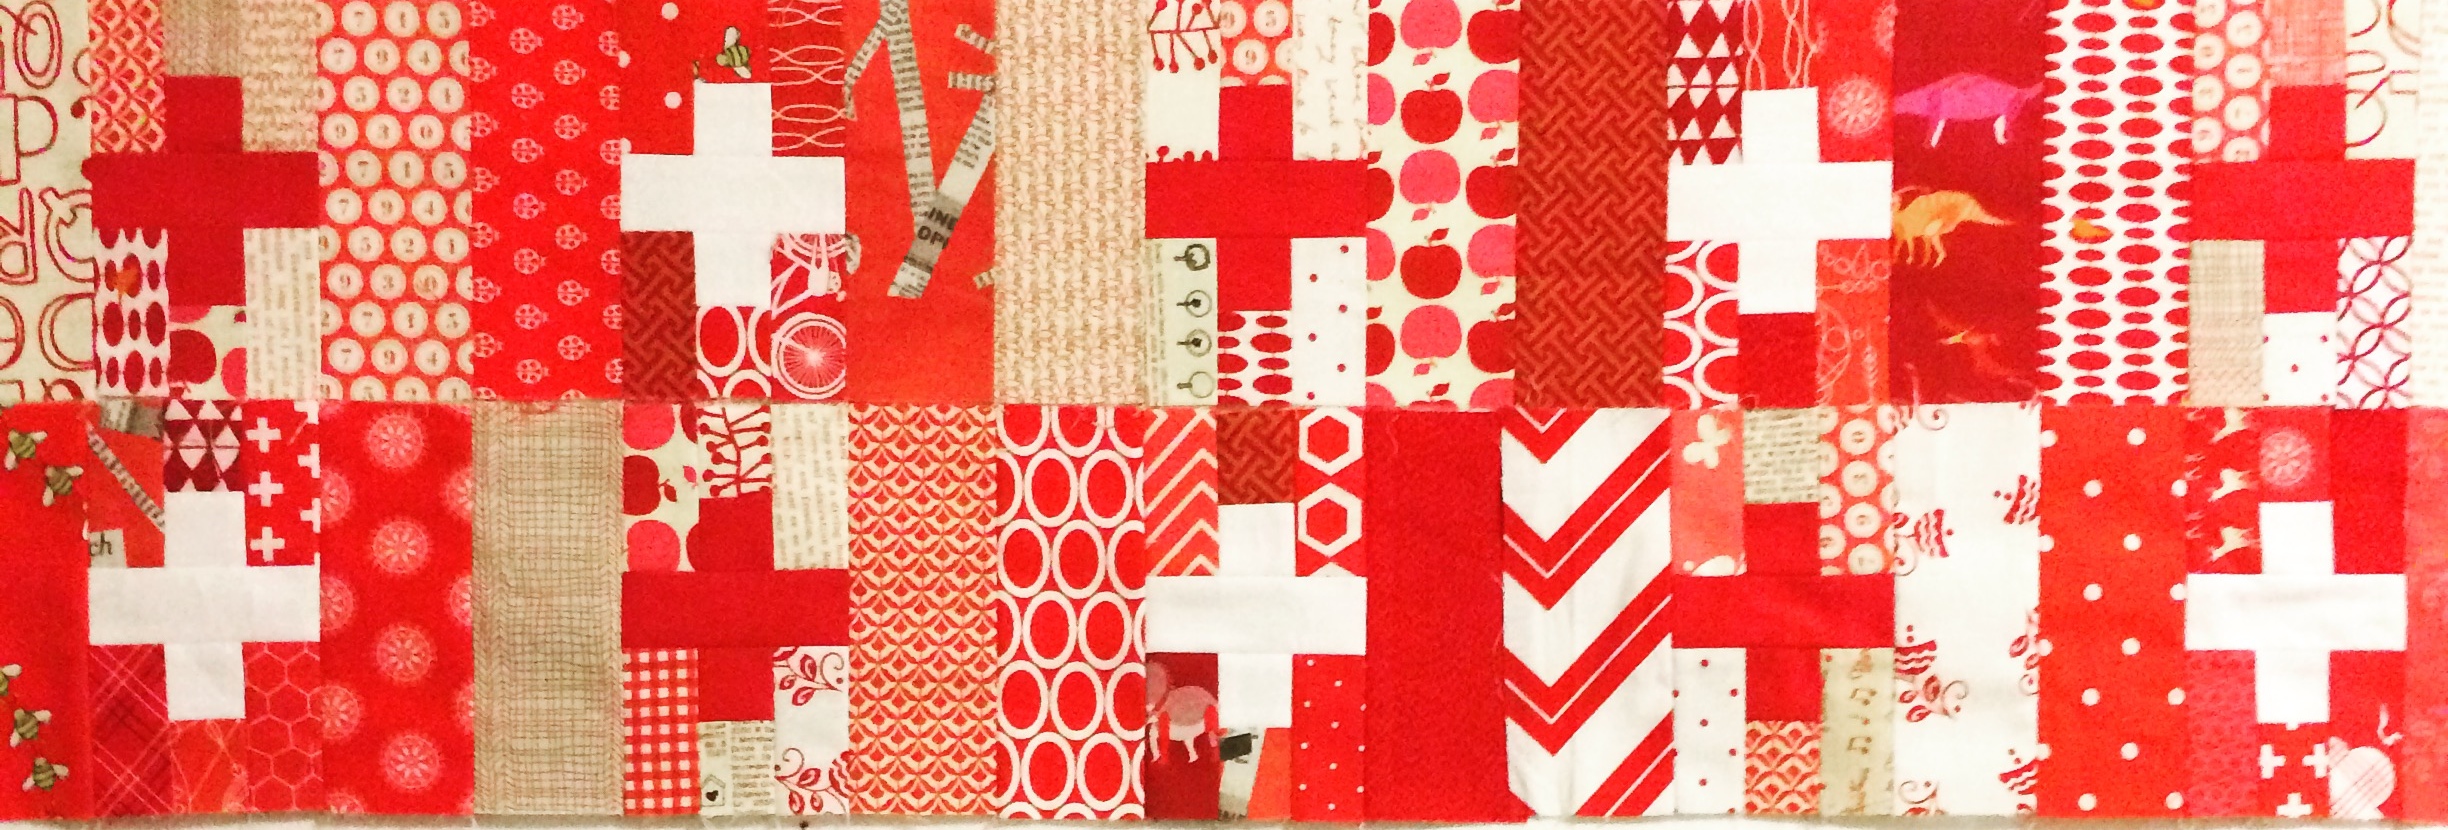
The last quilt I am working on, is Ashley’s rainbow quilt (each row of one color). Being the last person, I get to also construct/piece the top. Like I mentioned above, I am loving working on the math. The additions I have added include a row of red crosses, a row of Anna Maria Horner feathers in teal/aqua and the blue row consisting of economy blocks and blocks from Patchwork City.
The red crosses will be added to an orange row (still to be decided) and Laura’s fabulous yellow and pink rows.

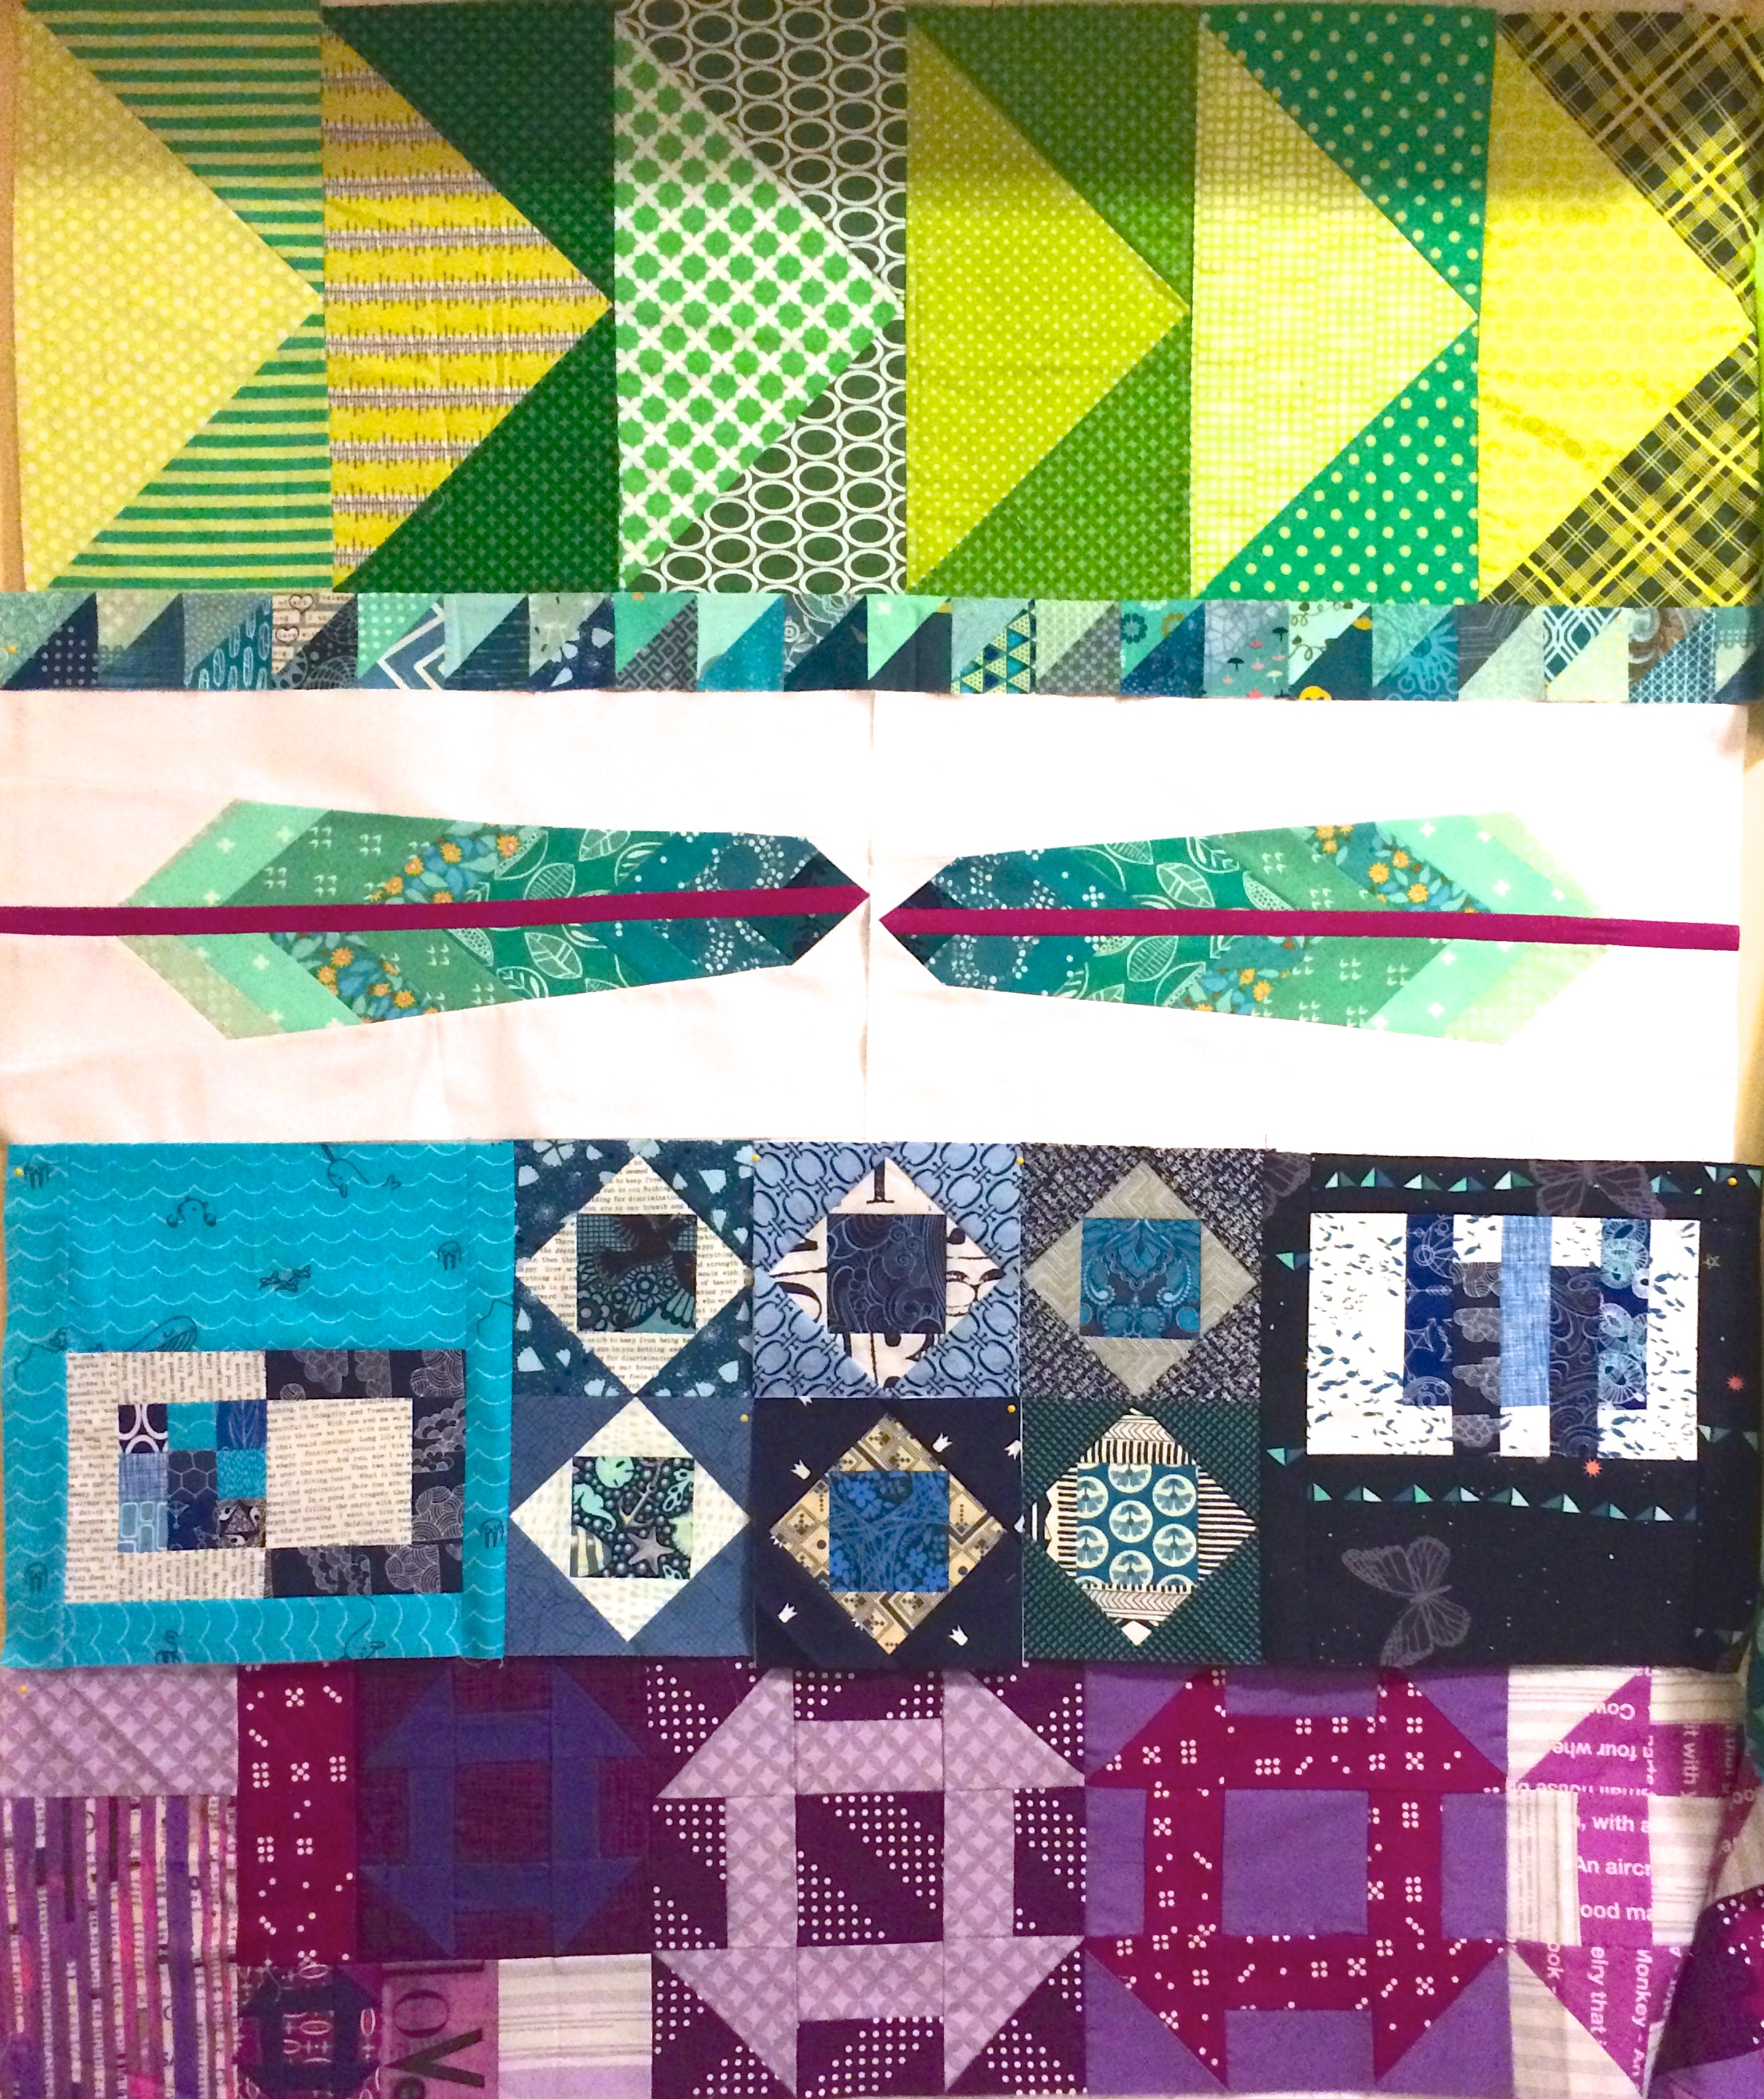
In this last picture, you can see how the bottom 1/2 of the quilt is progressing. It starts with Ashley’s starter row of Green flying geese, Renee’s row addition of the HST teal/aqua, my feather and blue row contributions and the purple churn dash row from Jess.

I would highly recommend the traveling quilt process. I enjoy it more than bees. I can’t wait to see how my road sign minimalistic quilt turns out. I am off to make dinner and work on more of Ashley’s quilt!!
Linking up with Lee over at Freshly Pieced for WiP Wednesday (see button on the right).