I have been having fun with my new design “Phased Circles” of late. I will at some stage release the pattern for the whole quilt seen here. In the meantime, thought it would be fun to share with everyone, how I made up the individual blocks.
You will need the following materials.
- Circle Rotary Cutter (cuts at least a 8.5″ circle)
Inner Circle
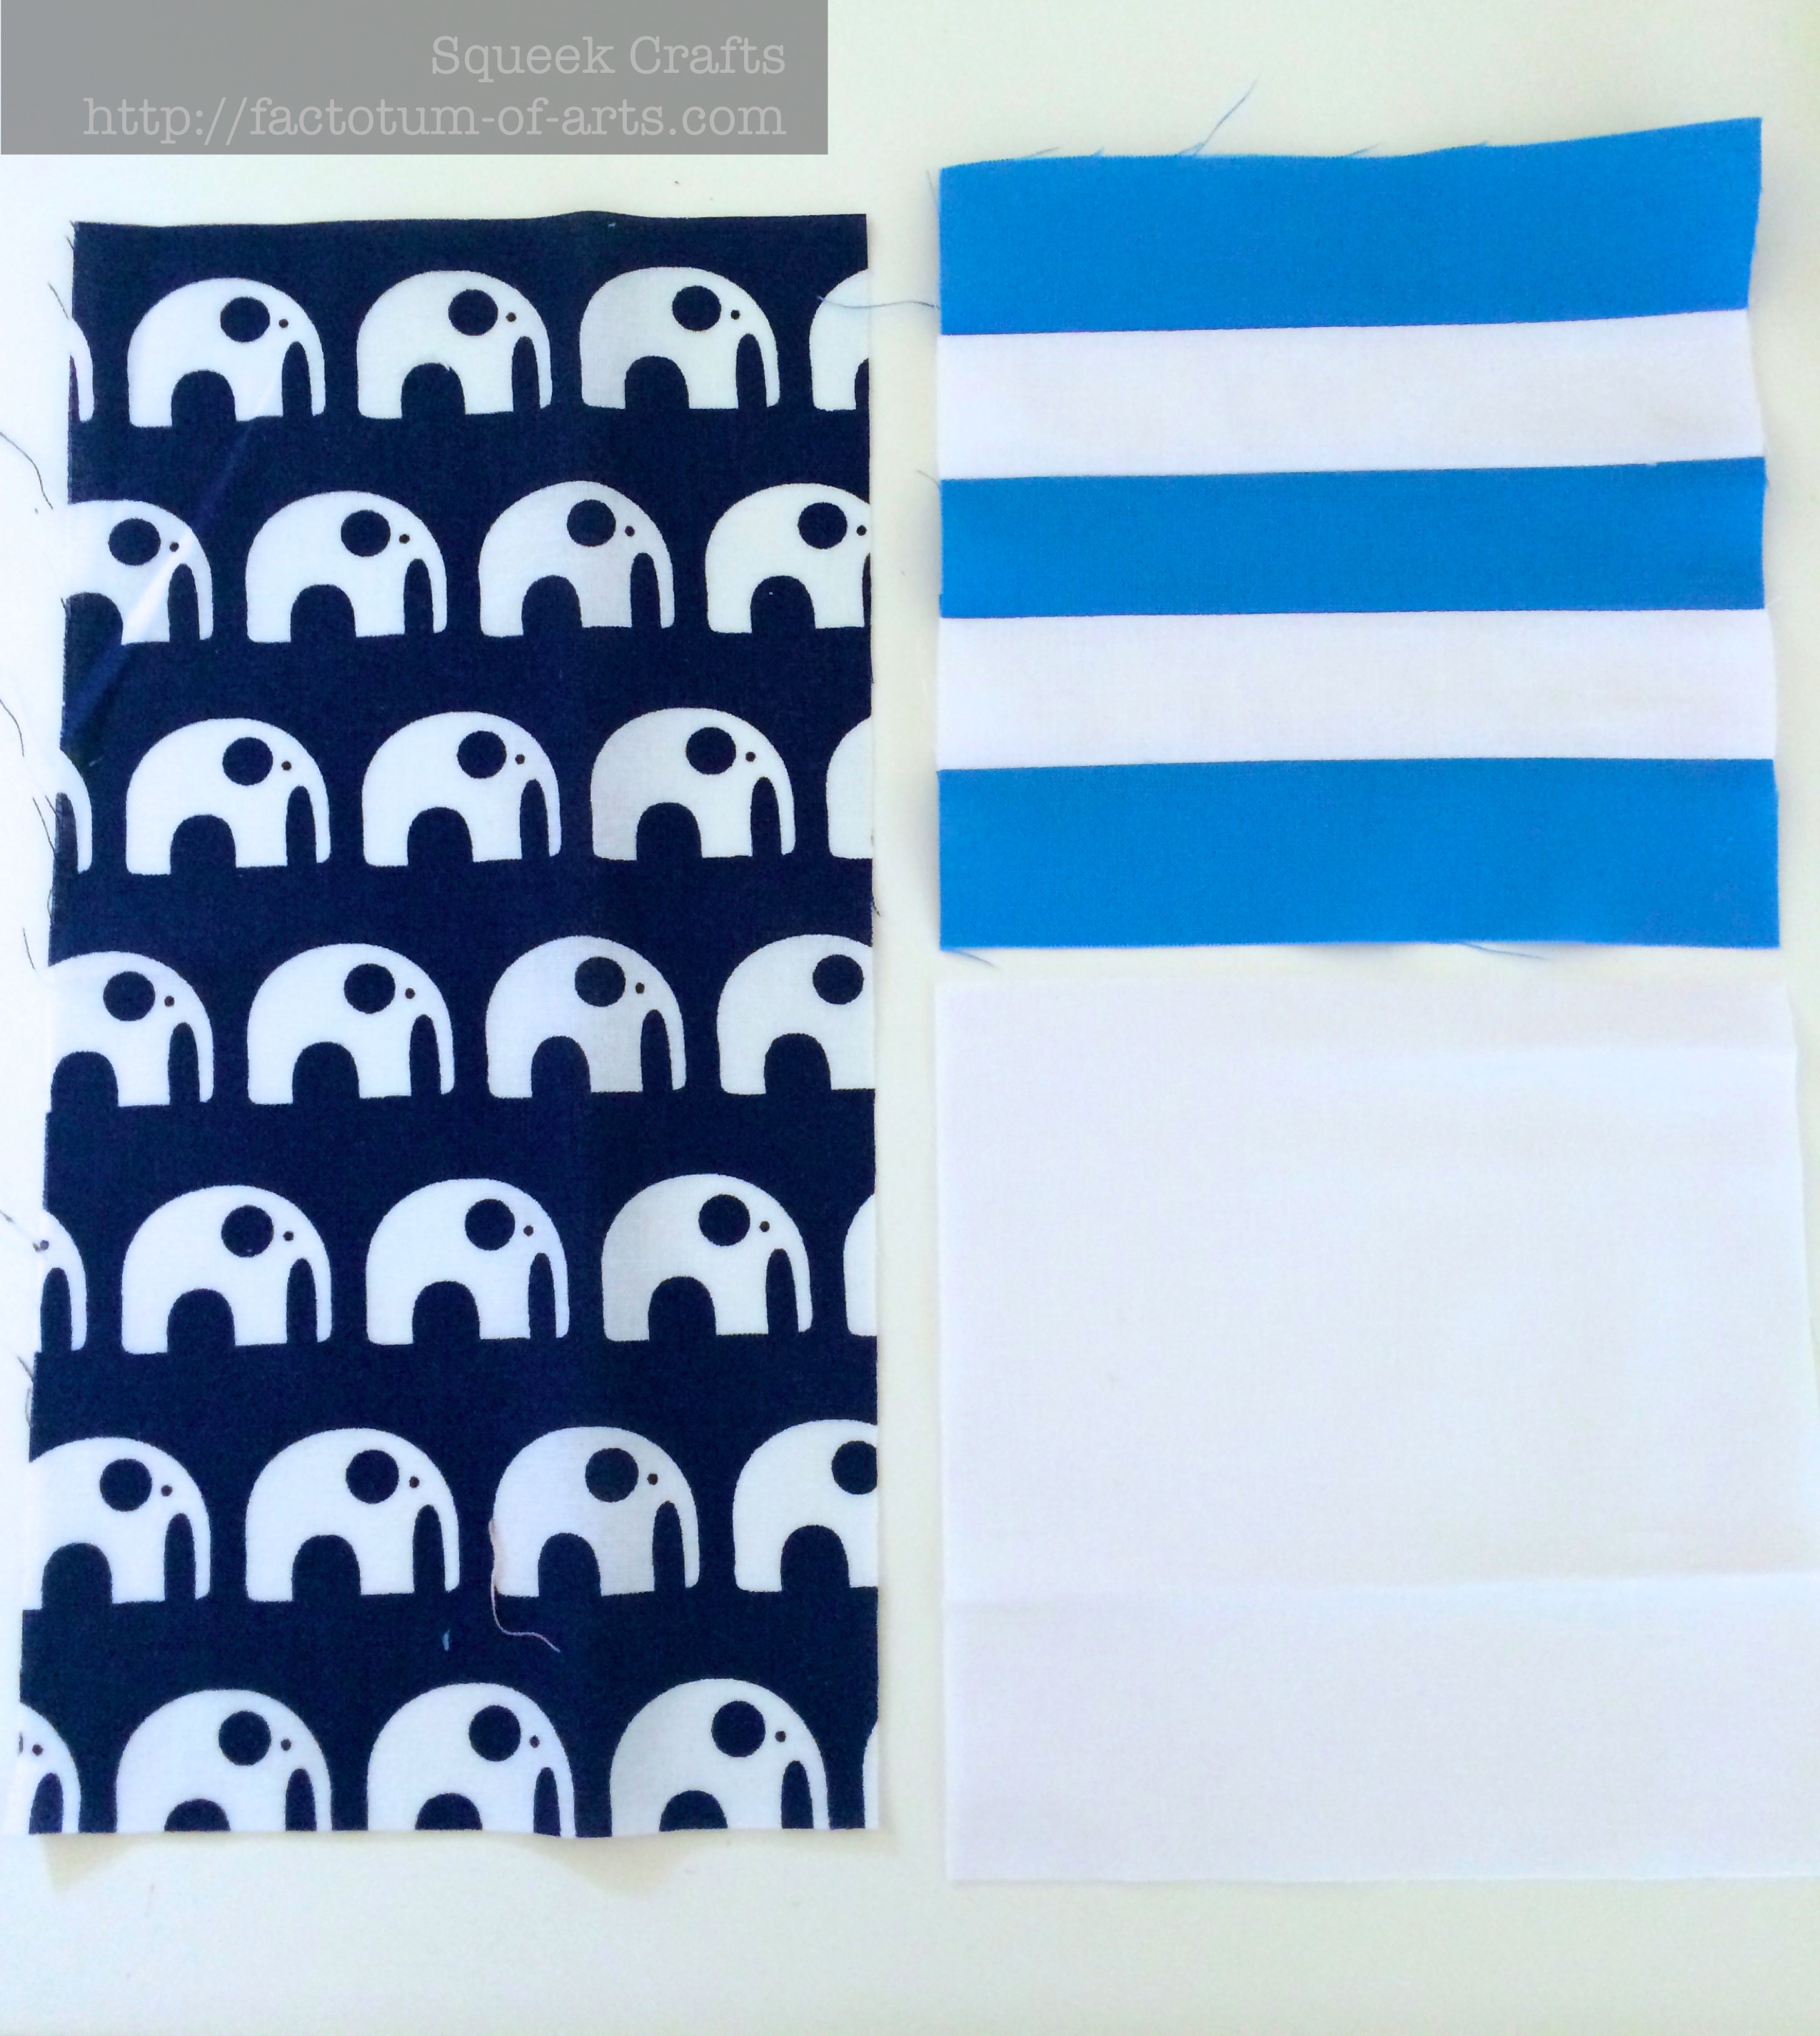
- 1 5.5″ white cotton square
- 1 1.5″ strip of white cotton and a colored solid of your choice (I used Kona skinny strips so I did not need to cut)
- 1 5.5″ x 10.5″ printed fabric (dark/saturated print)
Background
- 1 6.5″ square of four low-volume prints in monotone colors (as in my quilt) or four prints in a complementary color (as seen in this block) to the inner circle fabric selection.
- Let’s start with the inner circle.
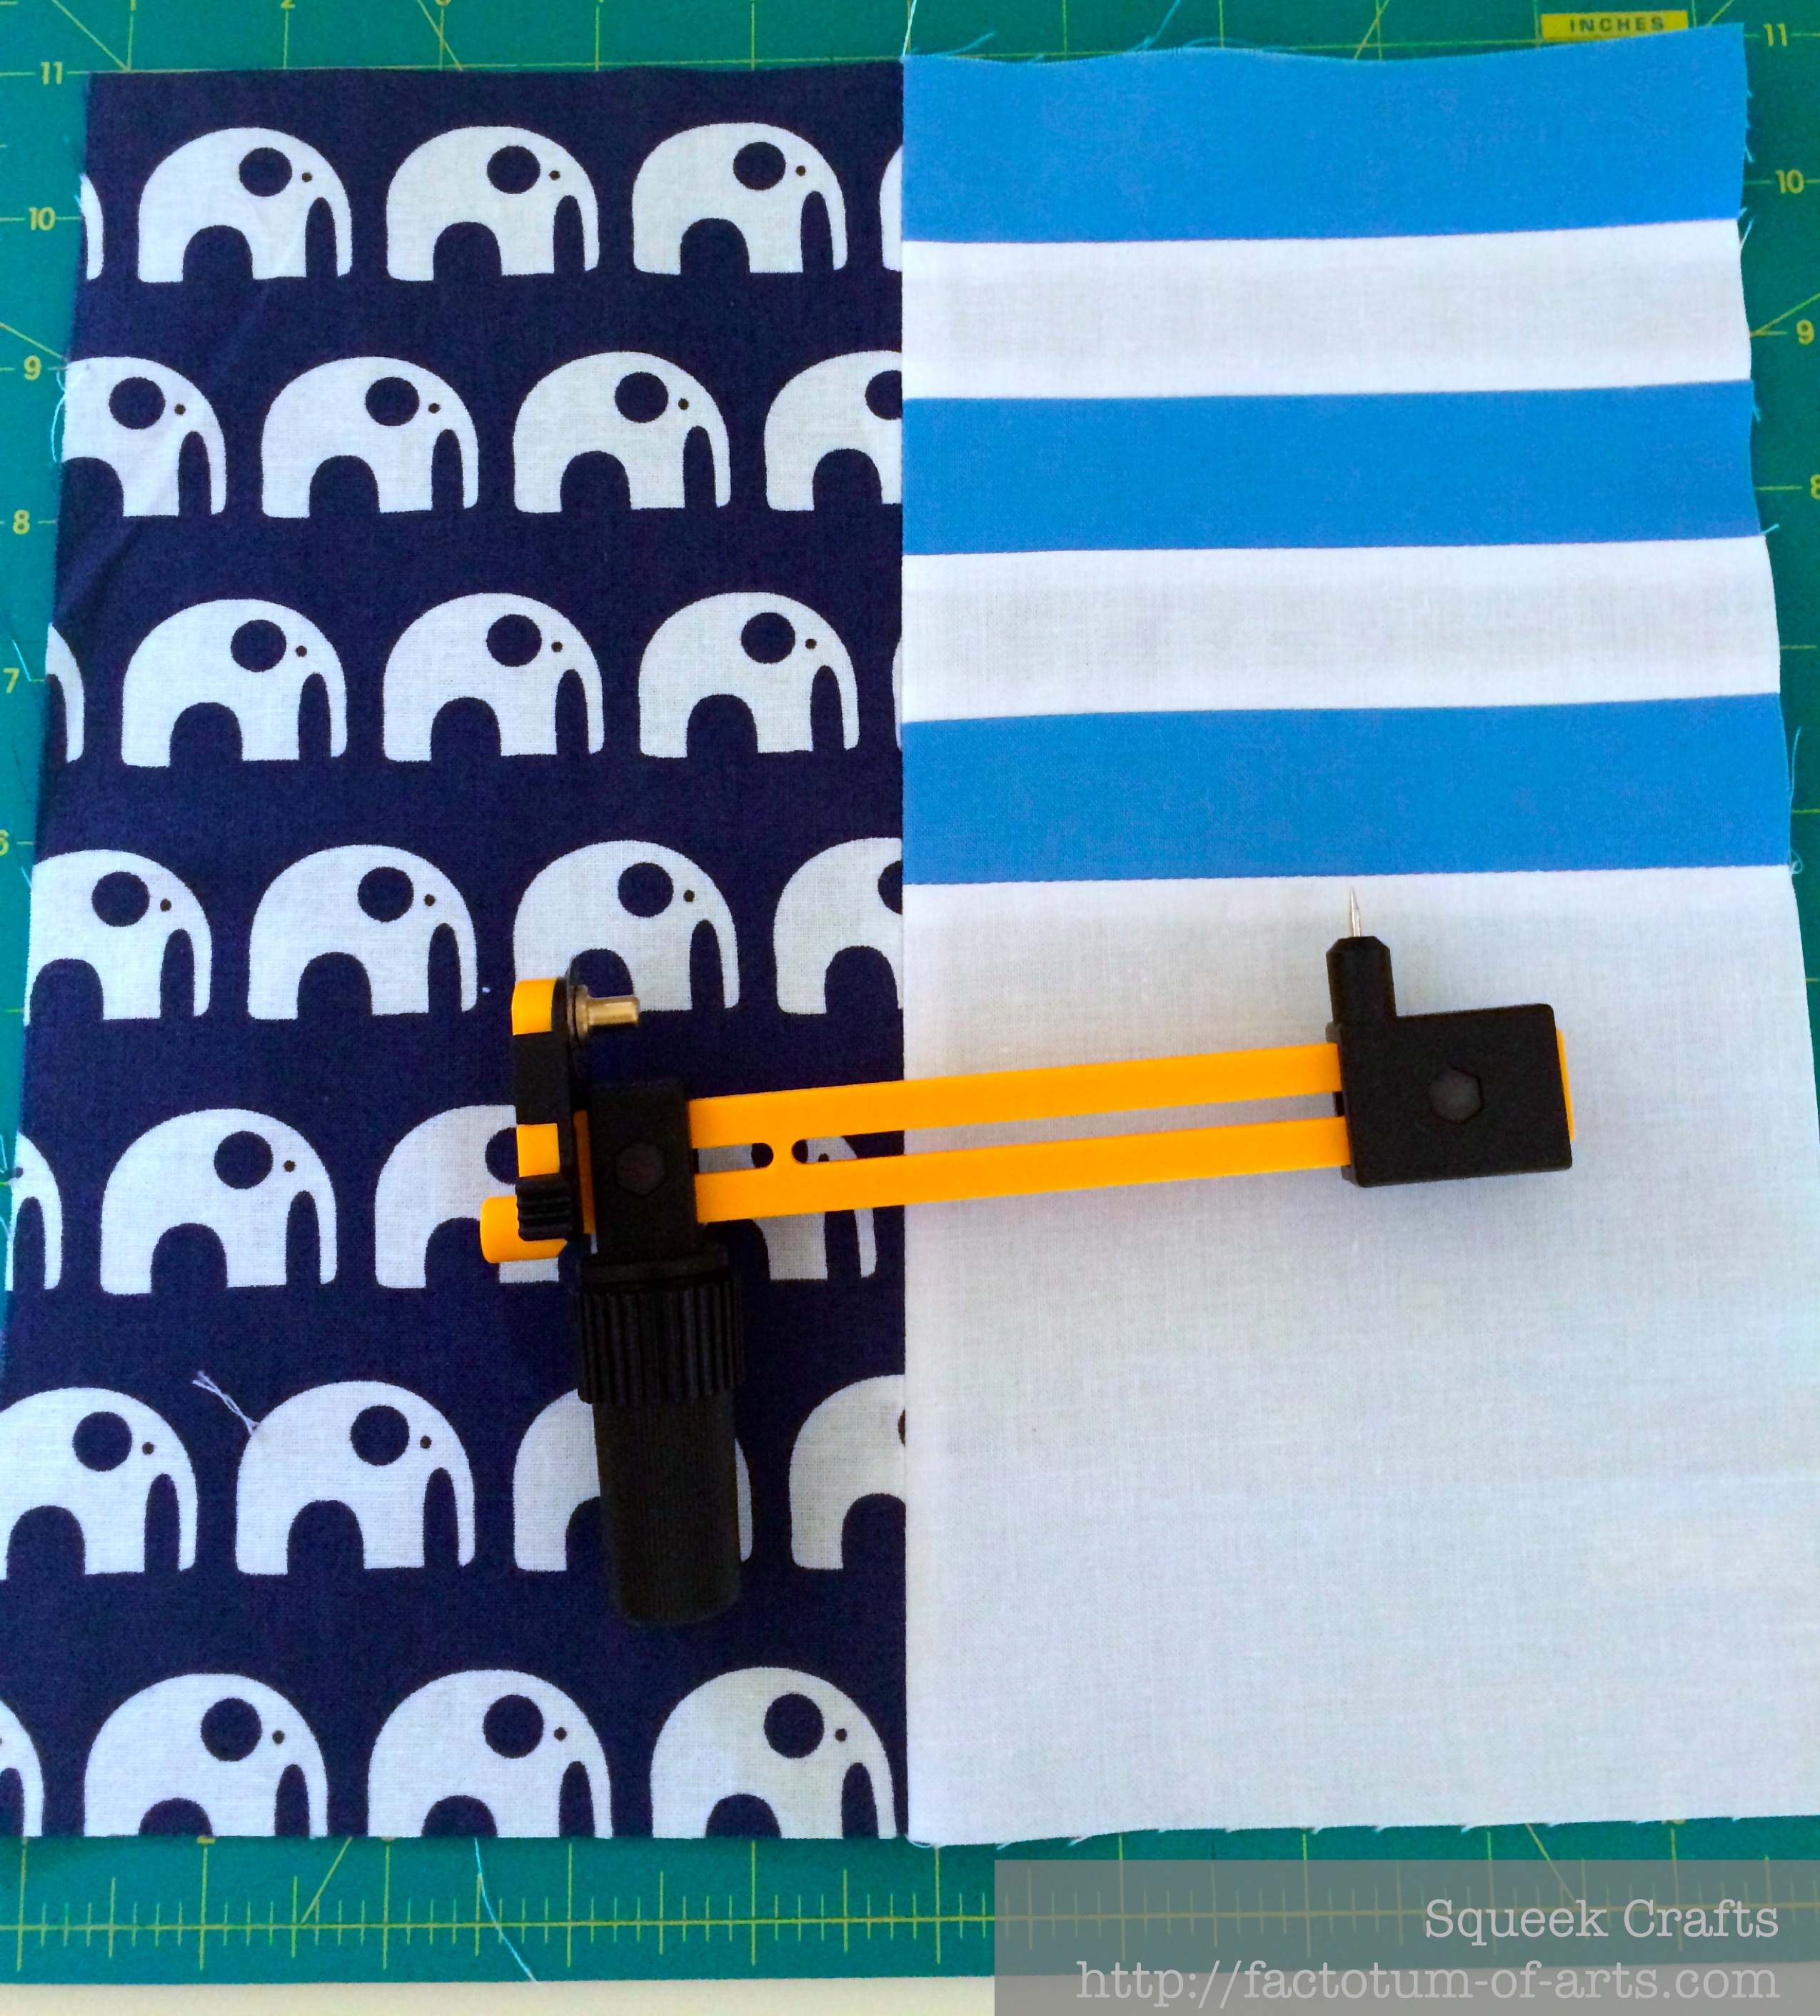
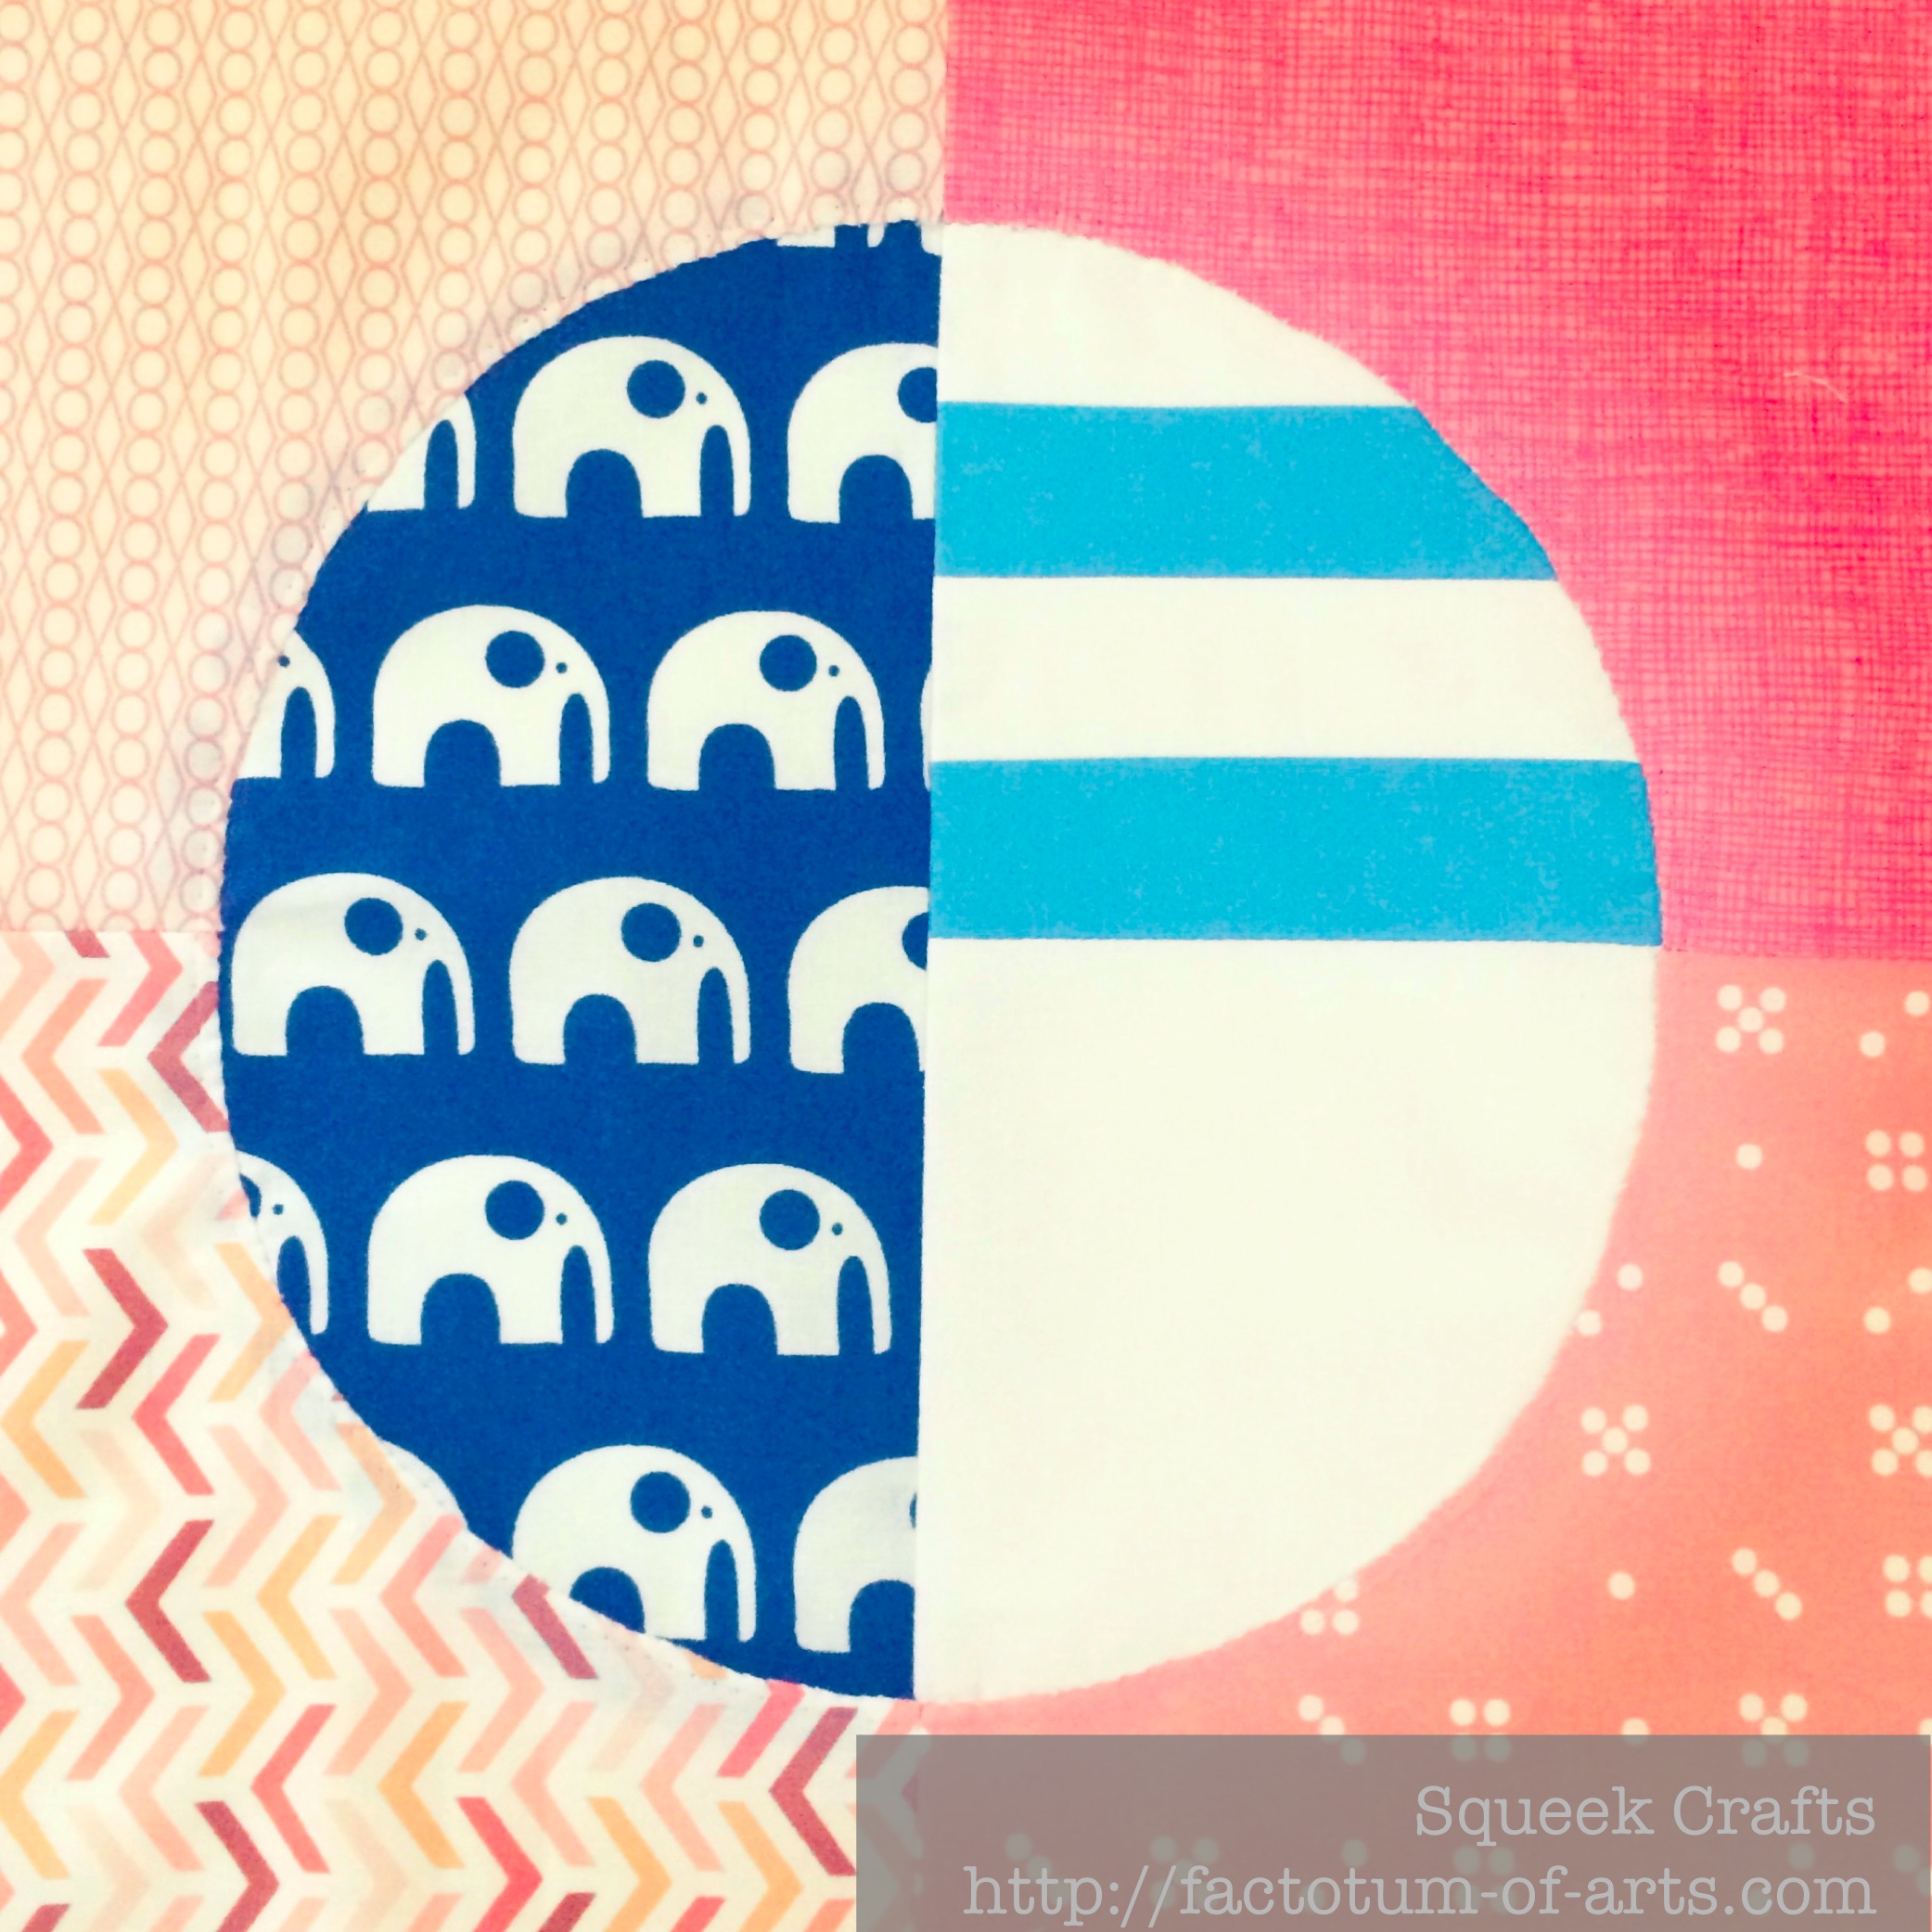
Sew your white and colored strips together for approximately 12″. Cut excess and press seam open. From this strip, cut 2 5.5″ pieces and cut an additional 5.5″ single piece from the colored skinny strip. Sew these 3 pieces together to form a striped 5.5″ square – as in top right square below. Layout your pieces, the 5.5″ striped square, 5.5″ white square and 5.5″ x 10.5″ printed fabric.
- Sew the striped square to the white square (as seen on the right) and press seam open. Then sew the this rectangle to the 5.5 x 10.5″ printed fabric to form a 10.5″ square as shown below.

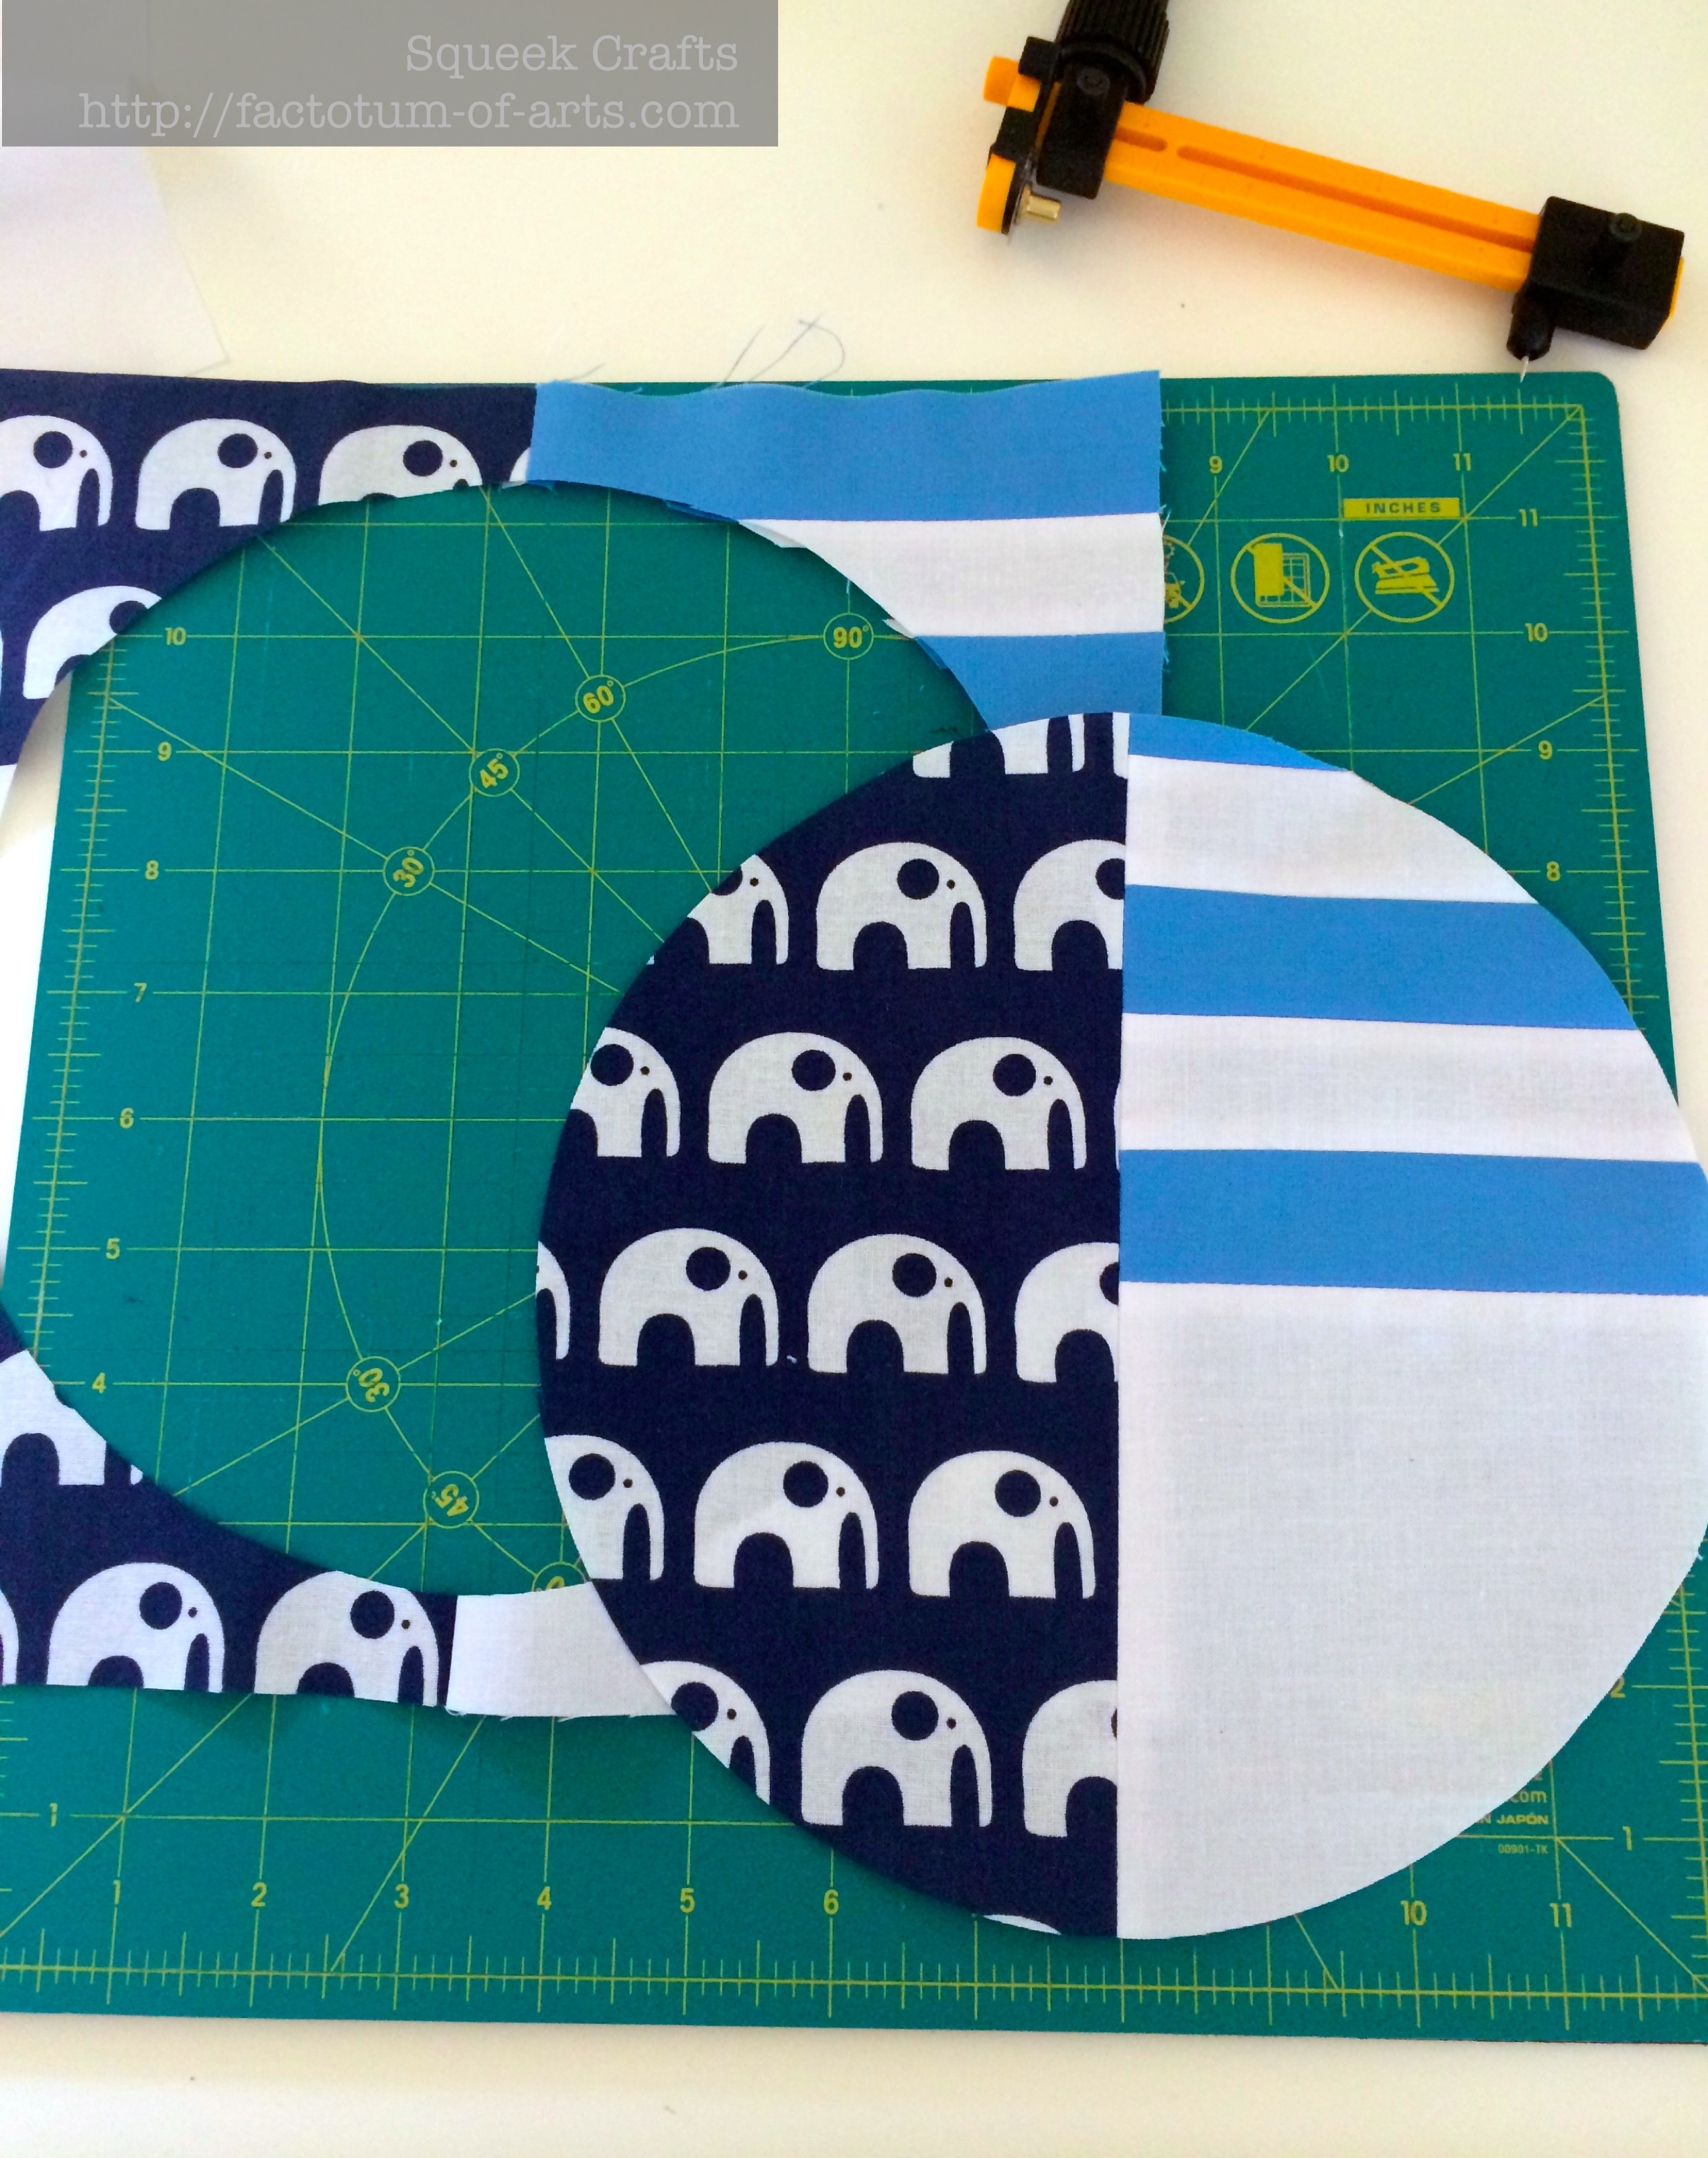
- Use a circle rotary cutter (I use Olfa Circle Rotary cutter which is available online and in stores) to cut a 8.5″ circle using the intersecting point in the center as the middle.

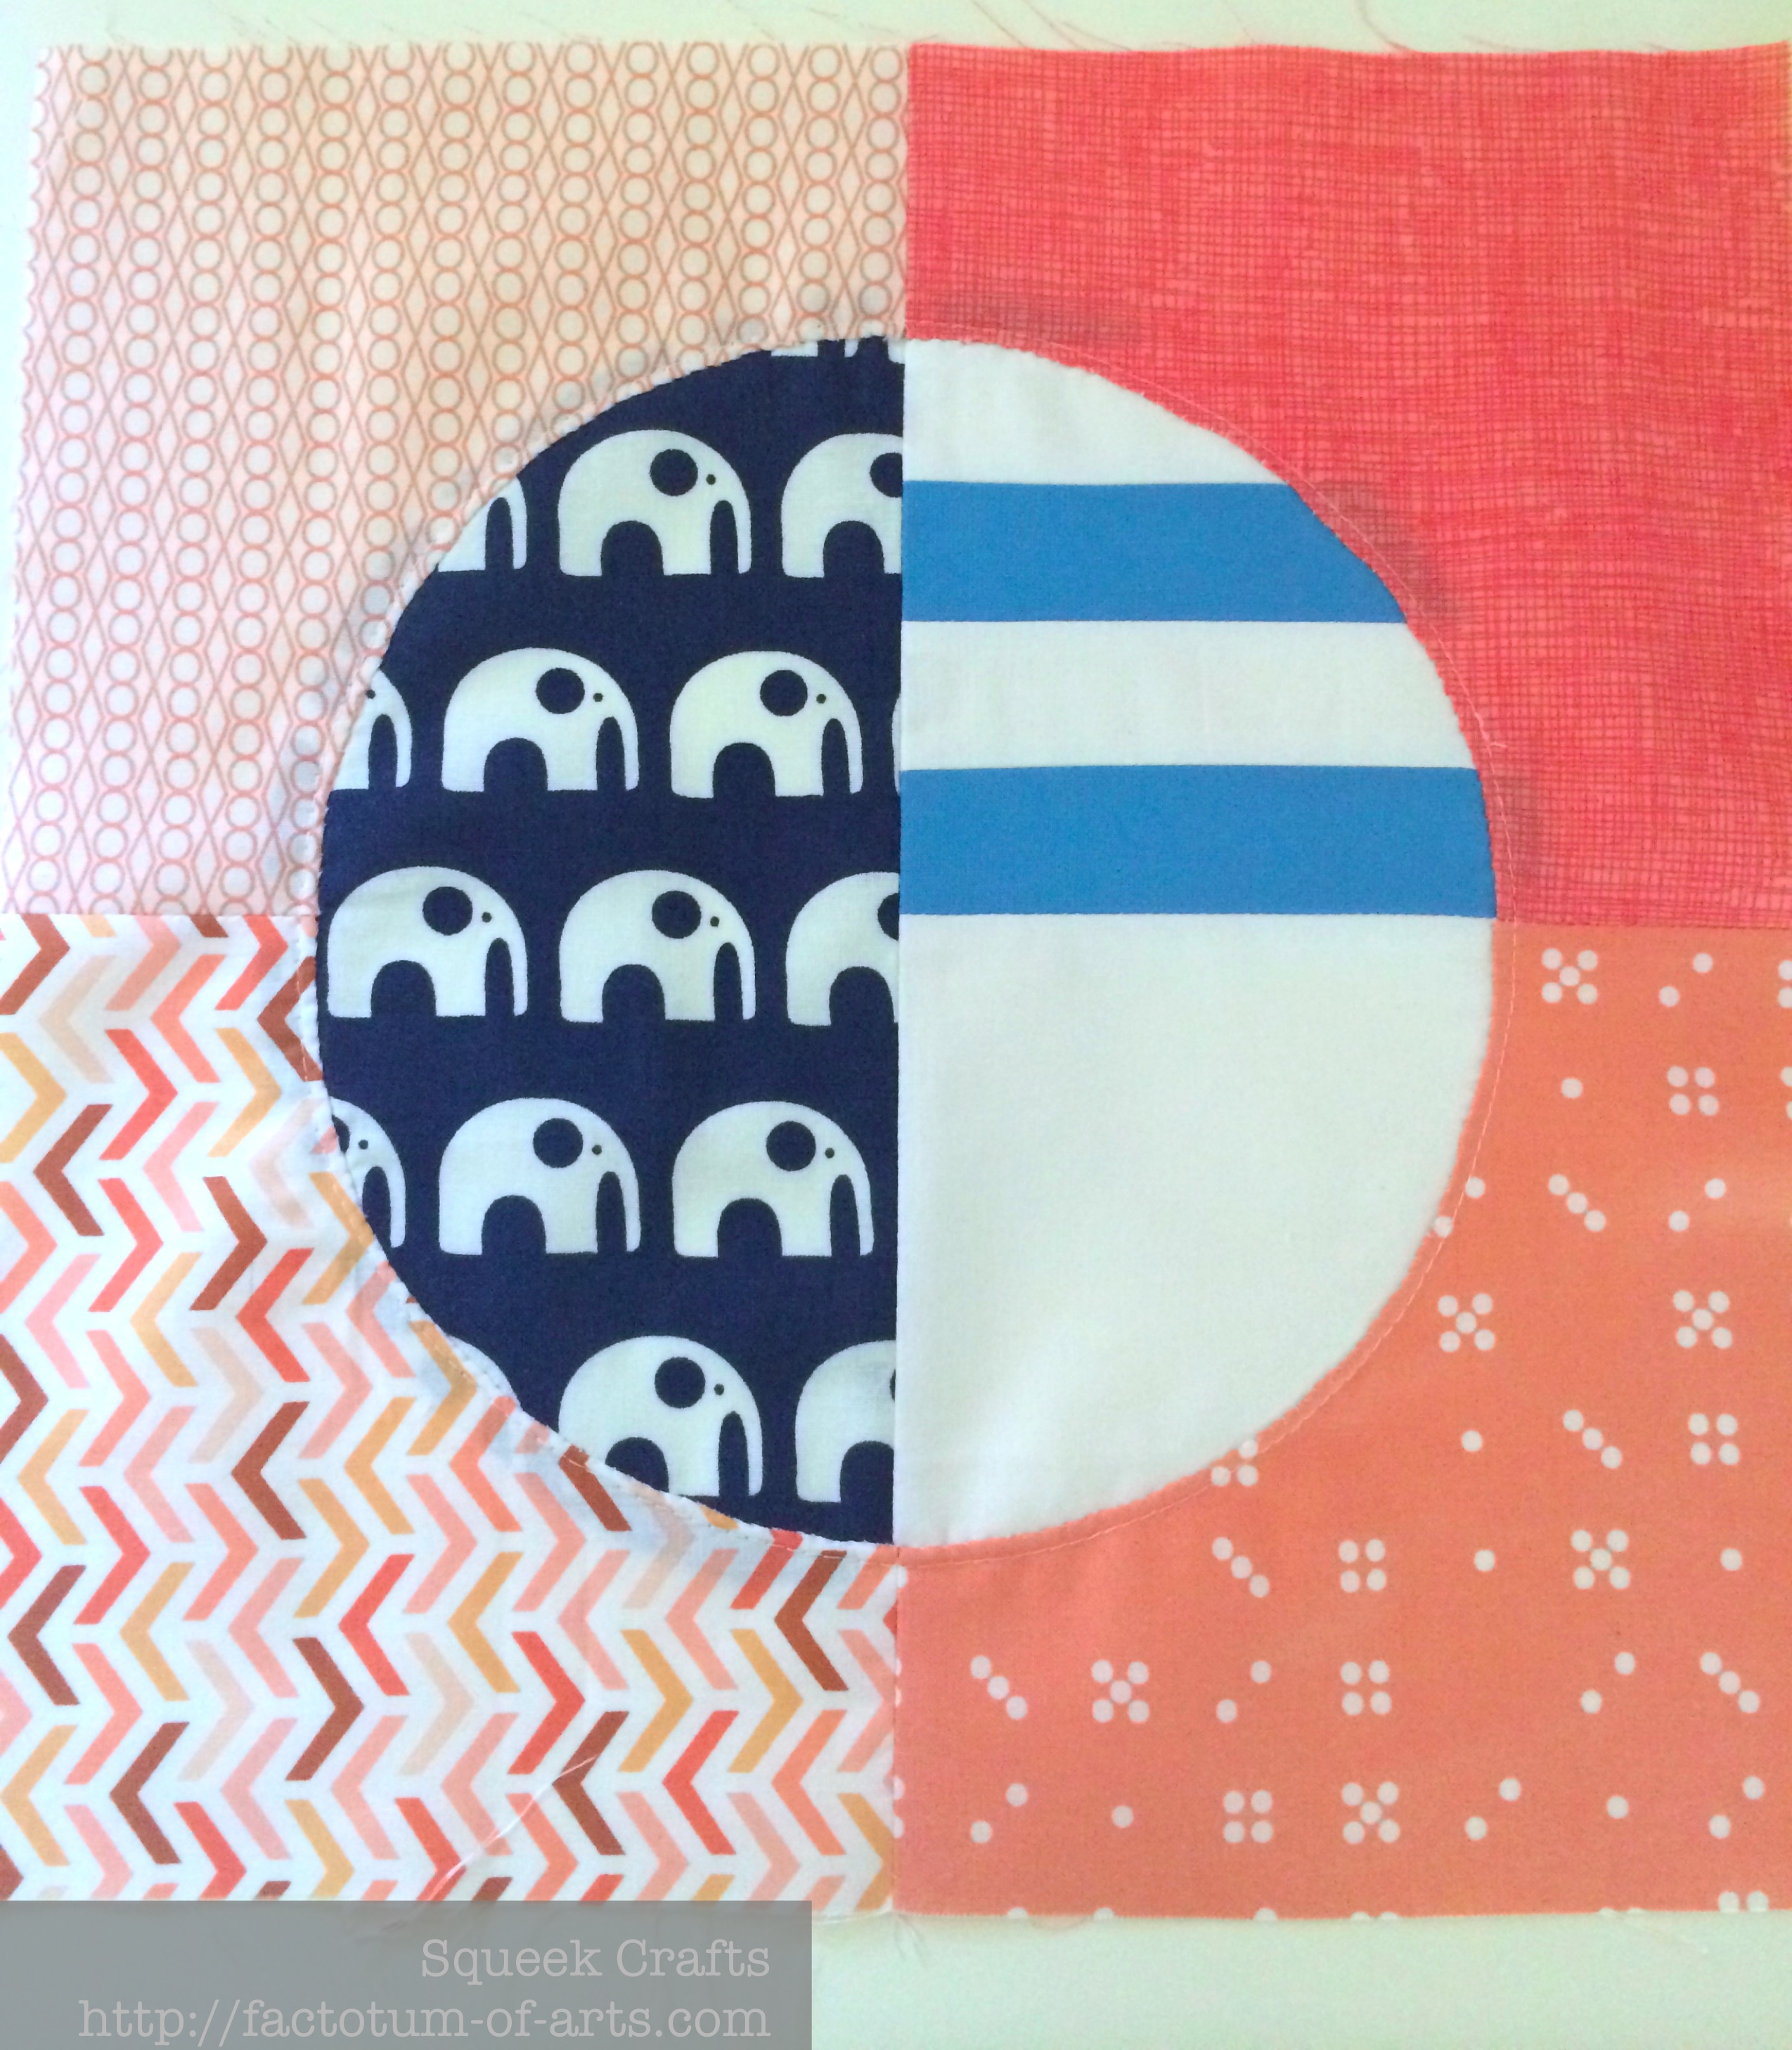
- Now for the background of the block.Layout the four square prints. Think about where the white fabric will be placed as you want the darker colors to be where the white is present in the circle you just cut. In my block that is on the right. This provides the best contrast.

- Sew each side together (i.e left side/right side). Press seams open. Then sew each of these two pieces together to form a 12.5″ square.

- Using the circle rotary cutter cut a circle that is 7.5″ circle.

- Overlay the background square on the inner circle. Match up the intersecting lines (there are 3 of them in this block). Pin them in place, add more pins if desired to hold fabric in place.

- Sew a basting stitch at 1/4″ from the edge of the circle of the background fabric.
TIPS: I use my 1/4″ foot and use the inside edge as a guide. My stitch length is set at 3 on my Janome. I sew at the slowest speed setting, on my machine, so I can turn the fabric.
IMPORTANT: Make sure you stop and lift and realign frequently for best results.
- At this stage, it is time to use a technique called Needle turn appliqué. The fabrics are in reverse, where the background is on top of the main fabric (inner circle in this case); normally the background is what you would be appliqué for pieces onto.
- Start at one of the seams of the background square.
- First off, select a matching thread to the background fabric….For this block use coral or off white thread.
- Knot your thread.
- Use your needle to fold the top under, towards the basting stitch. You are folding under here about 1/8″.
- From the bottom (so knot is on the bottom), push needle through all layers and do a little hold stitch .
- Now, sweep the edge under another 1/2 – 1 inch or so towards the basting stitch (again 1/8inch). Use your fingers to press and smooth out the line. Use an appliqué stitch to sew along the folded each.
- Continue along about 1/2 -1 inch at a time.
- Make sure you make a little hold stitch at the end and beginning of each fabric piece
Here is what it will look like:

- Continue until the whole circle has been appliquéd.

Here is a close-up of the finished appliquéd parts.
- Remove the basting stitch and you are all done. Square up your finished block – unfinished size for this test block is 12.5″ .


The needle turn appliqué technique was shown to me by Carolyn Friedlander. I loved it, by the way this was my first time trying it. I actually took the project outside and relaxed while doing the hand sewing as it was portable. It meant, I did not have to be inside by my machine. So if you need something while the kids are playing sports/swimming, or need a travel project these would be great (once basted).
There are several versions of this technique, one version is shown in the Craftsy class by Sarah Fielke “Big Techniques from Small Scraps”. The reason to reference this class, is that this will show you the needle turn appliqué basics and appliqué/hold stitch basics. Differences to the above tutorial include; the focus on sewing the pieces to the background, glue basting instead of stitch basting and uses a 1/4 inch seam folds.
If you do not want to do this via needle turn appliqué, you could use a inset circle technique (uses the sewing machine instead of hand sewing). The Craftsy class by Cheryl Arkison “Inset and Appliqué Circles by Machine” is a good class for this technique.
There we go that is my finished test block and tutorial for “Phased Circles”. Let me know if you have any questions. Linking up with Amanda Jean @ crazy mom quilts for Finish it up Friday.

Very neat and accurate applique technique for circles, thank you for sharing that. My next task is going to be finding a circular cutter here…
Thank you for sharing going to get a circular cutter.
Great tutorial Michelle. I love this quilt it is gorgeous. You did a fabulous job on the needle turn applique!
They look good! I like that they were pieced and then cut, it makes sense. The original quilt is beautiful as well.
Pingback: Phased Circles Quilt: Top Complete | Factotum of Arts
Pingback: Celestial Spheres (Part 1): Winter Solstice | Factotum of Arts
great circles – must put the circle cutter on my wish list ! your technique looks a lot like reverse applique !
Pingback: Traveling quilts, progress and lessons learned | Factotum of Arts
Pingback: Sunday Best {a finished top} | Factotum of Arts