Tag Archives: quilting

My kiwi cushion – first paper piecing project

I have wanted to try paper piecing for a while now. The results always look so precise and amazing. There are so many options but I decided I wanted to try this kiwi pattern by Juliet & Tartankiwi, as this was the design that inspired me to give paper piecing a try. It also brings memories of home. This is my work in progress this week….I am linking up with Freshly Pieced.

WIP Wednesday at Freshly Pieced

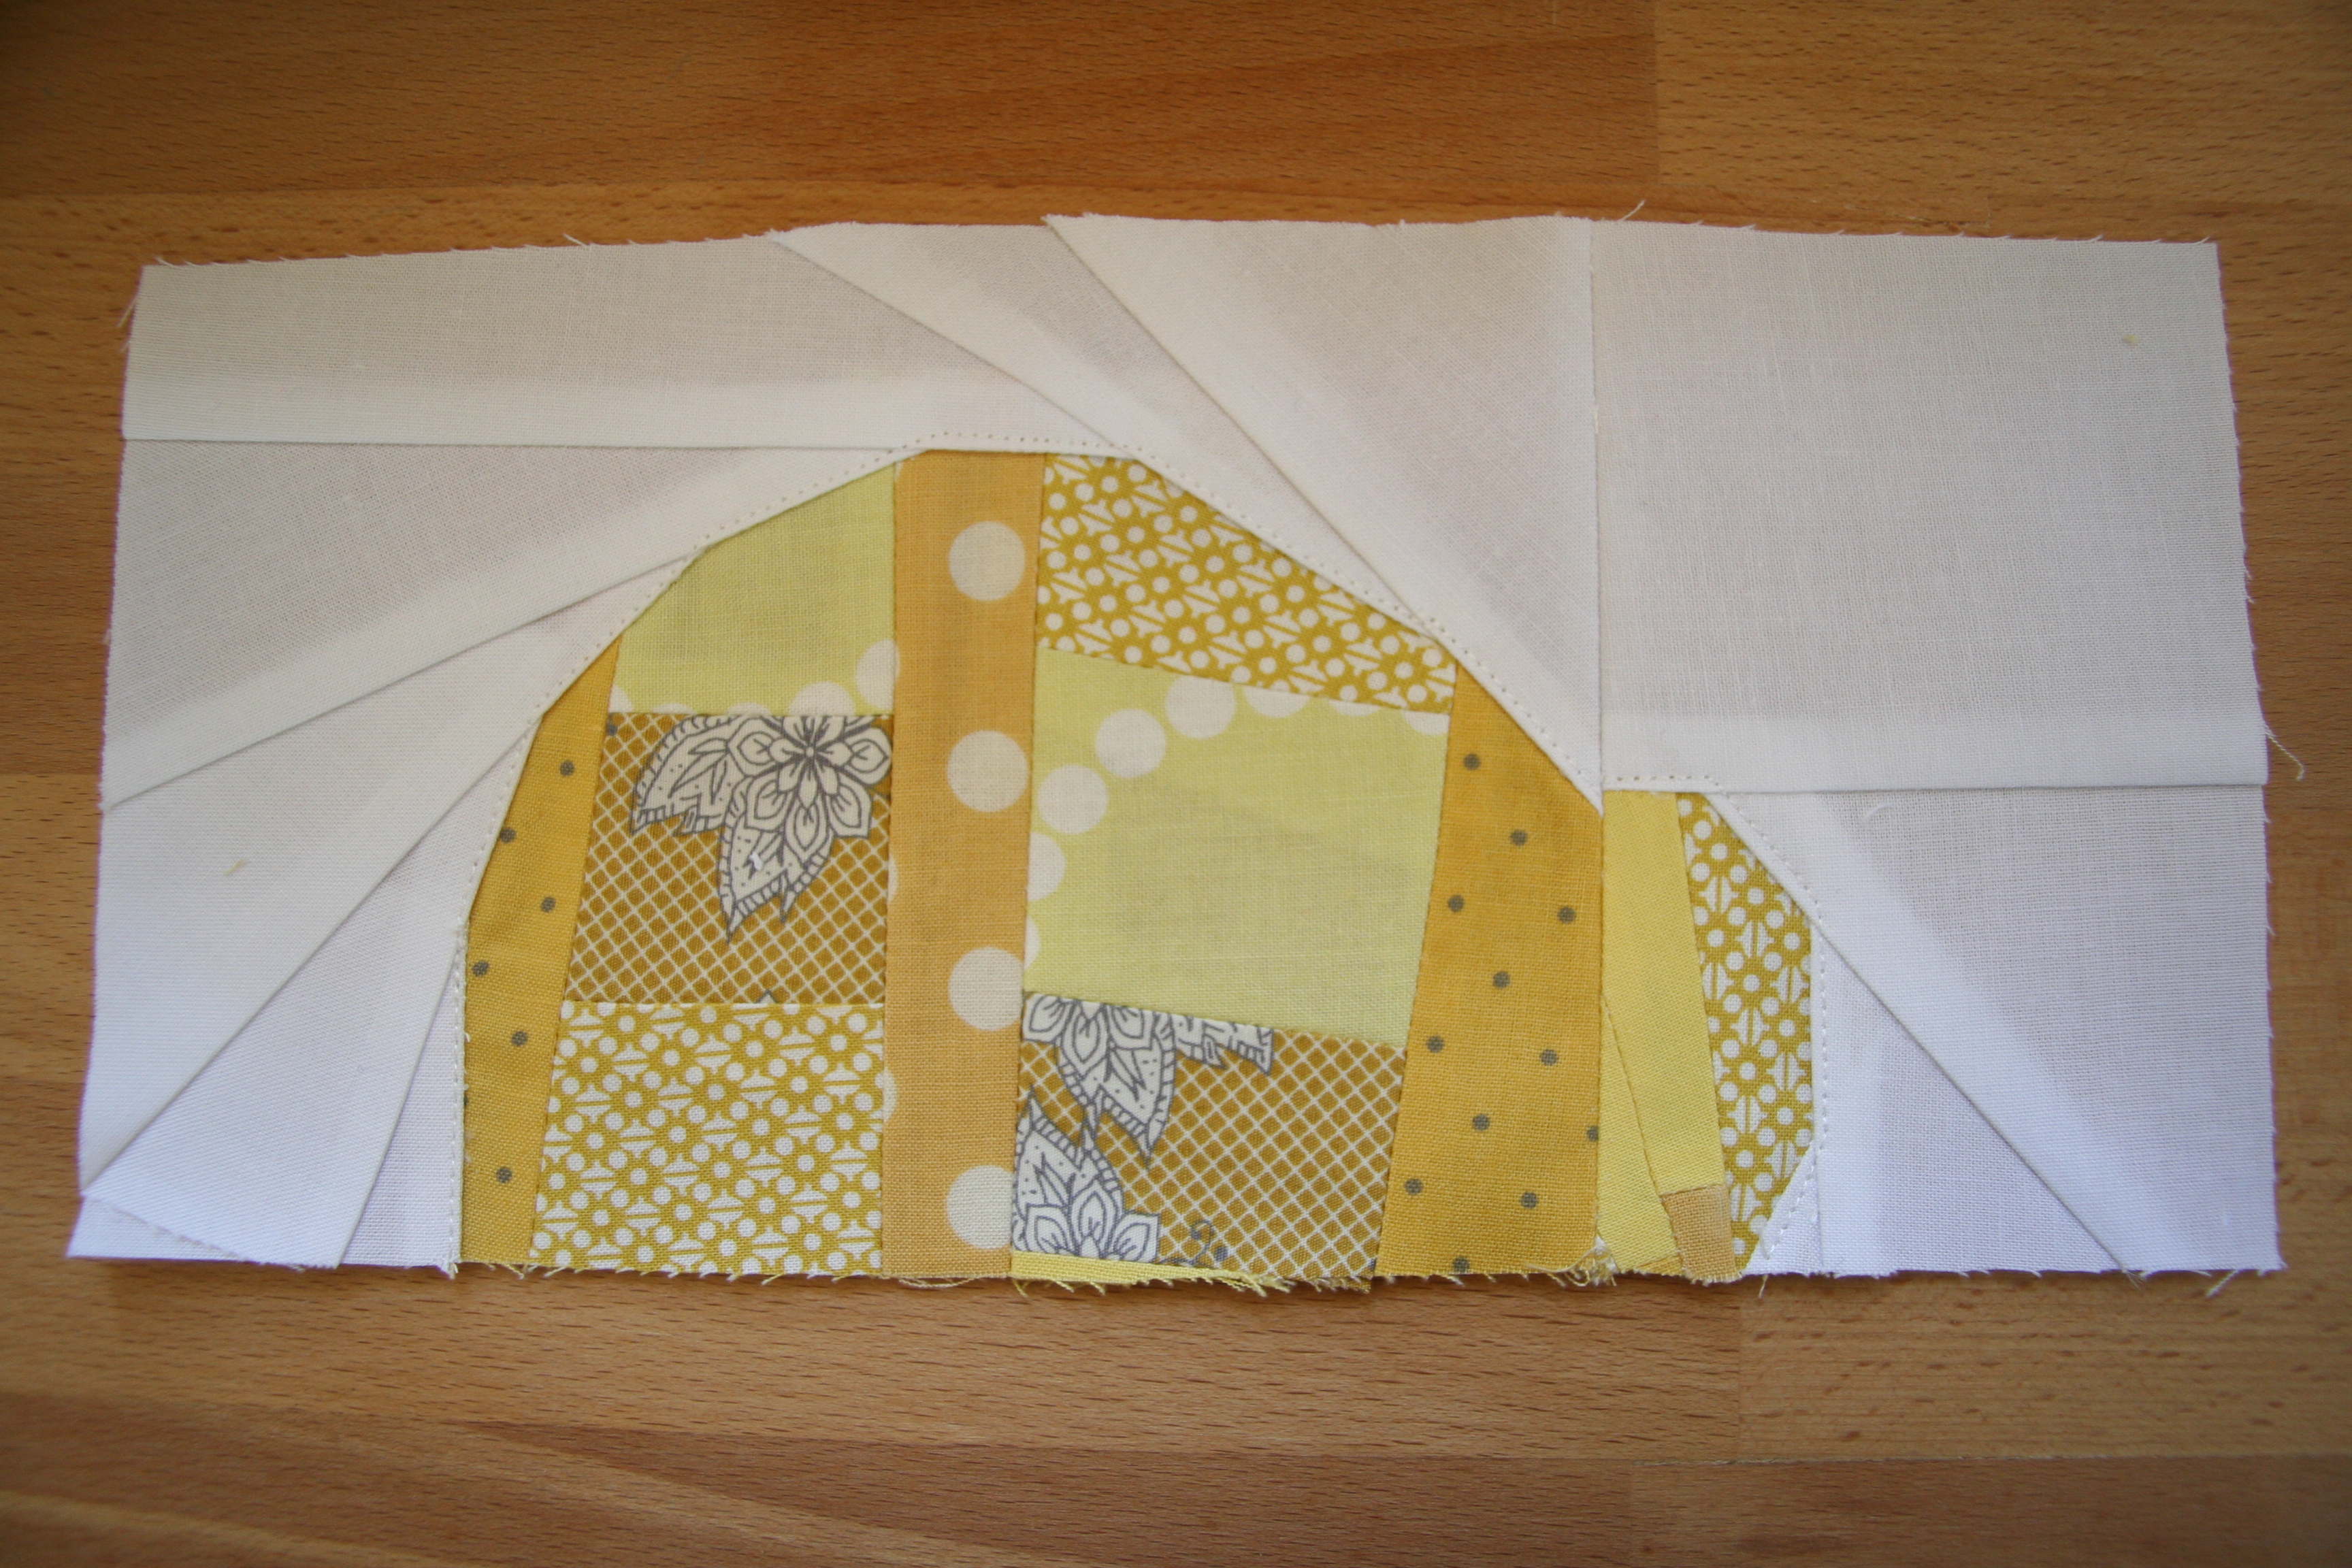
So the plan is to make another cushion for our grey sofa, that co-ordinates with my spoonflower cushion. I am using yellow and grey for my kiwi. I wanted to give a little more dimension to the kiwi itself, so I made patchwork blocks of yellow and grey to use like a piece of fabric. Here are the blocks.

This is for the body of the kiwi:
IMG_6944
The grey will be for the legs and beak:IMG_6949

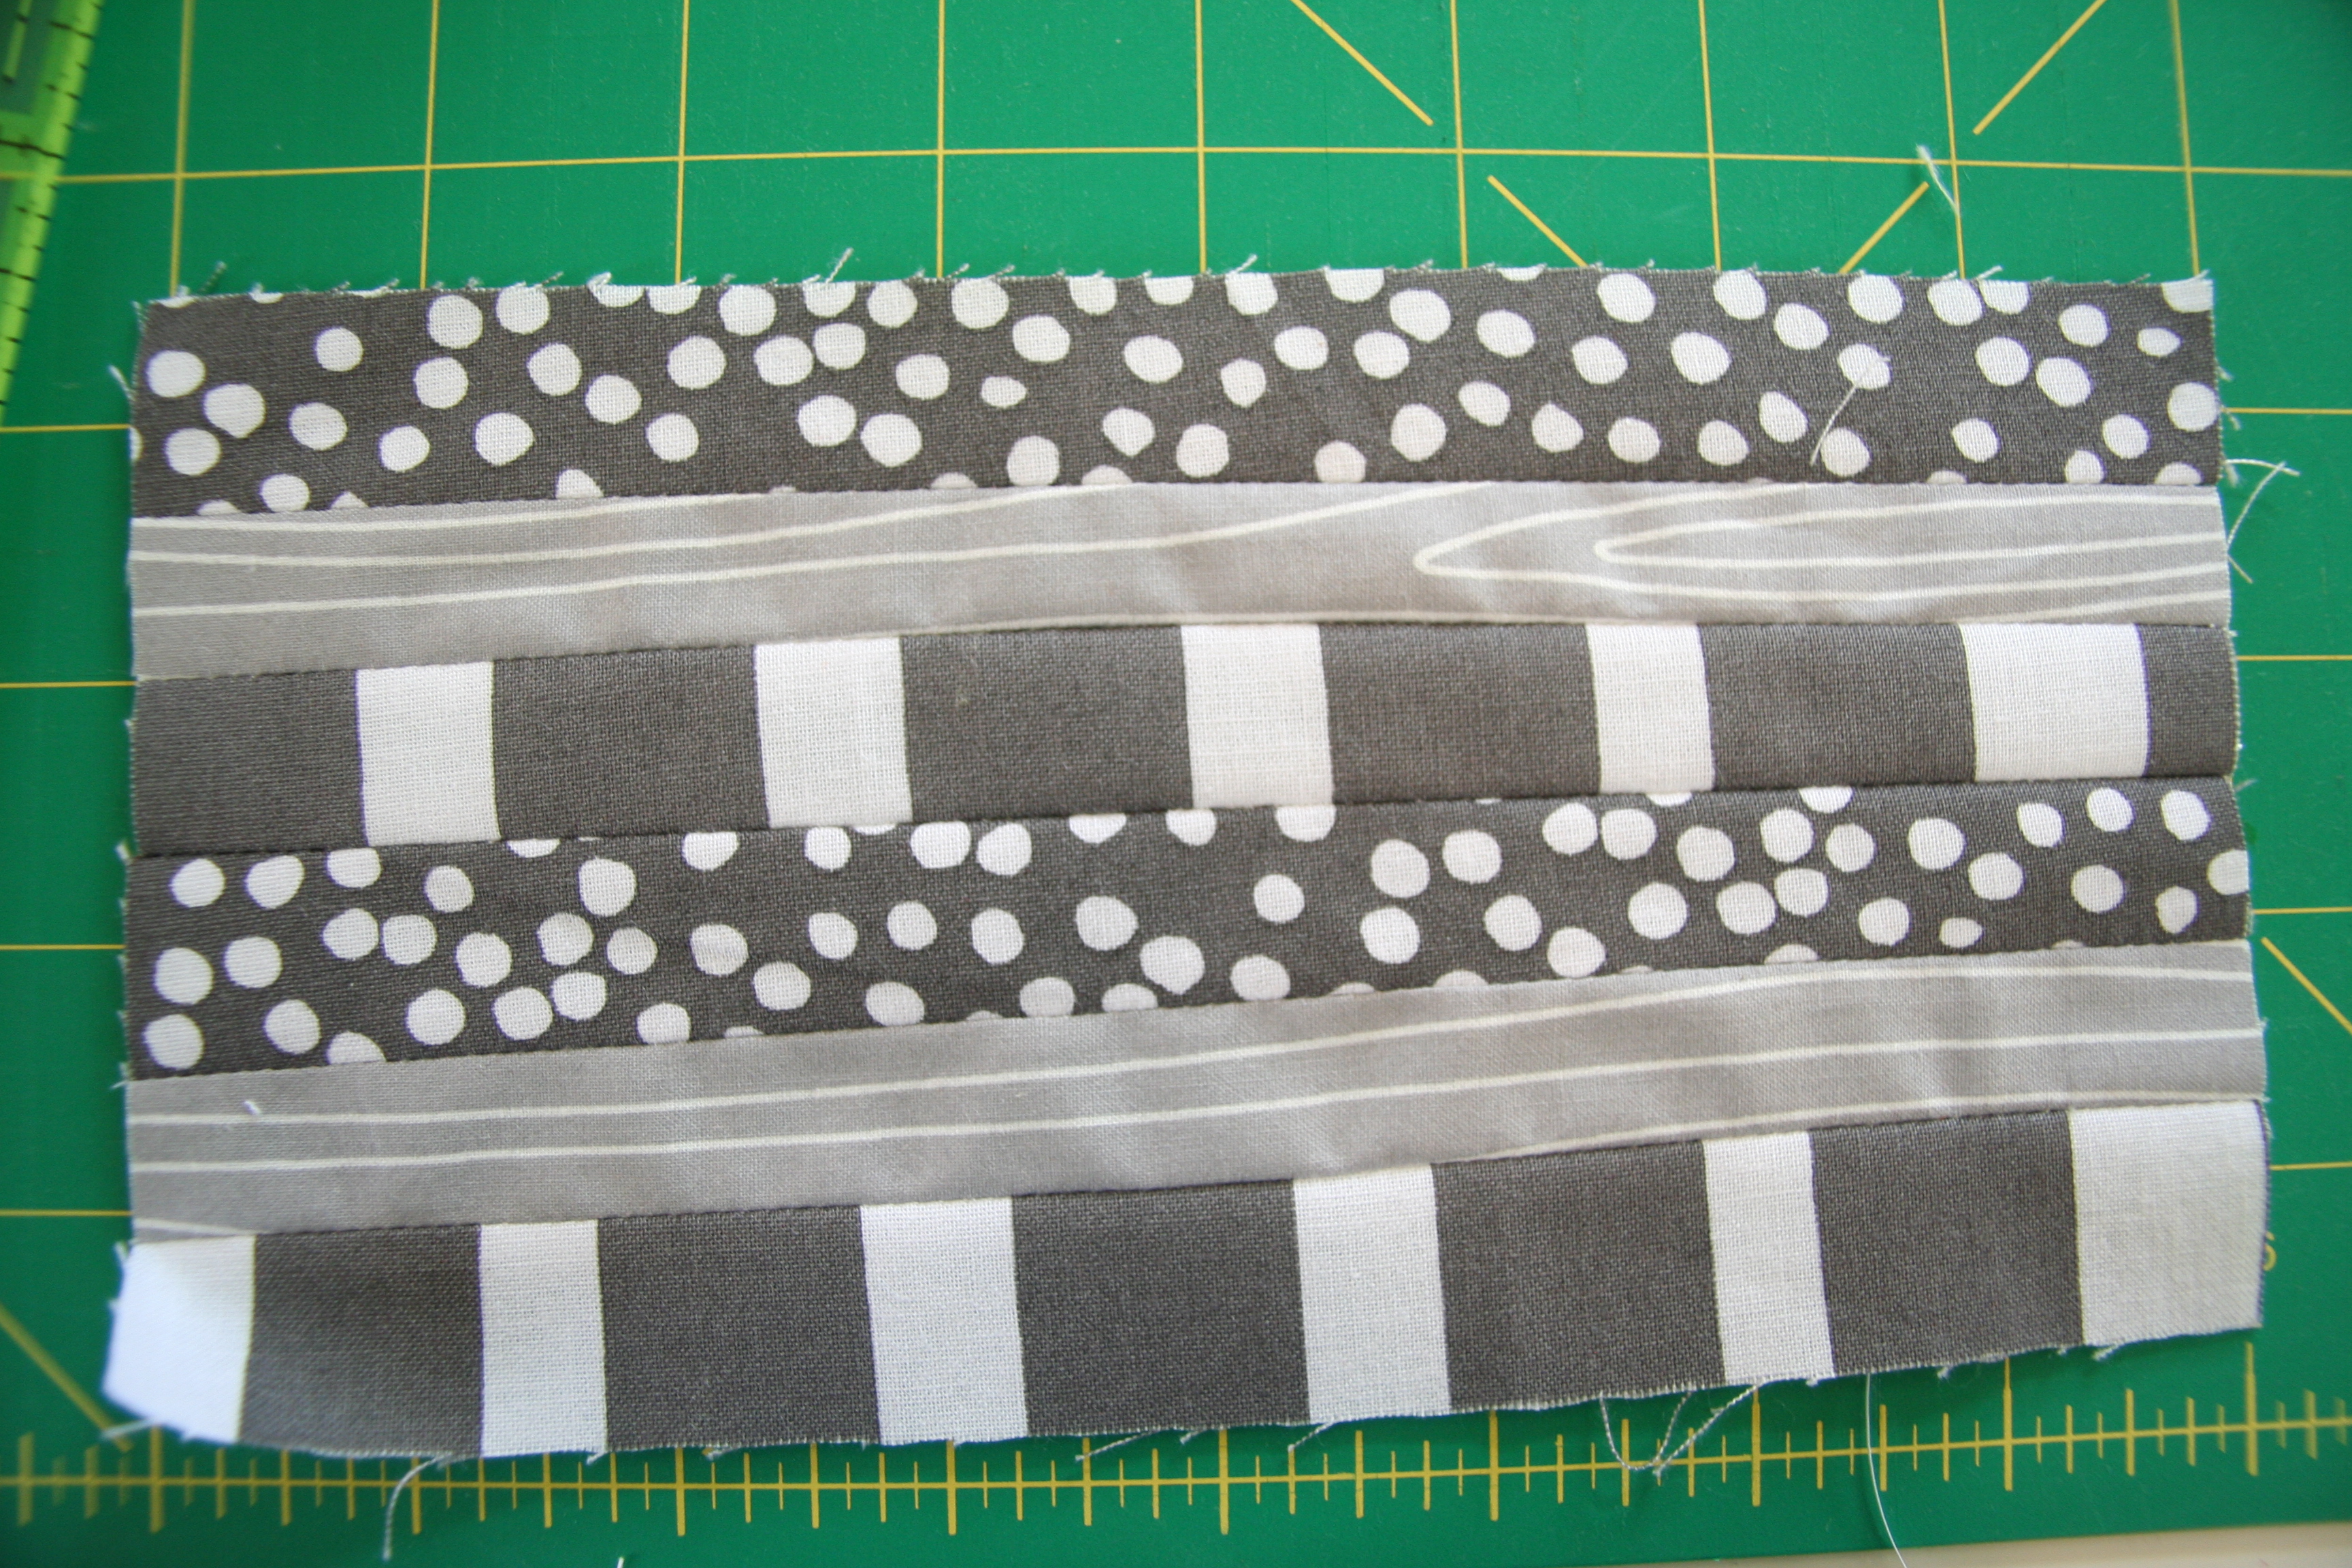
I am 1/2 way through the block and I love paper-piecing. The pattern for a beginner has been relatively easy so far and I think it is turning out well. I am hoping to finish the cushion cover up by Friday.

IMG_6947 IMG_6948

Small weekend finishes

I managed to get a couple of small projects done this weekend in preparation for our modern quilt guild monthly meeting – nothing like having an incentive :-).  I showed my “four seasons in one day” quilt for the first time at our meeting.  It was funny how nervous I was, showing my quilt and other projects. I present on a daily basis and usually have no qualms…..but not this time – it was like the first time you ever present to a “large” audience. I got great feedback for my quilt though, its nice getting that validation.

The small projects I was able to complete include:

  • The second pot holder for our kitchen. This has been a fun project trying out different techniques and using new materials, for example, quilt as you go technique and using the insul-bright material.
  • A name tag for quilt guild meeting. This was the first time I have used hexagons which I can see can be addictive. I was able to sit down in front of the tv and hand-sew this together in an hour or so. I used leftovers scraps for the front and backed the name tag with felt, using fusible web for the adhesive (first time using fusible web as well), and then quilted on my sewing machine. For the name part, I followed the same process I use for my homemade labels. I thought it turned out cute 🙂
    IMG_6942 IMG_6940
  • I fixed my son’s monster I had made, some stitching had come loose and needed a quick fix (it only took me 4-6 weeks to get around to doing it)
  • Finally, quilted the first straight line for the “four seasons in one day quilt”.

I am hoping to start a couple of my other March goals this week – I think I am going to try the kiwi paper piecing from Tartankiwi and also cut the fabric for the triple zipper pouch.

First Madrona road block for mini quilt

Our quilt guild Madrona Road Challenge started last month and ends in May. I had seen so many wonderful Madrona Road finishes I really did not know what I could do that is original, until I received my March issue of Dwell Magazine (a modern architecture and design magazine), this month’s focus is on Interior Design. In the article, Industrial Designer,  it shows how a 200 year old factory was transformed into an modern style and inviting home (pages 86-93). It is truly magnificent.

What captured my imagination were the tiles that was used in this transformation. There are two designs I want to use as quilts, but the one I am hoping to put into a 9 block mini quilt are these floor tiles:

Page 90
Here they are again in the top two photos for the shower and bathroom, I am using the shower photo as my reference for my mini quilt :Page 92

The first block is finished, which I am calling “Checkers Board Block”  – this is my finish for the week (linking up with Amanda from Crazy Mom Quilts).
Checkers Board Block

I am excited about this project as I have not made a mini quilt before and I am trying some new techniques out along the way :-). This weeks technique, that was different than what I normally do, was how I pressed the blocks to get them to line up and fit well together – I pressed the strip seams in opposite directions to each other. I liked how it turned out.

If all the other blocks turn out, I will make an effort to create patterns and post them, in case someone is interested.