As promised here is the Tutorial to make a iPhone/iPad (or other electronic device) stand I posted last week.

Materials:
- Fabric 12″ x 9″
- Cotton
- 2-3 cups of rice
- Pellon Ultra Firm 1 1/4″ x 5 3/4″
- Polyester Fill
- Start with a piece of fabric that is 12″ x 9″. Fold in 1/2 and press (6″ x 9″ size once folded)

- Sew a 1/4 inch seam at the top, with a 1 – 1 1/2 ” gap, and the side of the folded fabric (refer to black lines).

- Fold the fabric so that the side seam is now in the middle at the back. The top will form triangles. I press the seam open for a flat appearance later.Sew along the bottom to form a 1/4 inch seam leaving a 1 – 11/2 inch gap (refer to black lines).

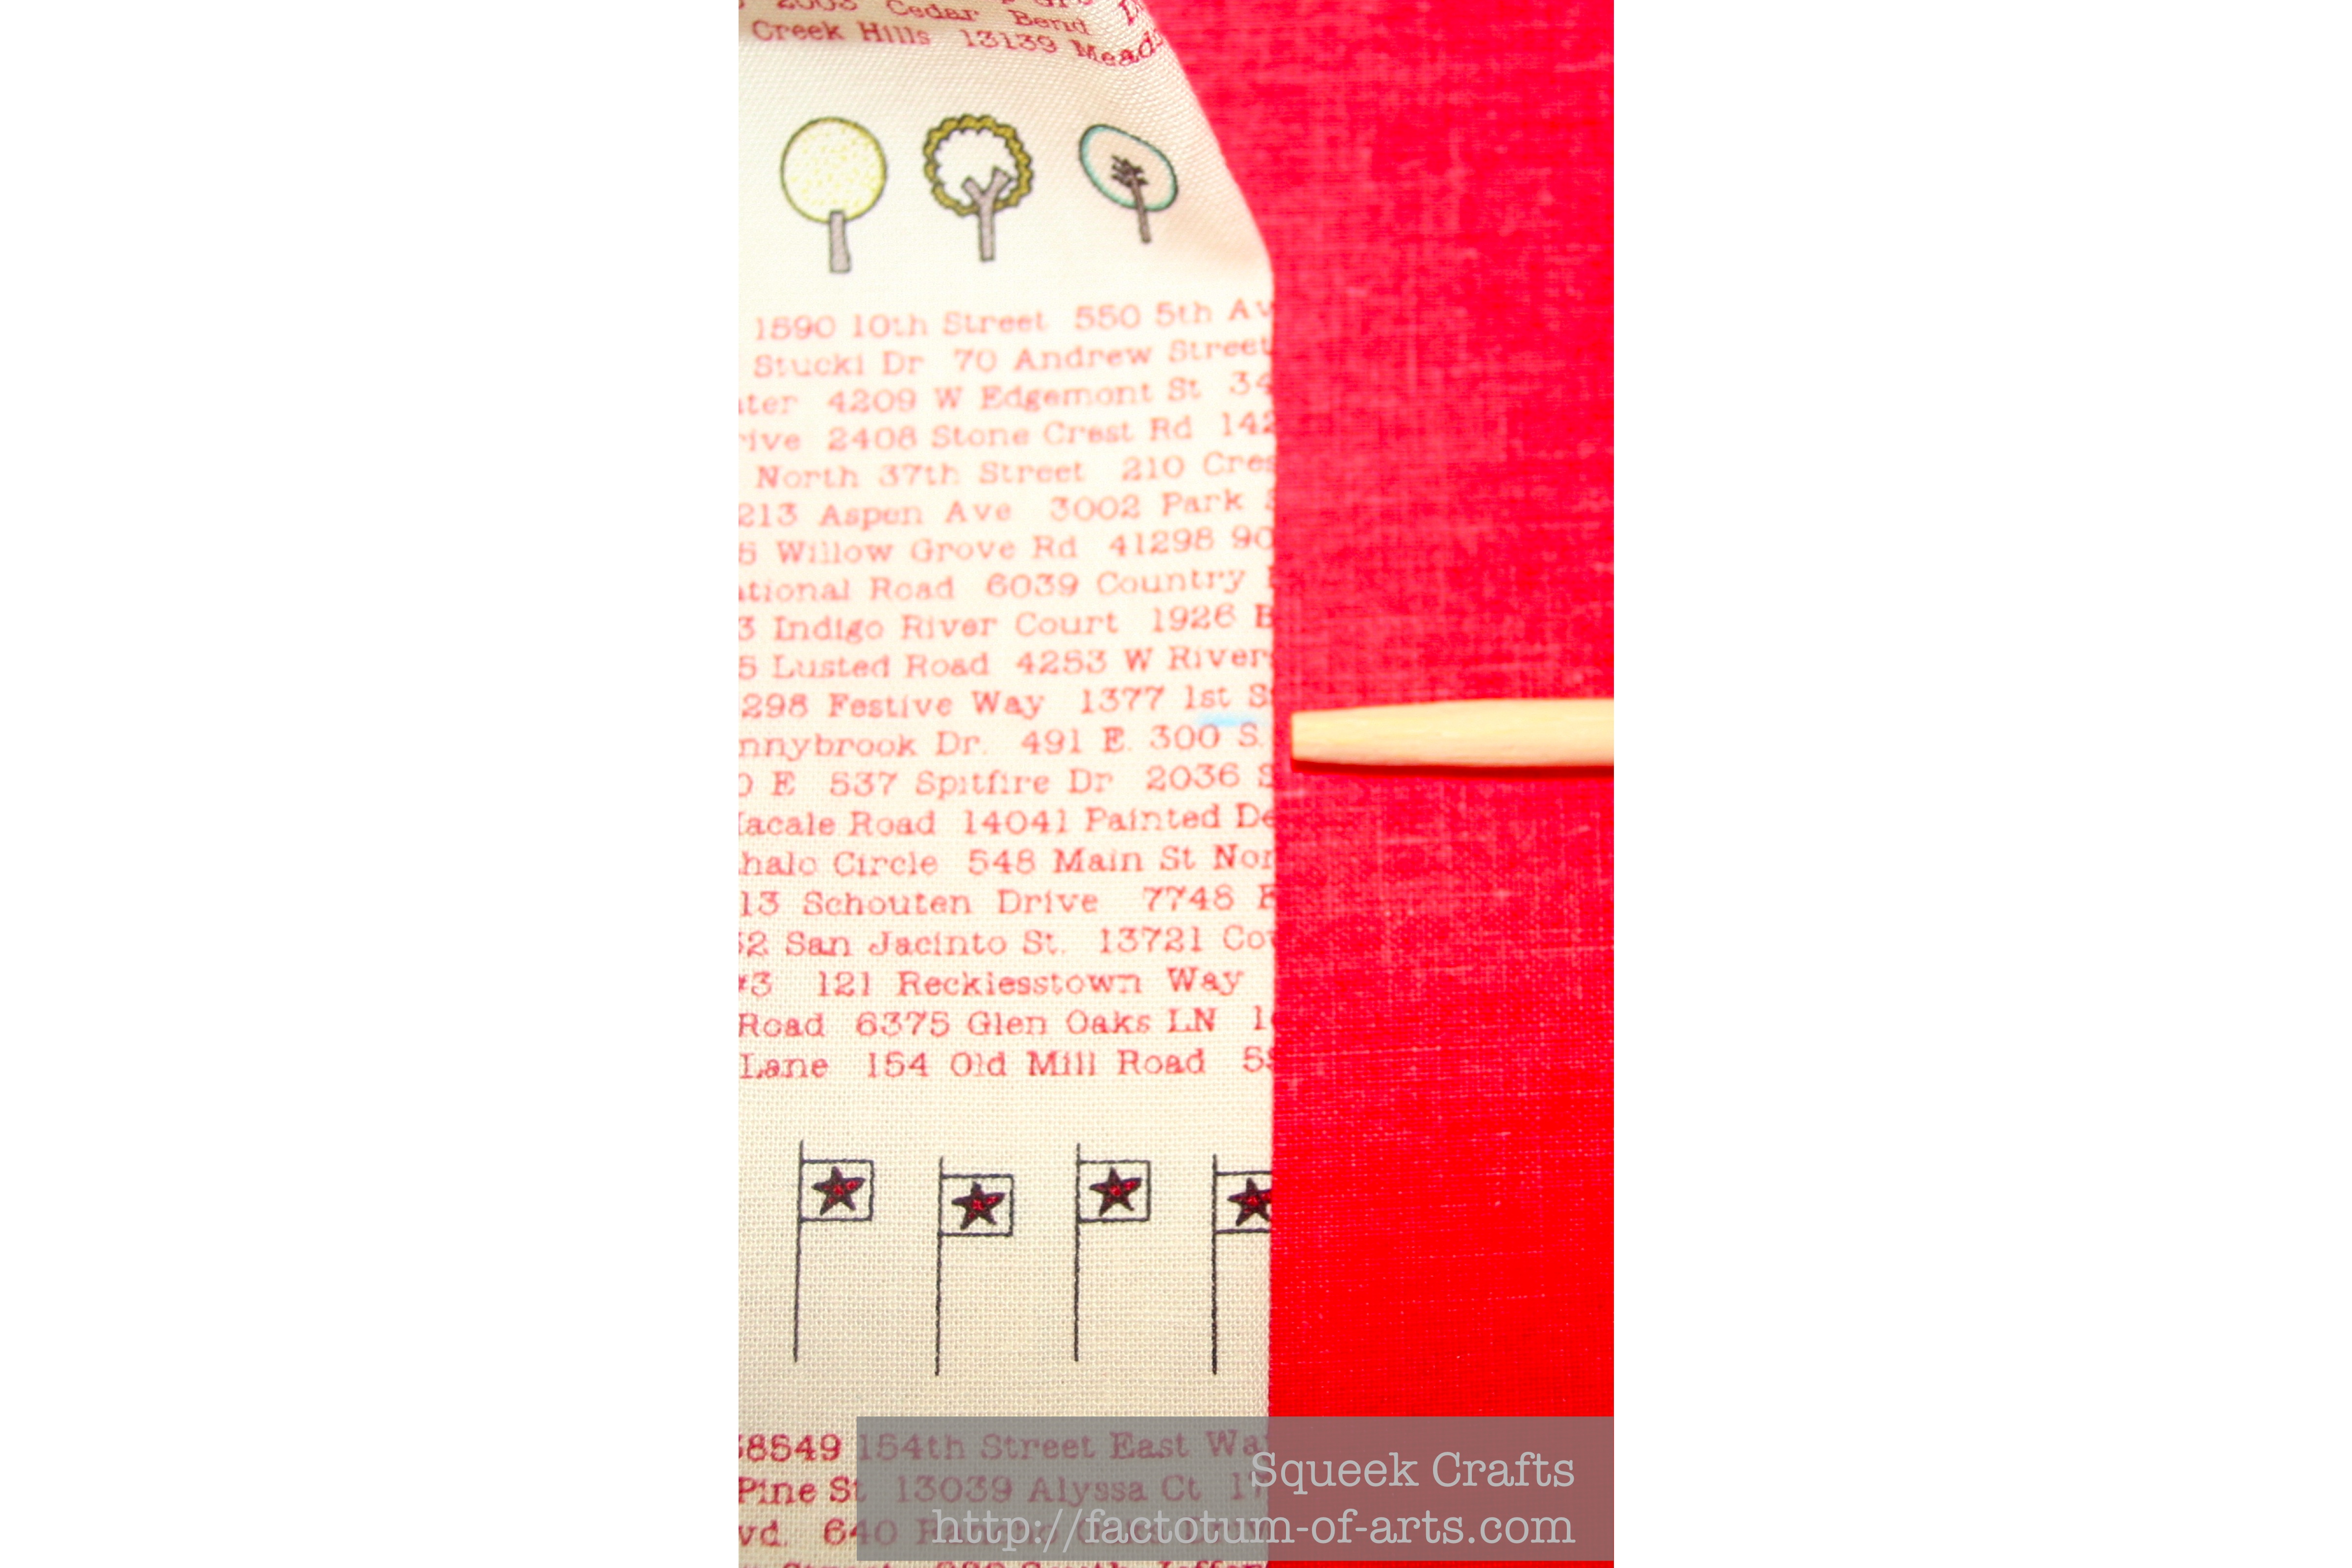
- Through one of the holes, feed the fabric through to invert fabric to show right side. Use a chop stick (or other device to ensure the corners are turned completely.
- Measure 3 inches from the bottom seam. Mark with chalk on each side (refer to where the chop stick is pointing). This will be the mark you will use to place the Pellon Ultra Firm Strip.

- Feed the Pellon Ultra Firm through the whole at the bottom.

- Move The Ultra Firm Strip into position with the top aligned with the chalk marks. Pin strip. Sew a border around the strip to ensure it remains in place (refer to black lines).

- Through the hole at the bottom, stuff with polyester filling until fill.

- Hand sew the bottom hole closed. I use a slip stitch to close my openings.

- For the main pillow, fill with rice. I use a Wilson piping bag to aid in adding the rice through the hole. NOTE: The rice will add a nice weight to the stand to make sure it will support the relevant electronic device.

- Fill as far as you can, approx. 3/4, or more, fill. You will have room at the top.

- Fill the rest of the space with the polyester filling.

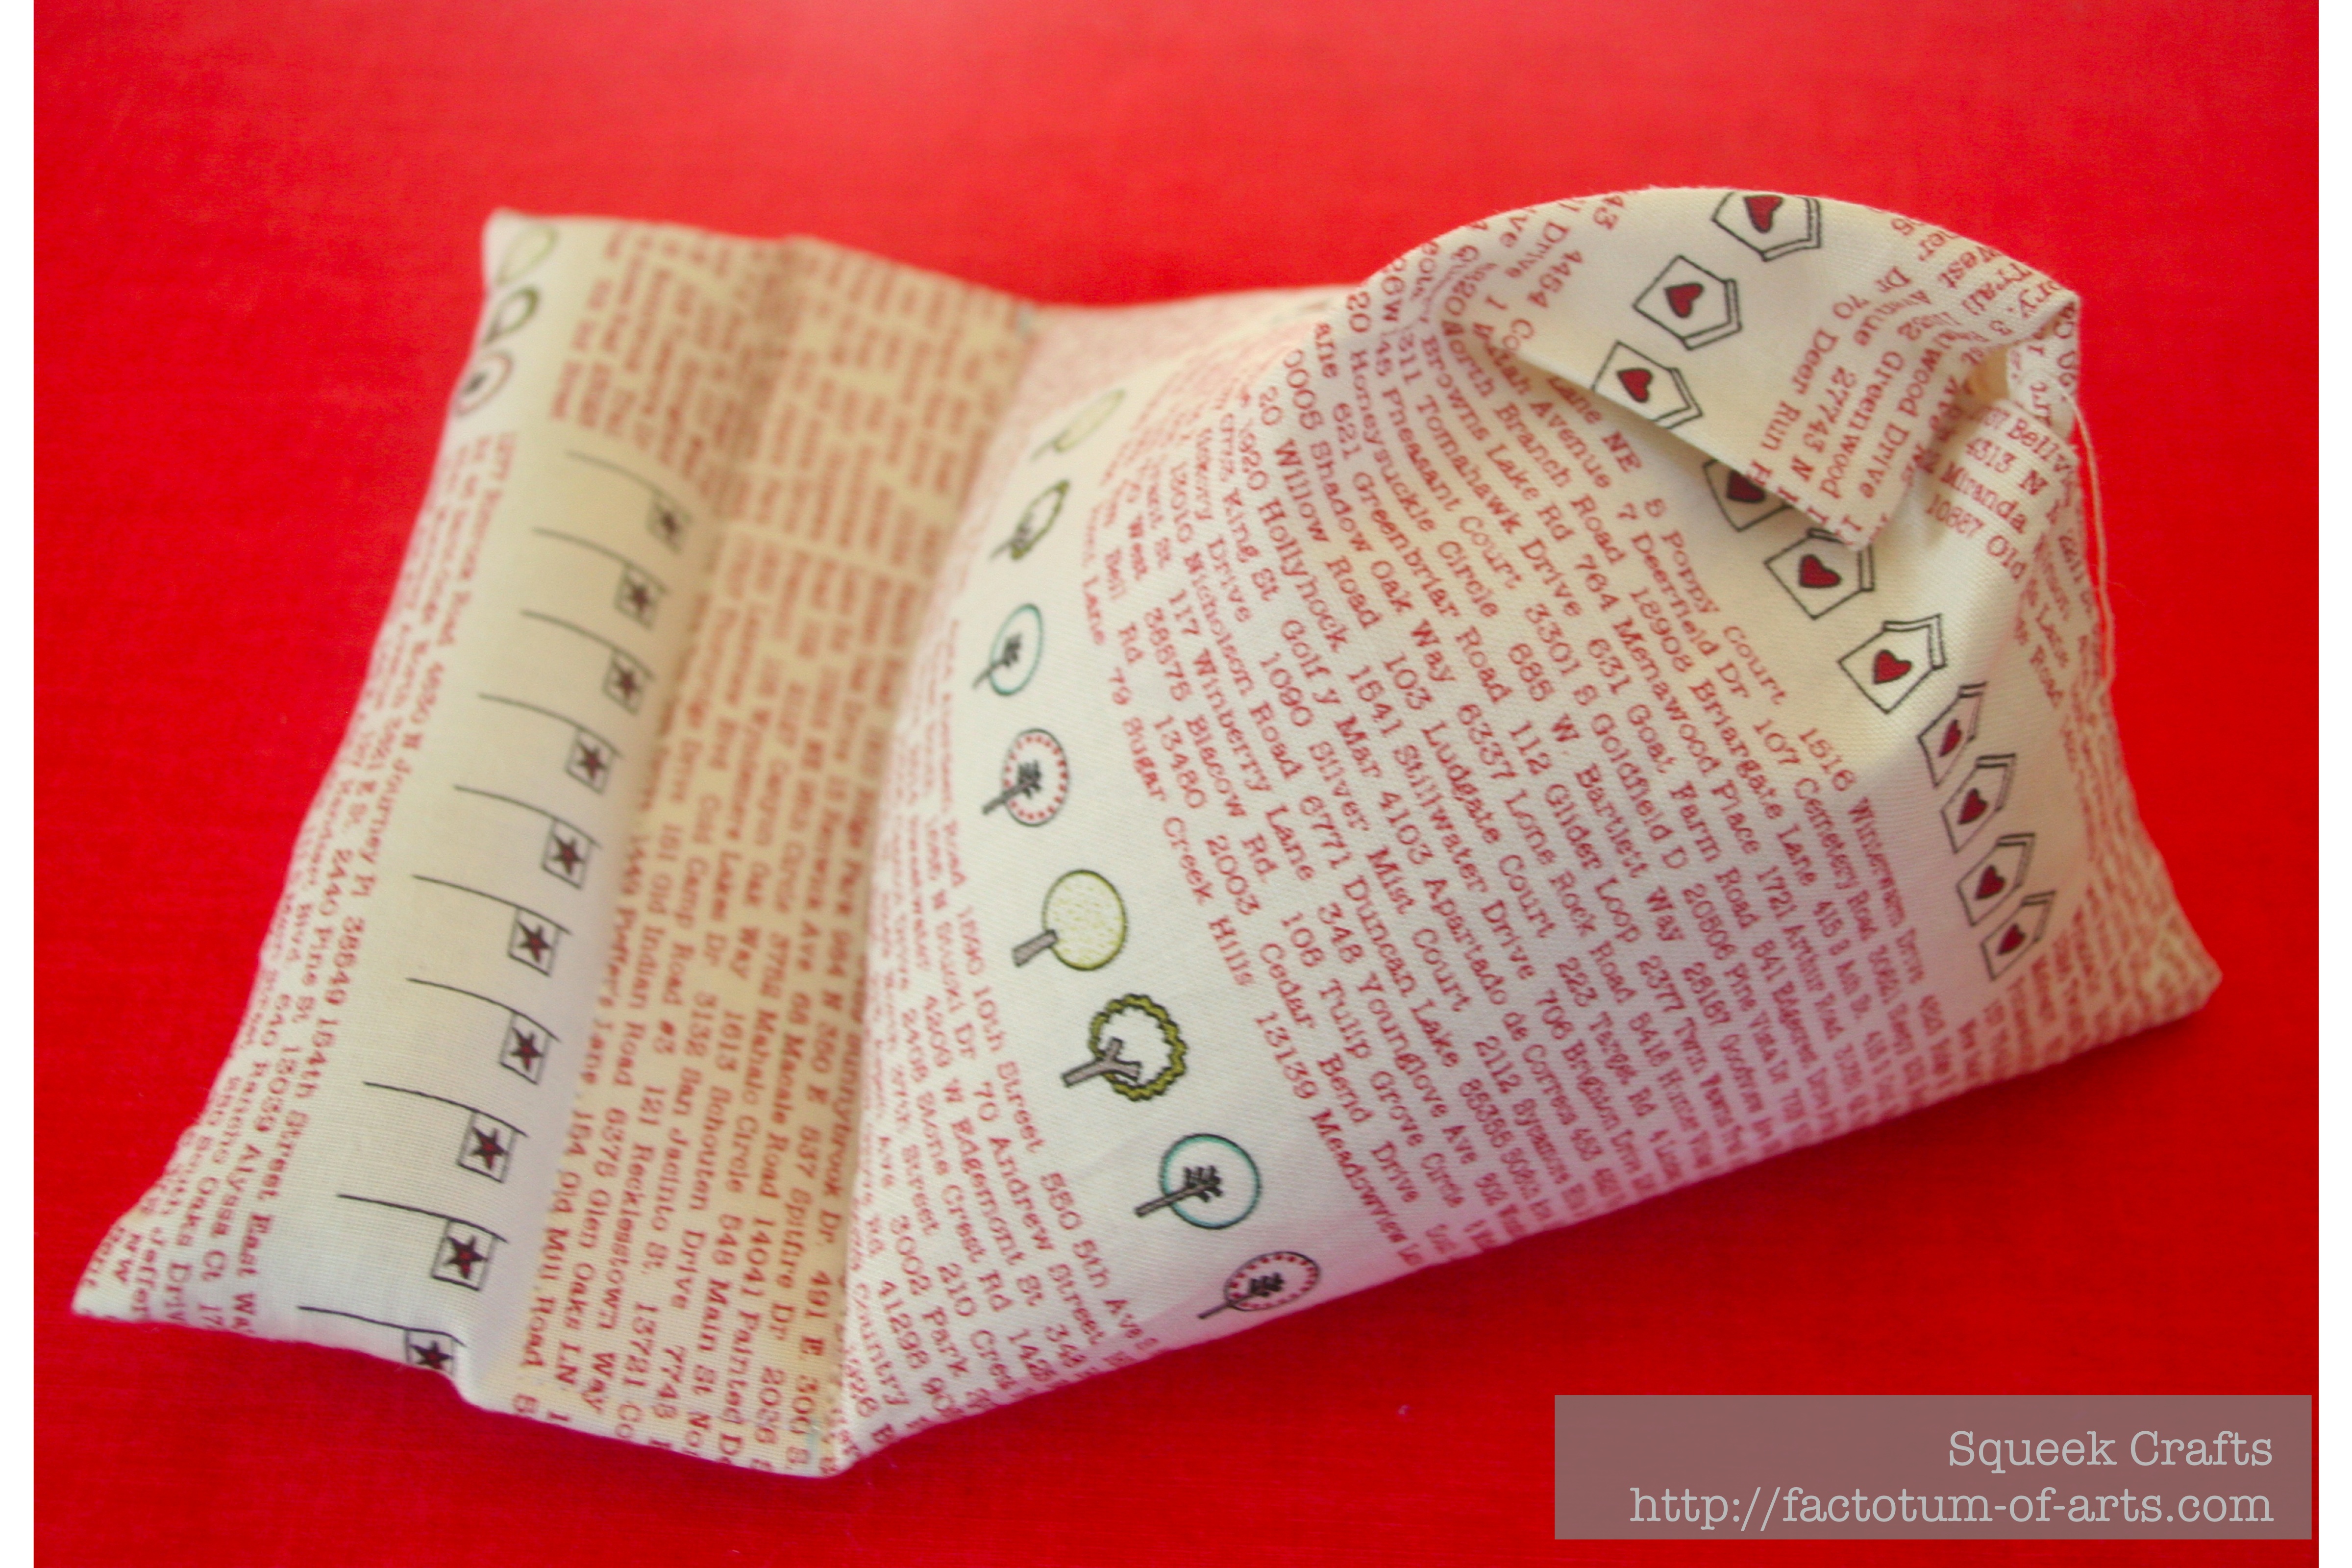
- Hand stitch top opening close. You now have a complete electronic stand.


My friends are loving these, so I hope your friends do to (or whoever you are gifting it to). If you have any questions or feedback let me know, leave a comment.
Update: I have had several people ask if they can use this also for an iPad. As mentioned in the title, we do use it for an iPad, which is usually used for Netflix/Videos. This means we typically have it in a horizontal position.

I would agree that this size stand would not work for an iPad if you were wanting to use vertically. I have not provided the measurements, if this is what you would like it for.
This tutorial is for personal use only.
Linking up with Amanda Jean @ Crazy Mom Quilts for Finish it up Friday.

Thanks so much for sharing! I think these little stands will make great gifts–I am going to try to put one together tomorrow.
Let me know how it goes. I would love to see it.
this is such a neat idea.. thank you for the lovely tutorial.. 😀
Your welcome. Thank you for stopping by 🙂
This is so neat 🙂 Thanks for sharing the tutorial! I don’t think I’ll get one made this year but I’m definitely keeping a link.
Maybe some lovely person will send one sometime soon 🙂
Forget my friends and family, I’m making one for me! Thank you for taking the time to do the tutorial.
Thanks Sarah, I know what you mean….I need one for home and the office 🙂
Pingback: iPhone/iPad Fabric Stand | What the Bobbin?
Pingback: Christmas Finishes | Factotum of Arts
Pingback: Small Finishes | Factotum of Arts
Easy explicit tutorial. Thanks
Hi, i have a question concerning step 1: do you fold the pieceof fabric with the longest sides together or the shortest? Something is wrong with mine 😦
So the longest side the 12 inch side when you fold it , it will be 6″. The 9″ side is where the two fabric ends meet when folded. Hope that helps
Ok, great! That did help! Thanks a lot for this great tutorial. I have a feeling it was not the last time i made it 😉
I am glad the writer above asked as I was wondering the very same thing! Maybe a note in the text above?? THX for the tute as I need one of these, sooner than later, LOL.
Pingback: I’m Craft Challenged | The Snarky Quilter
Pingback: Teacher Appreciation gifts | Factotum of Arts
Pingback: Suporte para Tablet e Celular (pillow stand) | Juju Teteia
I have looked at all kinds of patterns and tutorials to make one of these. I tried another pattern 1st because it seemed so much easier. Fortunately, I did some of the seams in a basting stitch because it didn’t work. I just moved over here and followed your directions. It was very easy. I love my iPad holder! You did such a great job and I love it!!
What a cool gadget stand! Thanks for sharing your tutorial! 🙂
Pingback: Friday Finds: A list of DIY gifts for Father’s Day | a little bird made me
Pingback: Blogiversary + Giveaway | Factotum of Arts
Pingback: My son’s first sewing project | Factotum of Arts
Helen at Till We Quilt Again posted a link to your tutorial on her blog because she has made a couple of these…I’m just sayin’ that these will be appearing under the tree this Christmas!!
Pingback: 14 Hi-Tech Gifts for Readers | Dodo Burd
Thanks for a great tutorial! I definitely plan to make a few of these! I just had one question. In the original photo, you have a loop (I think?) at the top that holds the cord. Do you just slide the cord through the loop, or is there velcro to hold it? I’m off to find some rice! 🙂
Did you ever make one for an Ipad? Just wondering starting fabric size. If I try one and come up with a size, I will comment again. Thanks for the great tutorial!
I made it! and its Awesome!! I face time with my grand daughter(2 yrs old); so now mom’s iphone wont be falling over. Off to make mine now! it will also be great just as home base for my phone…i never know where it is 😉 THANKS for the Tutorial!!
Pingback: 33 Great Gifts for Men under $20 | Dodo Burd
Pingback: Handmade Holidays Nov. 26: Gifts for Kids to Make | Sew Mama Sew | Outstanding sewing, quilting, and needlework tutorials since 2005.
Great project and tutorial! I didn’t have any Pellon stablizer, so I cut a strip of plastic from an old binder, and that worked fine–I think plastic needlepoint canvas would work too, or even cardboard. You could also use them to prop up CD cases or greeting cards.
I just let my 10 and 12 year old granddaughters make these. They look and work great! The only help they needed was in pouring the rice in. Awesome project for their Christmas gifts.
Thank you for your wonderfully written directions! I have made eight today for Christmas gifts!
Pingback: Ipad stand ovvero leggio per Ipad | STRAVAGARIA
Thank you for this wonderful tutorial! I am starting to sew and I’m only as experienced as what I can remember from 8th grade Home Economics class some where around 1985’ish! Yikes!! My 10 and 13 year old daughters wanted to learn to sew and I decided to pull an old sewing machine out my mother in law gave me a while back and headed to Pinterest. That’s how I found you. At first I looked at the finished project and said No way! But I read it, went step by step and made it perfectly. 🙂 Now I’ve done it, I’m going to whip up a few more to give to my girls and nieces for Christmas 🙂 Your directions were perfectly written and easy enough for a newbie to follow so thank you!
Thanks for your tutorial 🙂
Use polystyrene beads for bean bags and its lightweight for travel
Hi Norma,
I did try polystyrene beads and decided against them after trying them the one time:
1. they are a nightmare to get into the iPad/iPhone stand (took at least 3-4 times as long and they got stuck in the funnel – and I almost had to feed them in one by one).
2. In North Carolina folks do not stock them; you must order them into the state (via amazon or wallmart). There are safety restrictions in place for this state
3. Lastly, they are not as durable. After some time using an iPad the stand needed refilling (due to weight and compression – just like in a beanbag)…of course that is less possible with the stand (no zippers).
I agree the weight is much less if you are shipping them but the time and durability persuaded me to stick with rice or walnut shells.
fantastic tutorial i have made one double the size and it fits my iPad perfectly.
Pingback: January news + giveaway | Factotum of Arts
Brilliant and pretty! Thanks for the tutorial, I made 2 already, as gifts;)
Anna, Finland (Europe)
Pingback: 33 Great Gifts for Men under $20 - Best of Gifts For Men Best of Gifts For Men
thank you for sharing, I have made a few of these as gifts and they have been really welcomed. your way of visualising the sewing lines is really clear.
My tween daughters and I made 30 of these to give as Christmas gifts to our techie relatives. They were a big hit! Thank you for the clear instructions. I looked at other tutorials before this one and they were confusing and the end product looked too fussy. Now in getting requests from others for one, too.
I am getting ready to make 10 of these. Is there any way I can download the photos?
Reblogged this on the green apricot and commented:
Brilliant idea! Thanks Michelle for such a great tutorial. It’s on my list…
Thanks for the tutorial. I made one and it works great for my iPad mini. I didn’t have the Pellon, so I used a piece of lightweight cardboard.
Reblogged this on Quilting Bee and commented:
This is Brilliant!
Brilliant tutorial and easy to make. I’m just about to make a second one for a friend. I used chana dal beans as I had so many to use up and it worked really well. Thanks so much for the easy instructions
which direction do you fold the fabric? Should I fold the 12″ side to create a 6″ x 9″ rectangle or fold the 9″ side so I have a 4.5″ x 12″ rectangle? Thanks!
WOW, what a great idea!!!!! I’m going to have to make one of these today. And I like the little tab for the cord. What size is it and is it velcroed or what?? Looking in my stash to see what I can use. 🙂 Thanks for the tutorial.
Pingback: Concours GreenCherry Box d'Aout Septembre 2015 - Les fées de Tya
Pingback: Feeling crafty — made an iPad stand! | Simple Crafty Life
Just what I’ve been looking for. Saw one at the quilt shop…the pattern was out of stock. Came home and tried making it on my own. Epic Fail. Following your EXCELLENT tutorial, I made one for myself this evening…less than an hour. Thank you Thank you.
Thank you for the directions. Love these. Am going to make about 10 for xmas gifts.
Thank for the tutorial, the instructions were nice and clear and easy to understand. I made one in half an hour yesterday.
Reblogged this on jenniferjasonwood and commented:
Nifty!!!