Tag Archives: sewing

Weekend Finishes {06.17.2013}

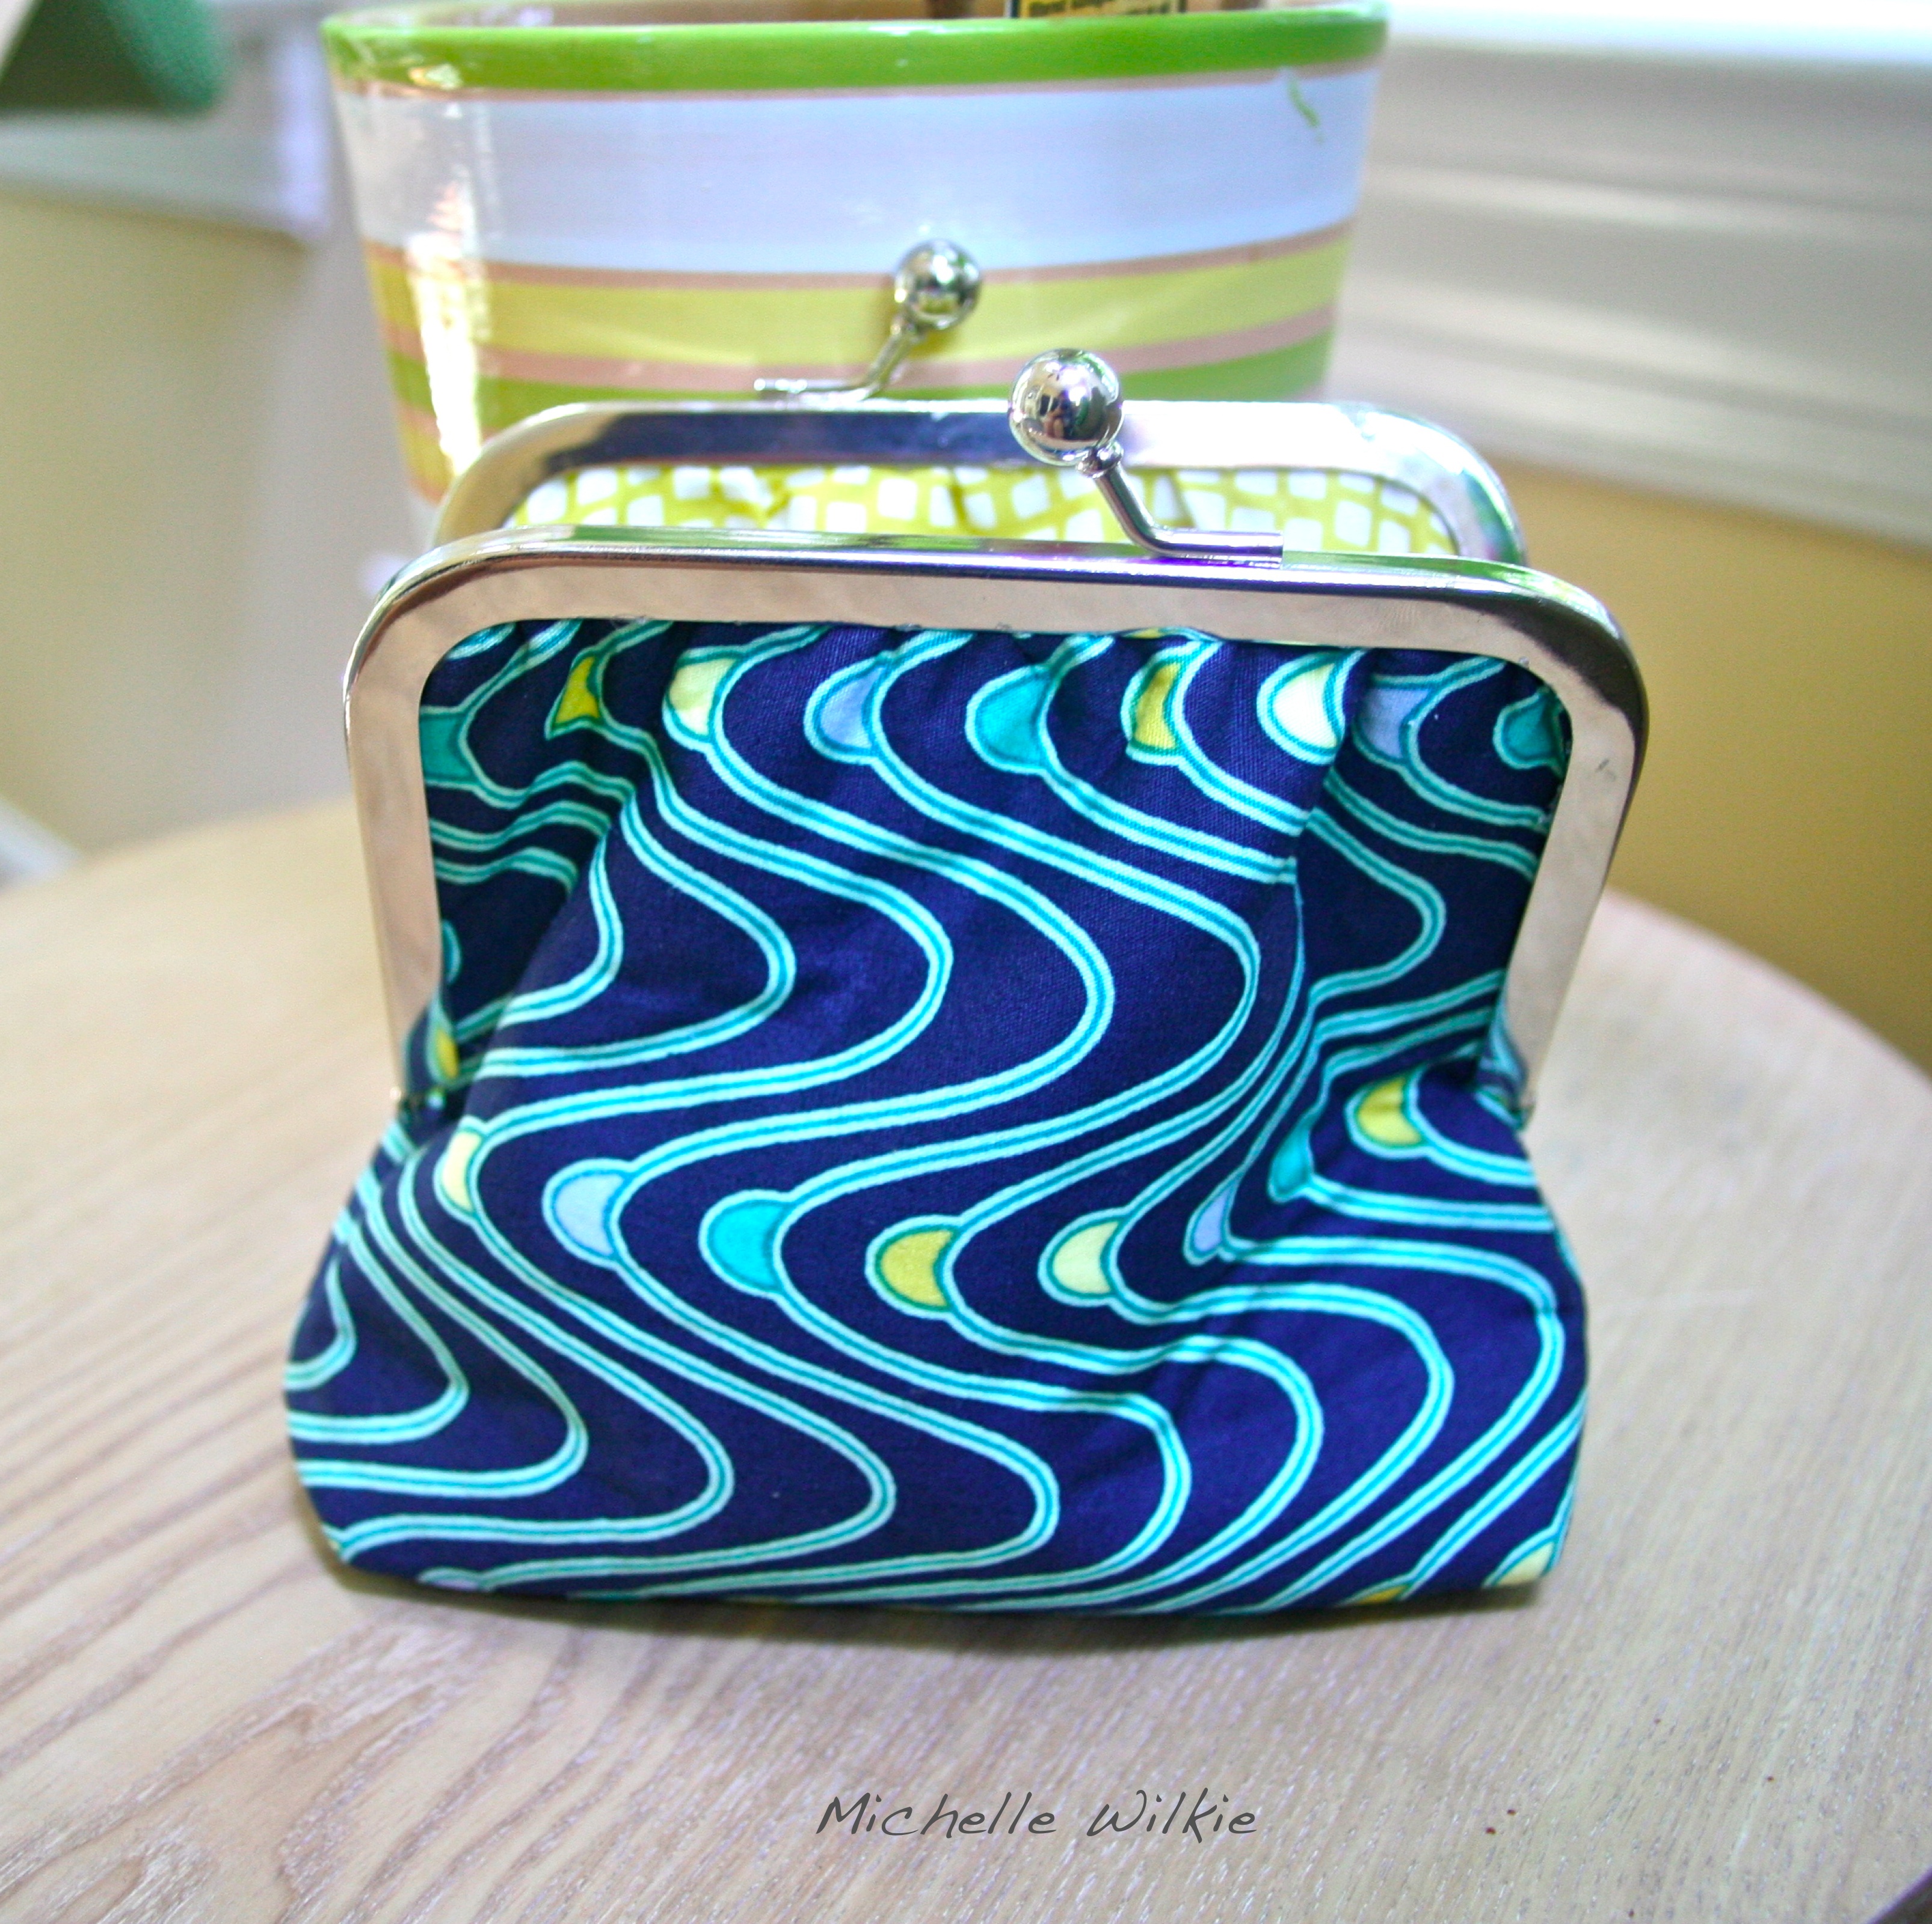
This weekend, I had some projects I needed to catch up on, one being a birthday gift for a friend. It took me a while to decide what I would make, I had one hundred and one ideas. I finally decided on making my first coin purse. After a false start (which we won’t talk of), I finally finished my little gift mid-day on Sunday and dropped it off an hour later (with instructions it still needed to dry for 8 hours). A little close I know 😉

Details: Coin Purse
Design: Michelle Wilkie (Squeek Crafts – that’s me)
Silver Frame + Glue: While Baby Naps (Etsy Store, glue can only be sent within the US)
Outside Fabric: Carnaby Street  – 60’s Waves Midnight (Purchased from: Moona Fabrics – Etsy)
Inside Lining: Carnaby Street  – Kings Road Lemon (Purchased from: Moona Fabrics – Etsy)

CarnabyPurse3 CarnabyPurse1 CarnabyPurse2 CarnabyPurseSide

I am linking up with two wonderful link-ups today. Firstly Sew Cute Tuesday with Janice@Better off Thread, and secondly Plum and June: Let’s get acquainted Monday Link up,  which is being hosted this week by Lucy at Charm about You.

Better Off Thread     Plum and June

Don’t forget to check out the 2013 Let’s get acquainted New Blogger blog hop that is underway hosted @ Plum and June.

Plum and June

The blog hop schedule is:

Friday, June 7th
Nancy @ Owen’s Olivia
Amy @ 13 Spools
Ashley @ Wasn’t Quilt In A Day
Casey @ The Studiolo
Nanette @ Yeah, I Made That
Ange @ Heart Of Charnwood
Kim @ Robot Mom Sews
Erica @ Kitchen Table Quilting

Friday, June 14
Julie @ Jolie Maxtin
Melissa @ Melia Mae Quilting
Adrianne @ On The Windy Side
Molli @ Molli Sparkles
Laura @ Little And Lots
Sarah @ Duck Egg Threads
Kelly @ My Quilt Infatuation
Cari @ There’s A Thread
Valerie @ Between Quilts

Friday, June 21
Leigh Anne @ Ella’s Cottage
Stacey @ The Tilted Quilt
Sarah @ Quilt Candy
Jackie @ NW Patchwork
Liz @ Beadqueene’s Bits And Baubles
Erica @ Happy Fabric
Stephanie @ Simple Sewendipity
Lauren @ Seraphym
Amy @ Cloud CouCou Crafts

Friday, June 28
Green @ So Sew Green
Gwendellyn @ The Rainbow Revolts
Jessica @ Stitched In Thyme
Amira @ Little Mushroom Cap
Kathy @ Kayak Quilting
Michelle @ Factotum Of Arts
Paula @ The Sassy Quilter
Kris @ Sew Sunshine
Camilla @ Faffling

Friday, July 5
Christa @ Christa Quilts!
Alyce @ Wonderland By Alyce
Anna @ The Crooked Banana
Rachel @ Sew Happily Ever After
Stephanie @ Quarter Incher
Shayla @ Sassafras Lane Designs
Caroline @ Carolines Craftiness
Lisa @ Hilltop House Creative Works

Friday, July 12
Leona @ Leona’s Quilting Adventure
Karen @ Karen, {Novice} Quilter
Anne @ PlayCrafts
Rachel @ Let’s Begin Sewing…
Jan @ Sew And Sow Farm
Anna @ Quilting Along The Grain
Cath @ Wombat Quilts
Sarah @ {No} Hats In The House

Friday, July 19
Karen @ Little Birdie Quilting Studio
Kathy @ Kwilty Pleasures
Katie @ Snuggle Up With A Dish From Karma
Alison @ Making Happyness
Ella and Nesta @ Ella & Nesta’s Little Room
Adrienne @ Chezzetcook Modern Quilts
Nicole @ Modern Handcraft
Aylin @ AyliN-Nilya
Kelsey and Amanda @ Everyday Fray

Friday, July 26
Vicki @ A Quilter’s Mission
RobinSue @ RobinSue Quilts
Elisa Lea @ Lovelea Designs
Elizabeth @ In The Boon Docks
Jenny @ A Note To Follow Sew
Lorna @ Sew Fresh Quilts
Sonia @ Fabric & Flowers
Emily @ Sew E.T.
Em @ Sewing by Moonlight

New York Finale + Give Away

So, I am finishing up my posts on our visit to New York this week….and in celebration of my 40th birthday last weekend, the fact I have reached 200 followers (thank you all), I would like to include you all in my experience in the Lotta Jansdotter Surface Printing class I have a GIVE AWAY  :-).

GIVE AWAY!!!

The lucky randomly chosen winner will receive:

  • A Lotta Jansdotter Strawberry Journal
  • A Charm Pack of Bella Fabric Line (Lotta Jansdotter)
  • Lotta Jansdotter’s book – Lotta Prints (which covers most of the things we learnt in the surface printing workshop)

All you have to do is leave a comment below, by midnight Thursday 20th June, about what inspiration do you get for your projects from the environment around you. For a second entry, just let me know if you are a follower. If you are a no-reply commenter please leave an email address. I will announce the winner next Friday.

IMG_7692

Previous posts from our New York Visit:
40 and Lotta’s Surface Printing Workshop
New York Part 1: The City Quilter Fabric Stash Additions
New York Part 2: Quilting Inspiration

The New York finale is really simple, here are some of my favorite photos and views of New York.

Central Park
The park is so large we only saw a small part of it. We had amazing weather both days. The boys visited the Central Park Zoo where the Polar Bear was the star. There was a great sense of community and fun here. I also loved the statues at one of the entrances of the zoo.

IMG_7475 IMG_7478 IMG_7481

The High Line
This was a great (new-ish) place that used to be a railroad track above the factories in the meat packing district. It is now ~ 2 mile walk through gardens,  some vendors (like coffee, ice pops, and food items) and various art pieces. This is my favorite place in New York.

IMG_7523 IMG_7517 IMG_7526

Rockefeller Center
To get a good view of the city on such a wonderful day, we took advantage of the views at the top of Rockefeller center. We were lucky with the atmosphere which was buzzing as it was Puerto Rico Day and a parade was occurring. At the top we saw the Empire State building on one side and a great view of central park expanse on the other (wow is all I can say).IMG_7538 IMG_7562 IMG_7565

Grand Central Station
What an amazing Building, even in the pouring rain it was captivating. Celebrating its 100 anniversary, it is still in its glory. Look at the amazing ceiling with its celestial paintings.
IMG_7672 IMG_7665 IMG_7654

Times Square
We were very lucky with the atmosphere in Times Square when we were visiting. Obviously we went at night to get the full impact of all the lights….but the night we went there was a viewing party going on.  In the middle of Times Square you could sit and watch the Tony awards which was broadcasting on an extra-large screen – there must have been thousands of people out that night.
IMG_7590 IMG_7617 IMG_7625

I hope you enjoyed our view of New York.

Have a great weekend!!! Linking up with Amanda Jean @ CrazyMomQuilts.

Modern Mini Quilt Challenge

When Jennifer posted on her blog about the modern mini quilt challenge, I was so excited and couldn’t wait to join in in the challenge. I love small projects – what a perfect challenge.

Now to decide what to enter. I am so torn between my Sea Spray Pillow and the Wonky Universe Pillow, pictured below, respectively. I loved both but for different reasons, and they both had new techniques/skills I learned, each were a special gift and had a special meaning. Hmmm…. choices, choices.

Sea Spray….IMG_7424

or Wonky Universe… IMG_7245

Ok…now comes the decision….I think I am going to choose the…

Sea Spray” Pillow.

IMG_7421

This pillow was a gift for our pillow swap last Sunday. It was based on the “Crystallized” pattern in the book Pillow Pop. This was a challenge for me as it was the first time I have used HST’s, so I was so nervous about cutting them perfectly and matching them up. I used some techniques that Adrianne @ On The Windy Side had shared with me, to get pieces to be more accurate…specifically I took the time to cut them carefully and measure a few times, used my 1/4 inch foot and pinned each seam. I couldn’t have asked for a better finish !!!

I thought I would share some of the steps I took:

  1. Cut out 100 x 3 ” squares, 50 low volume and 50 blue, green or aqua.
  2. Choose one light square and one dark square. I used a 1/4 ” seam ruler – which I used to line up the middle along the diagonal and marked a 1/4 ” on each side. I then sewed on each of these two lines.
    IMG_7401
    IMG_7378
  3. Cut down the middle of these squares, between the seams. Press the seams, I like to press each seam to the side. Trim the corners. The squares should measure 2 1/2″.
    IMG_7395 
  4. Use a design board to lay out your design.
    IMG_7407
  5. Start at the top row and sew each square together using a 1/4 ” seam. This is where my new 1/4 ” foot came in handy. Keep sewing each row until finished. Press the seams but each row I pressed the seams in opposite directions in preparation to matching up the rows.
  6. Once you have the each row finished and pressed, take the first two rows and I pin each of the seams together so the seams match. I start from the middle and make my way out to the edges. Once pinned, sew a 1/4 inch seam. Repeat by adding a row to the block at a time. Press after each row addition.
    IMG_7411
  7. Once the top is complete, I used cotton batting and a piece of muslin (each about 21″ x 21″) to produce my sandwich I was quilting. I decided I would sew irregular distanced lines (about 1/4 inch apart) around the low-volume areas. Here is a view of the back of my quilted front, after pressing.
    IMG_7430
    Close up of the  quilting on the front:
    IMG_7426
  8. Once you have finished the front, its time for the back. I love invisible zippers sewed in the middle of the back. I used two pieces of blue Kona fabric that is 21″ x 11″, and sewed each piece of fabric to the invisible zipper following the instructions using my  invisible zipper foot.
    IMG_7428
  9. Once I have the zipper in, I trim all the edges to 20.5 ” x  20.5″ pillow. I pin the right sides together with the zipper being open to the middle. I then sewed a 1/4 ” seam along all the edges and double seam across the zipper one each side.  That’s it – turn the pillow in the right way and iron.
    IMG_7421