When Jennifer posted on her blog about the modern mini quilt challenge, I was so excited and couldn’t wait to join in in the challenge. I love small projects – what a perfect challenge.

Now to decide what to enter. I am so torn between my Sea Spray Pillow and the Wonky Universe Pillow, pictured below, respectively. I loved both but for different reasons, and they both had new techniques/skills I learned, each were a special gift and had a special meaning. Hmmm…. choices, choices.
Sea Spray….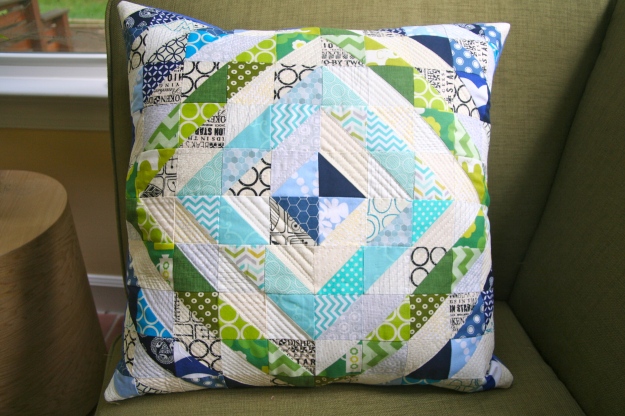
or Wonky Universe… 
Ok…now comes the decision….I think I am going to choose the…
“Sea Spray” Pillow.

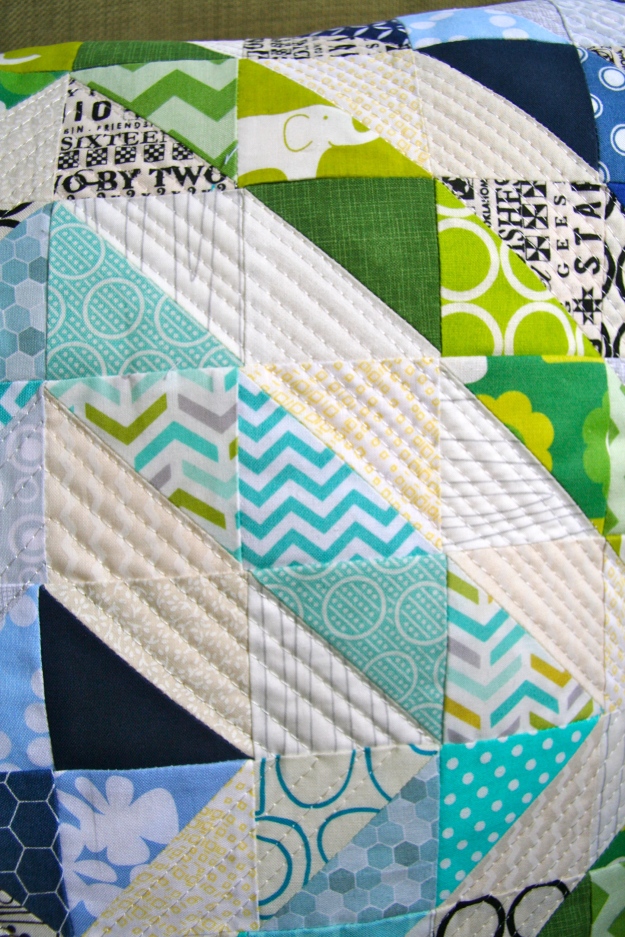
This pillow was a gift for our pillow swap last Sunday. It was based on the “Crystallized” pattern in the book Pillow Pop. This was a challenge for me as it was the first time I have used HST’s, so I was so nervous about cutting them perfectly and matching them up. I used some techniques that Adrianne @ On The Windy Side had shared with me, to get pieces to be more accurate…specifically I took the time to cut them carefully and measure a few times, used my 1/4 inch foot and pinned each seam. I couldn’t have asked for a better finish !!!
I thought I would share some of the steps I took:
- Cut out 100 x 3 ” squares, 50 low volume and 50 blue, green or aqua.
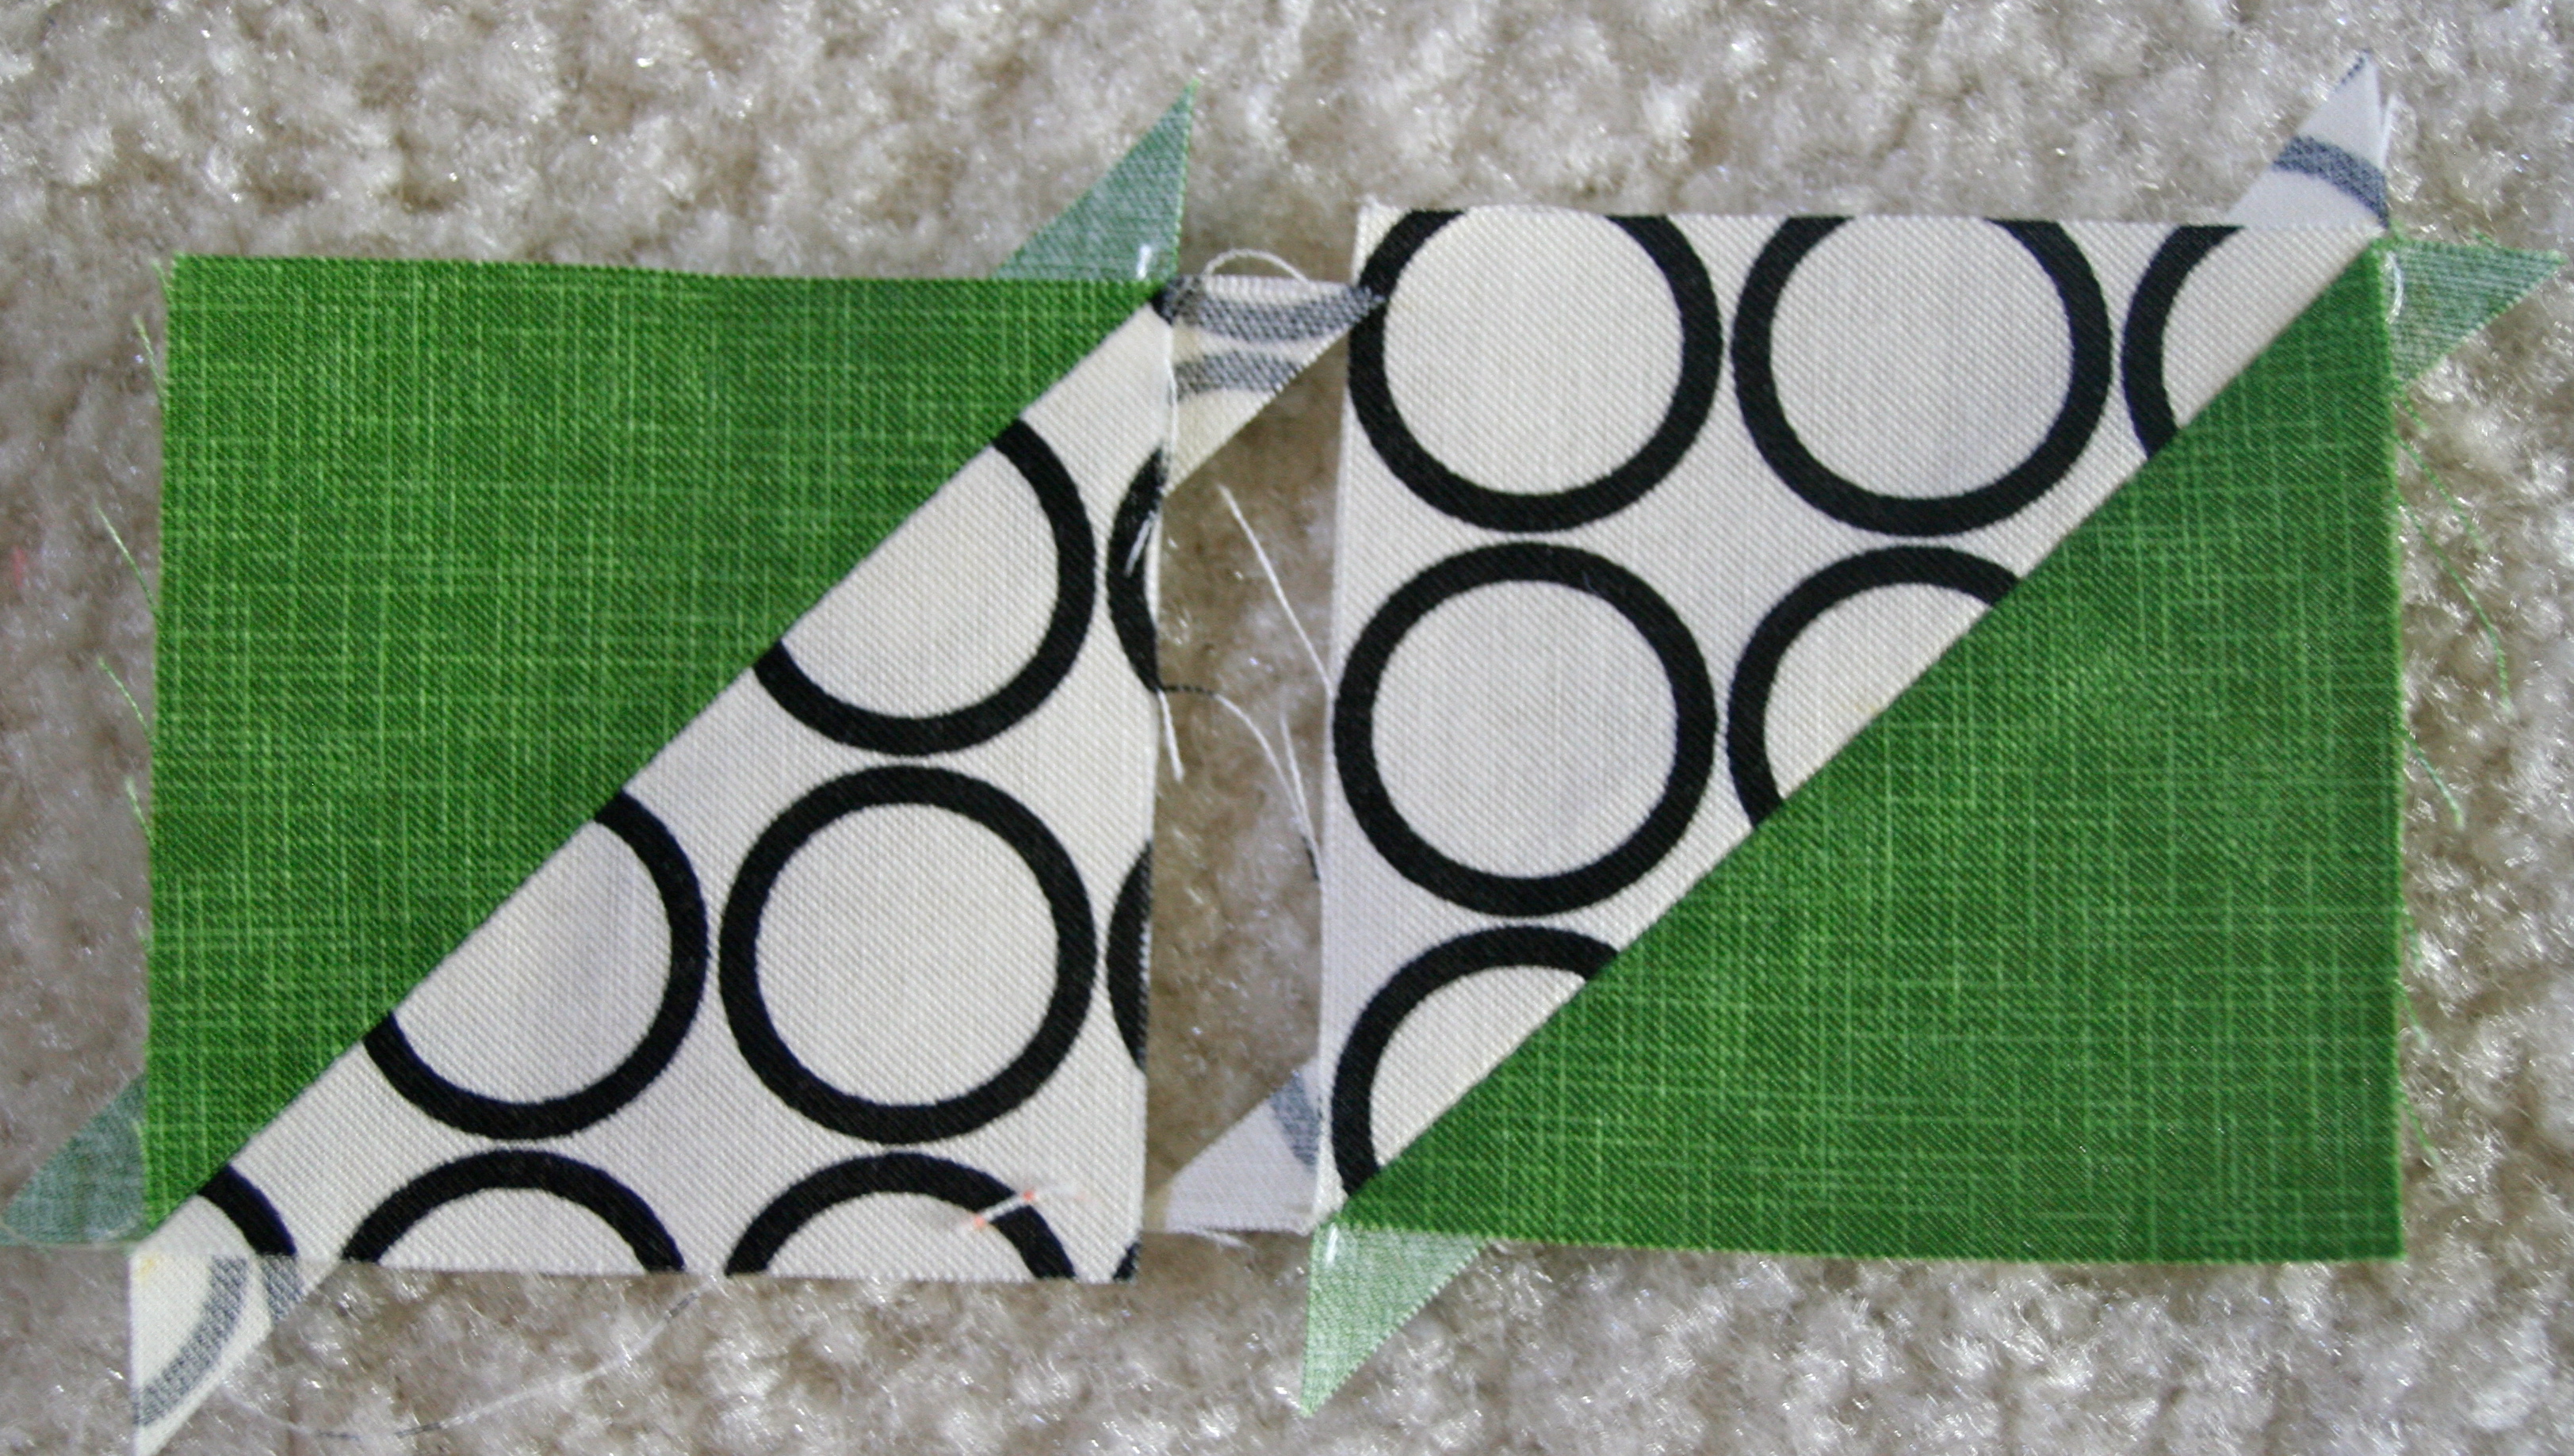
- Choose one light square and one dark square. I used a 1/4 ” seam ruler – which I used to line up the middle along the diagonal and marked a 1/4 ” on each side. I then sewed on each of these two lines.


- Cut down the middle of these squares, between the seams. Press the seams, I like to press each seam to the side. Trim the corners. The squares should measure 2 1/2″.

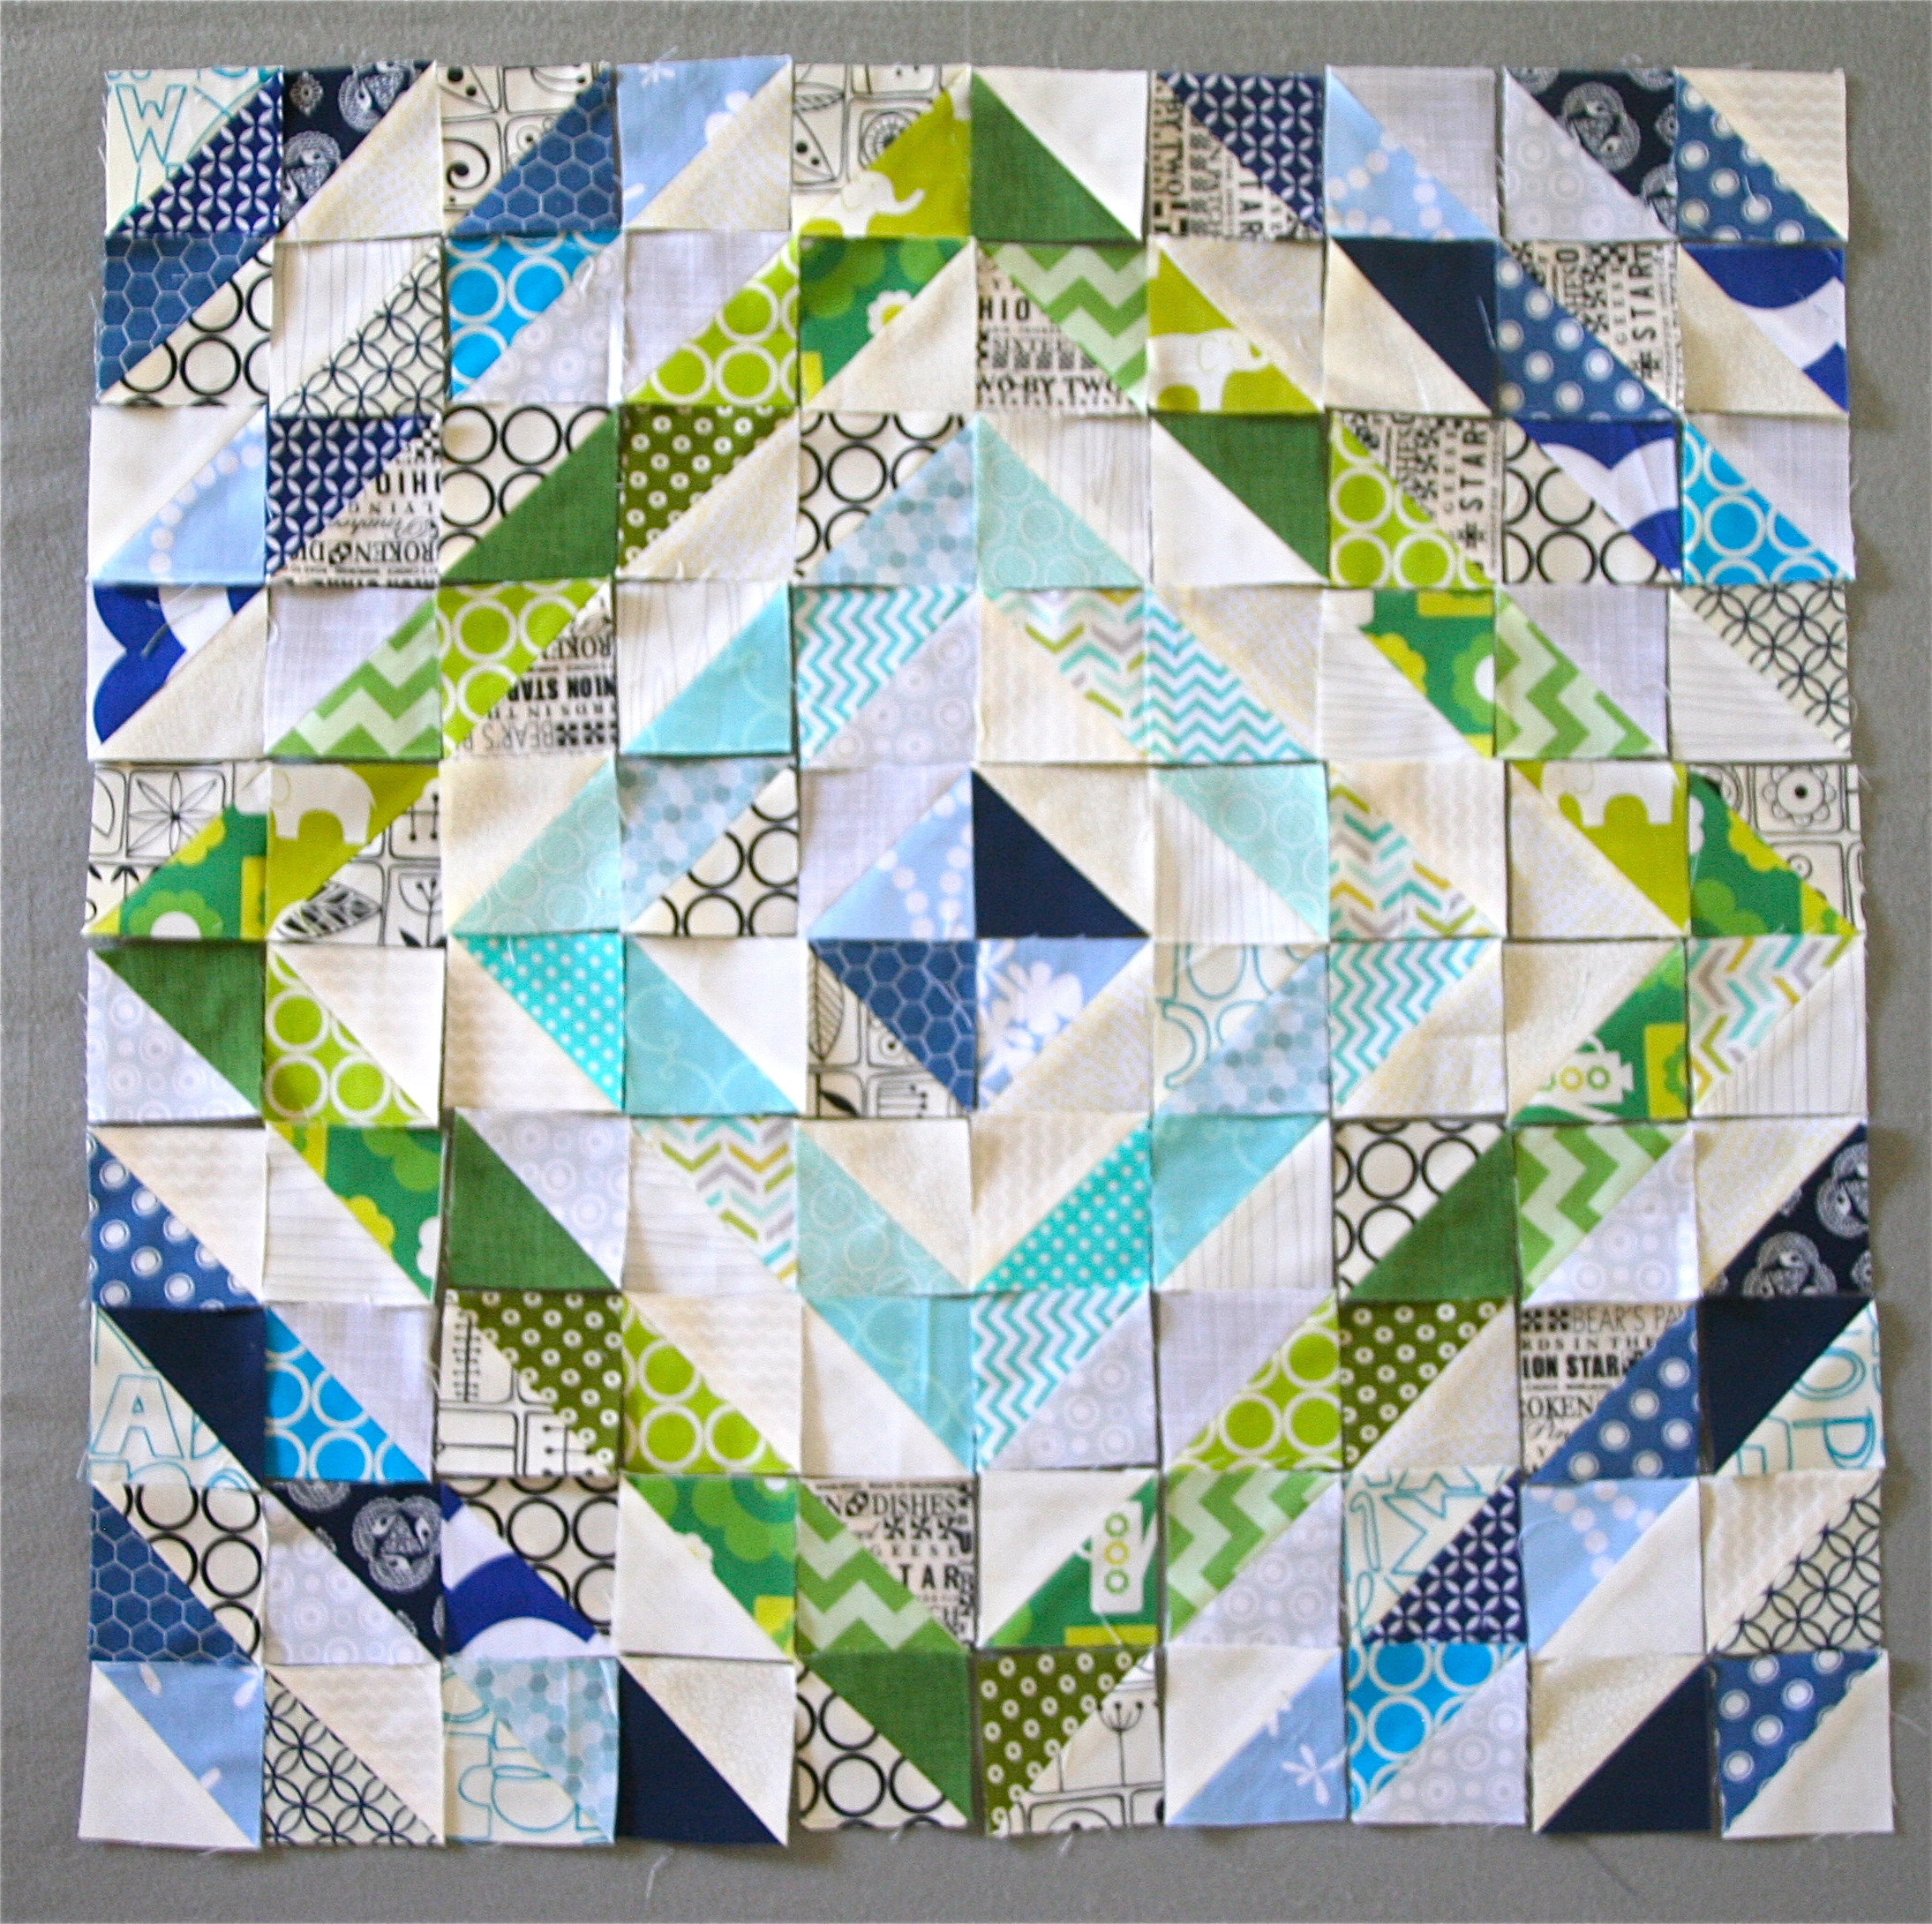
- Use a design board to lay out your design.

- Start at the top row and sew each square together using a 1/4 ” seam. This is where my new 1/4 ” foot came in handy. Keep sewing each row until finished. Press the seams but each row I pressed the seams in opposite directions in preparation to matching up the rows.
- Once you have the each row finished and pressed, take the first two rows and I pin each of the seams together so the seams match. I start from the middle and make my way out to the edges. Once pinned, sew a 1/4 inch seam. Repeat by adding a row to the block at a time. Press after each row addition.

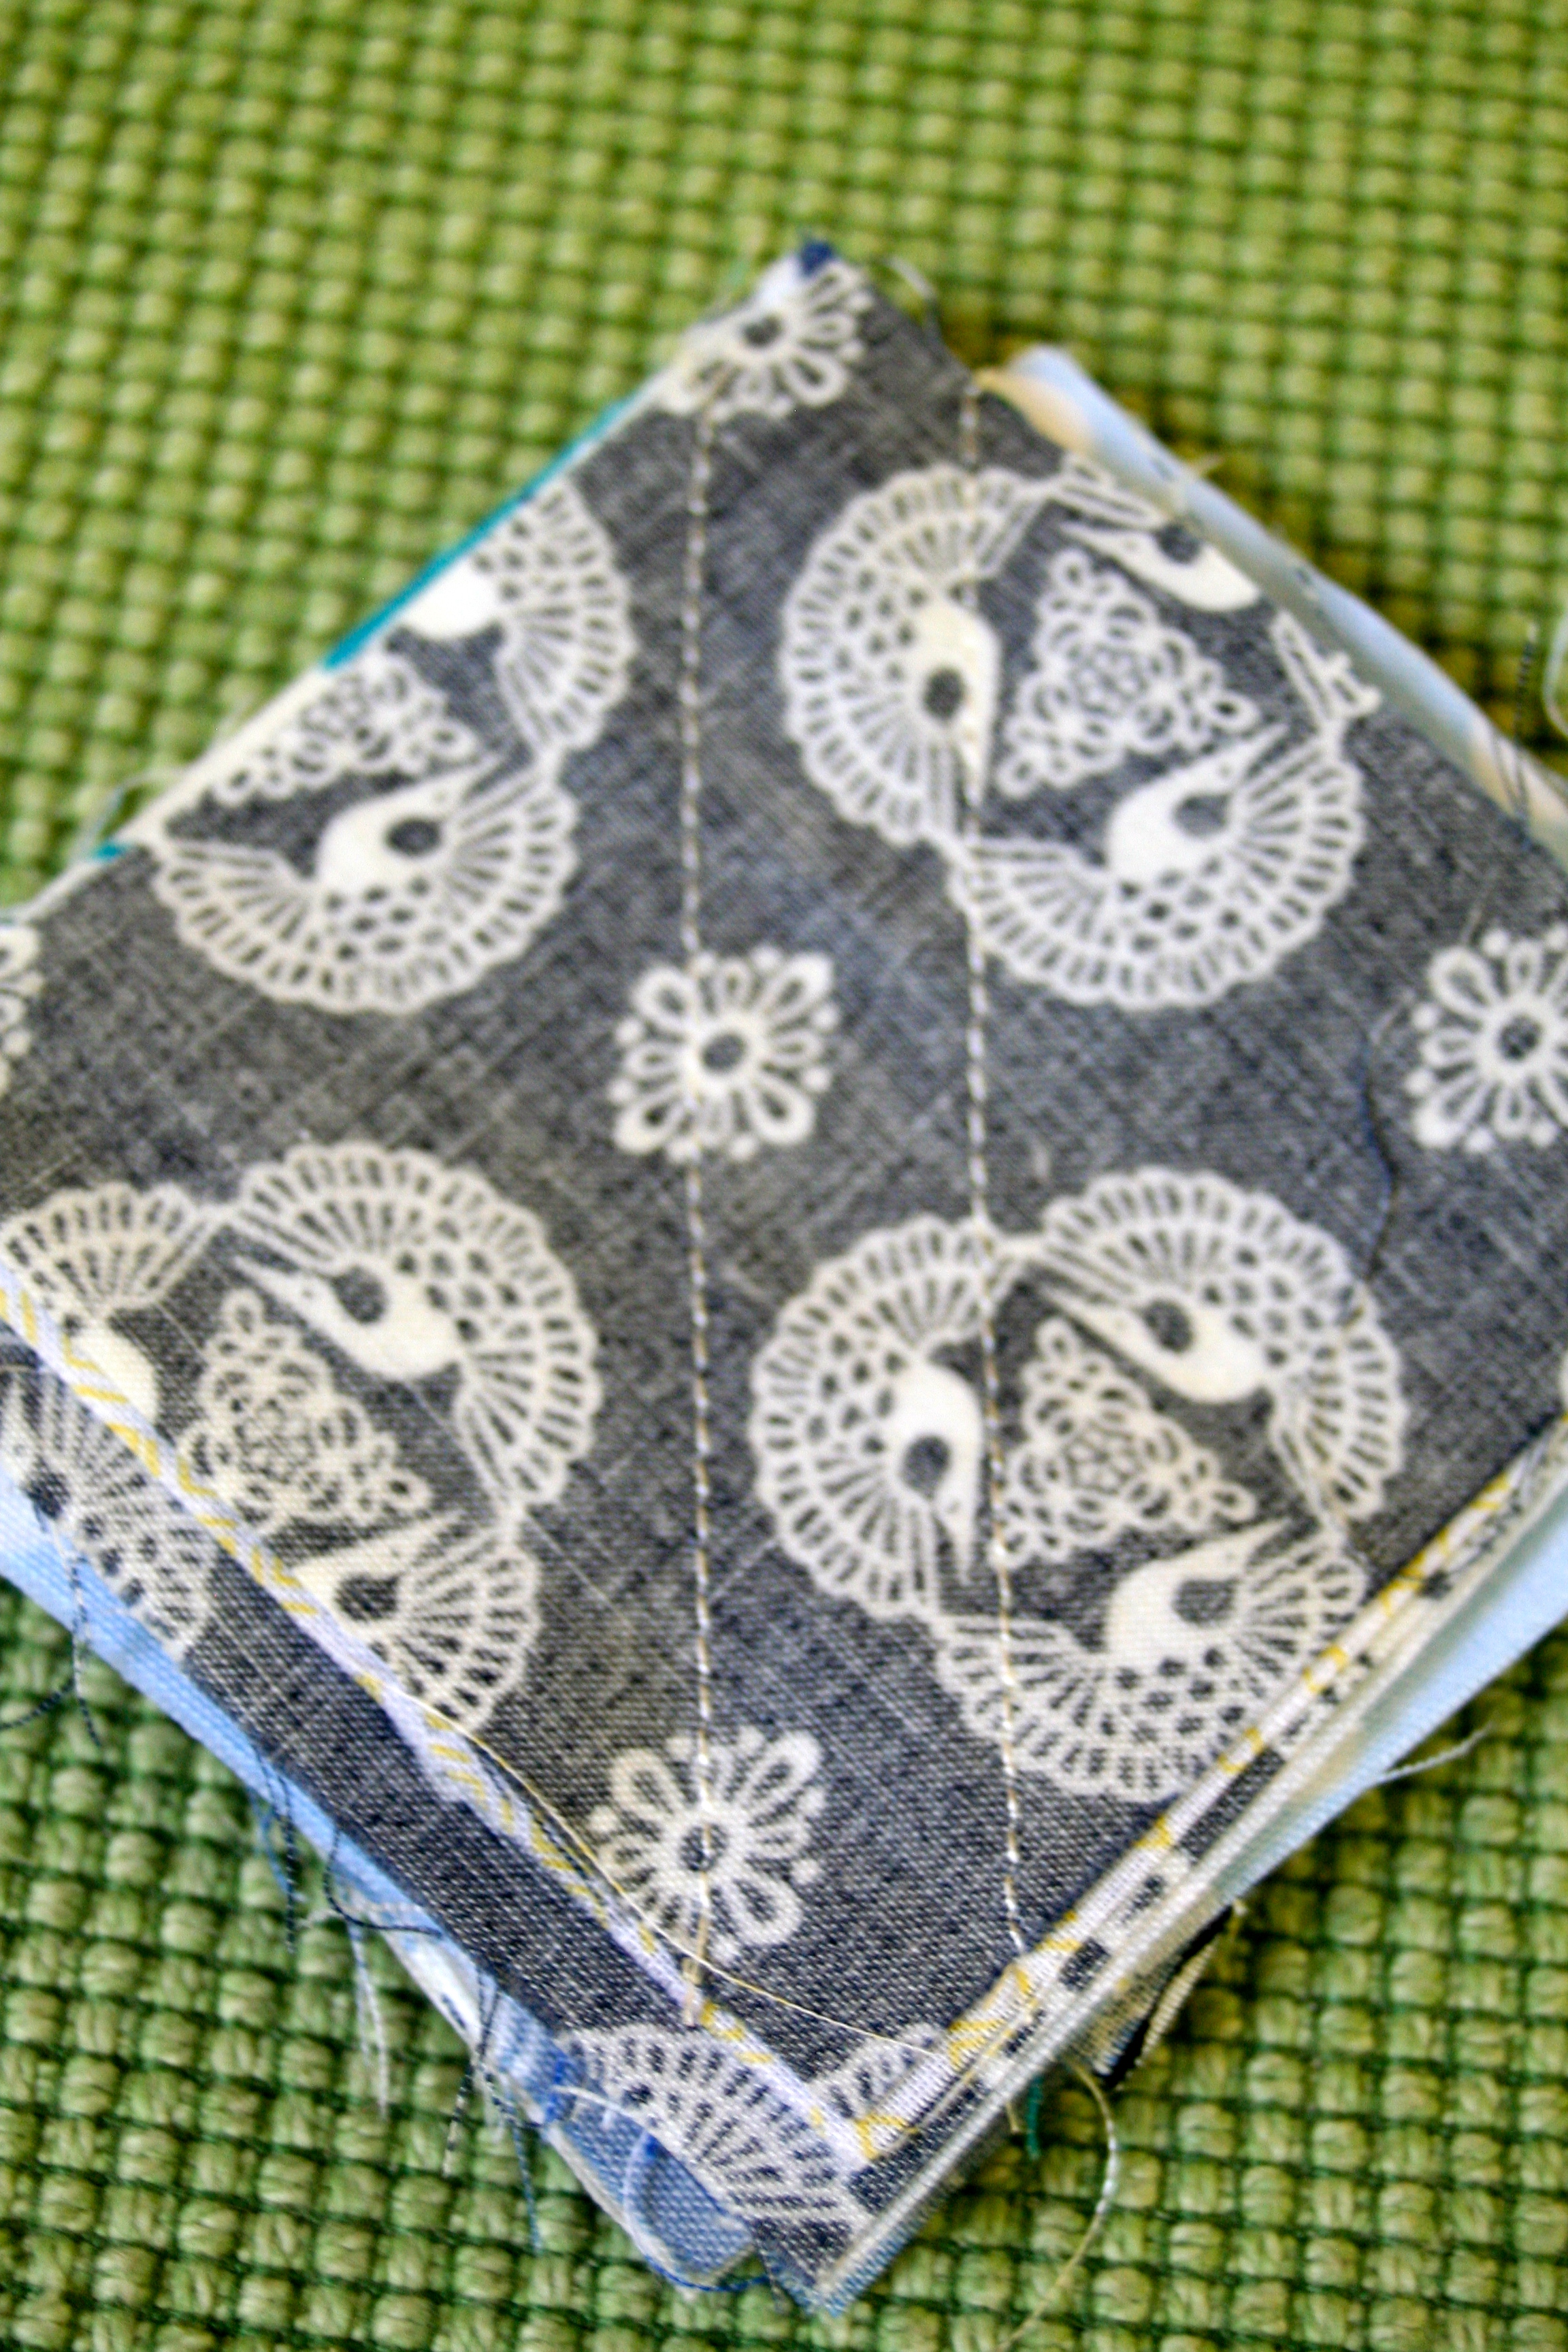
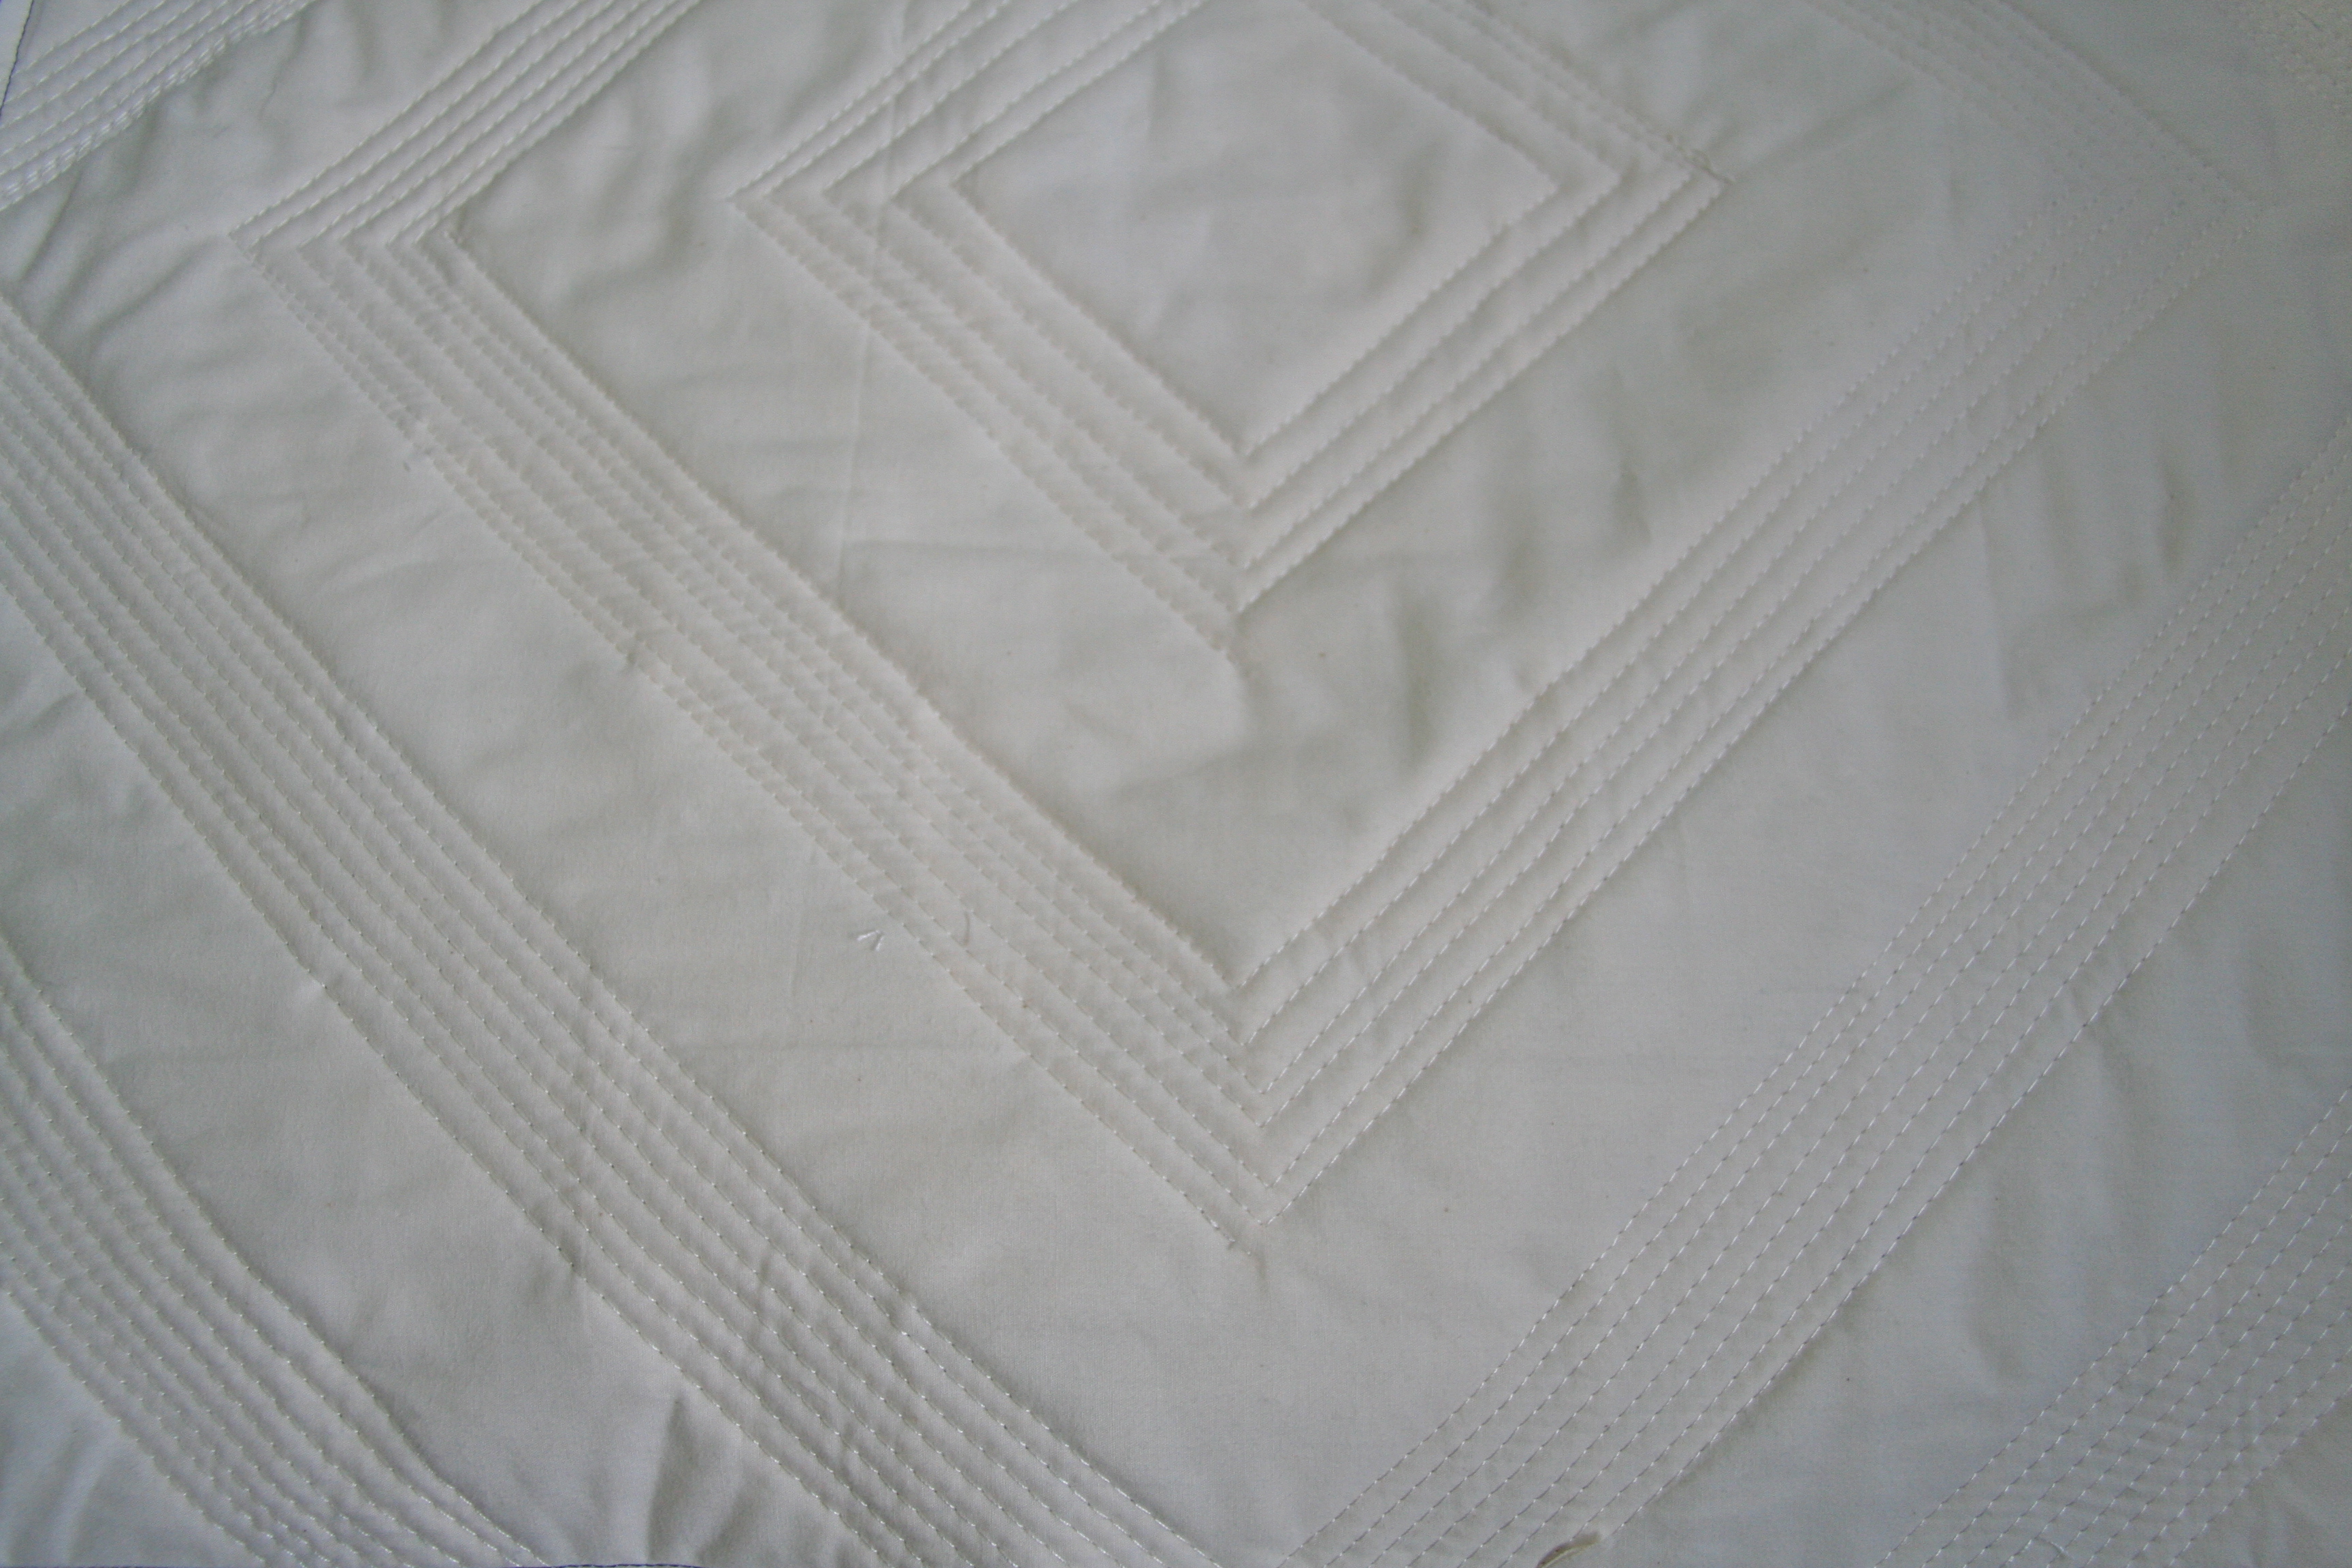
- Once the top is complete, I used cotton batting and a piece of muslin (each about 21″ x 21″) to produce my sandwich I was quilting. I decided I would sew irregular distanced lines (about 1/4 inch apart) around the low-volume areas. Here is a view of the back of my quilted front, after pressing.
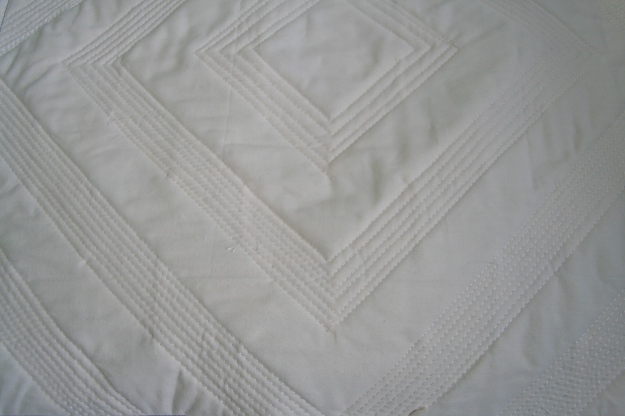
Close up of the quilting on the front:
- Once you have finished the front, its time for the back. I love invisible zippers sewed in the middle of the back. I used two pieces of blue Kona fabric that is 21″ x 11″, and sewed each piece of fabric to the invisible zipper following the instructions using my invisible zipper foot.
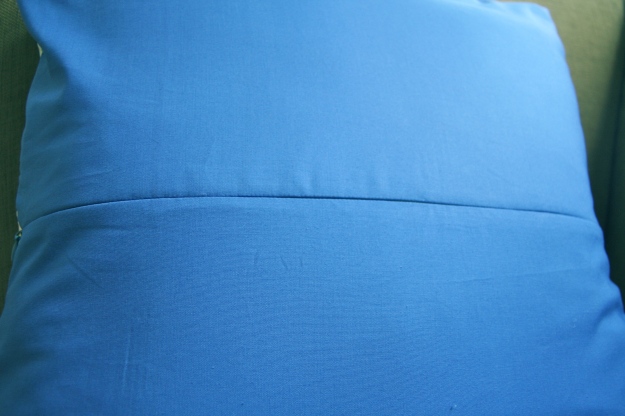
- Once I have the zipper in, I trim all the edges to 20.5 ” x 20.5″ pillow. I pin the right sides together with the zipper being open to the middle. I then sewed a 1/4 ” seam along all the edges and double seam across the zipper one each side. That’s it – turn the pillow in the right way and iron.