Tag Archives: sewing

April Finishes

mosaic9ac3abedf83d3d37b55c198ae673ec833887e66f

1. Hexagon Coffee cup sleeve made from left over mini charms
2. Hexagon Coffee cup sleeve made from left over Sew Stitchy by Aneela Hoey for Moda
3. Chair Bag for my Etsy store
4. Pencil-case project made by me from Patchwork, please book
5. Pin Cushion project made by me from Patchwork, please book
6. Market Tote project made by me from Patchwork, please book and used in our tote swap
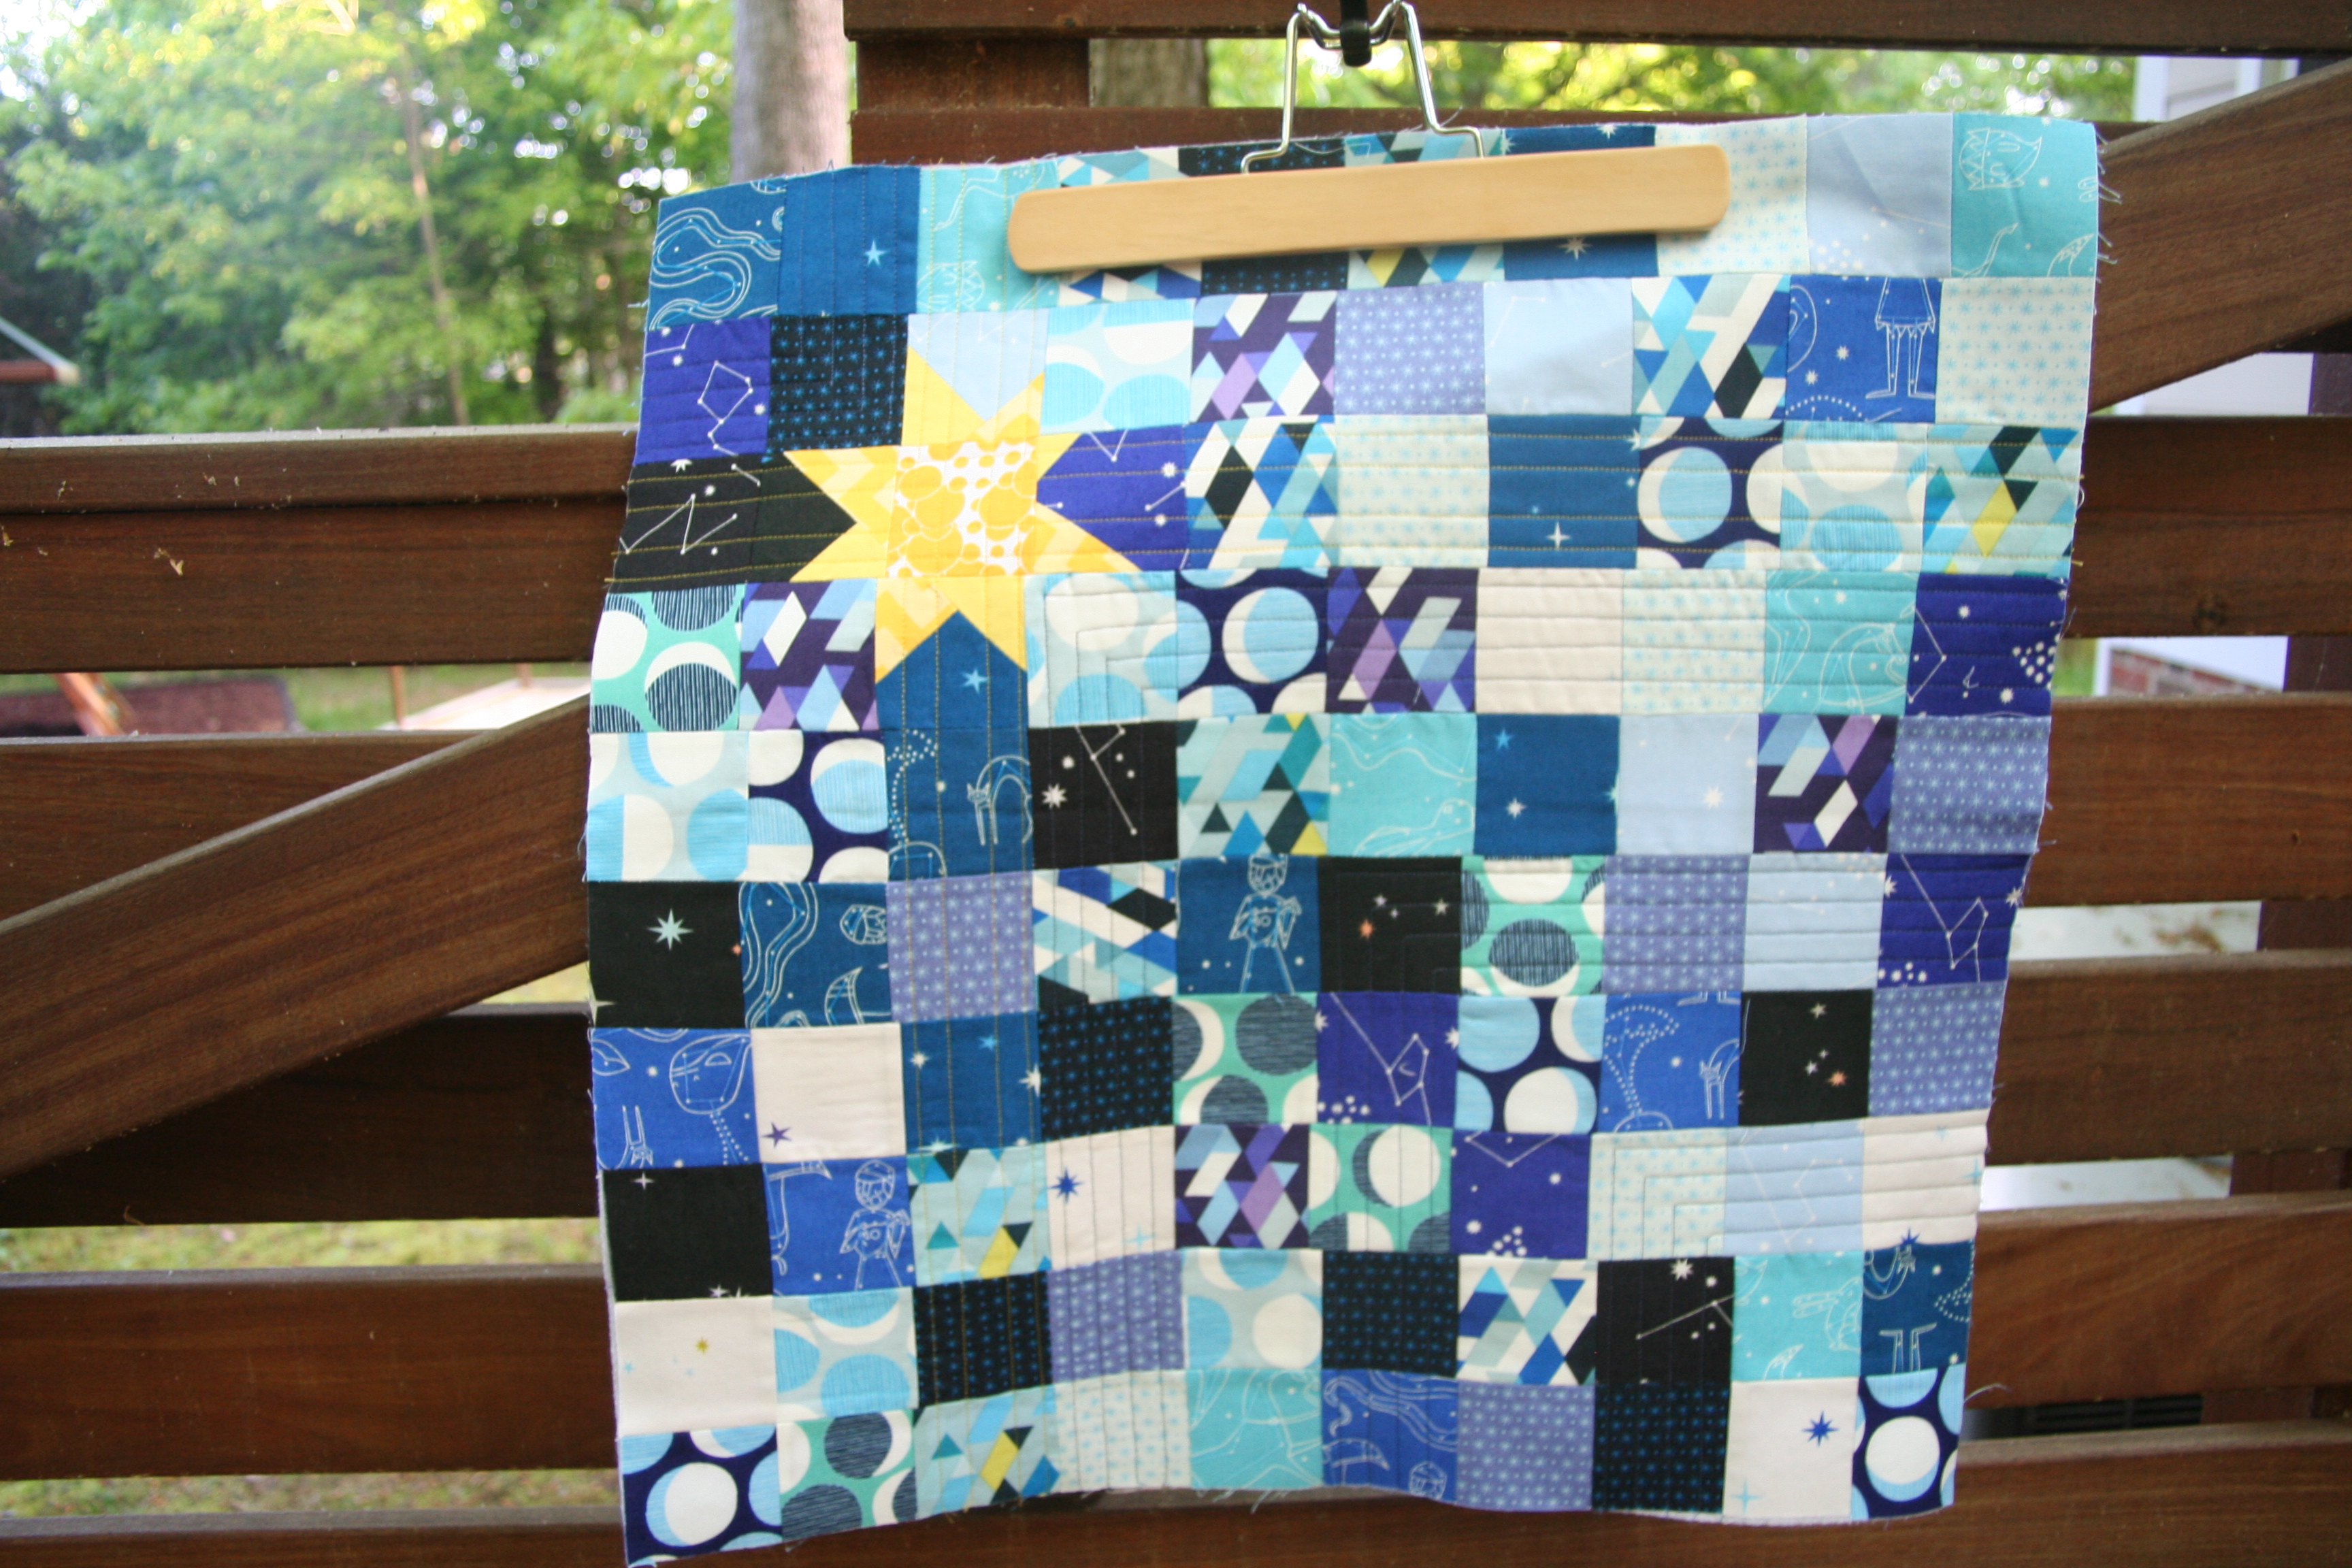
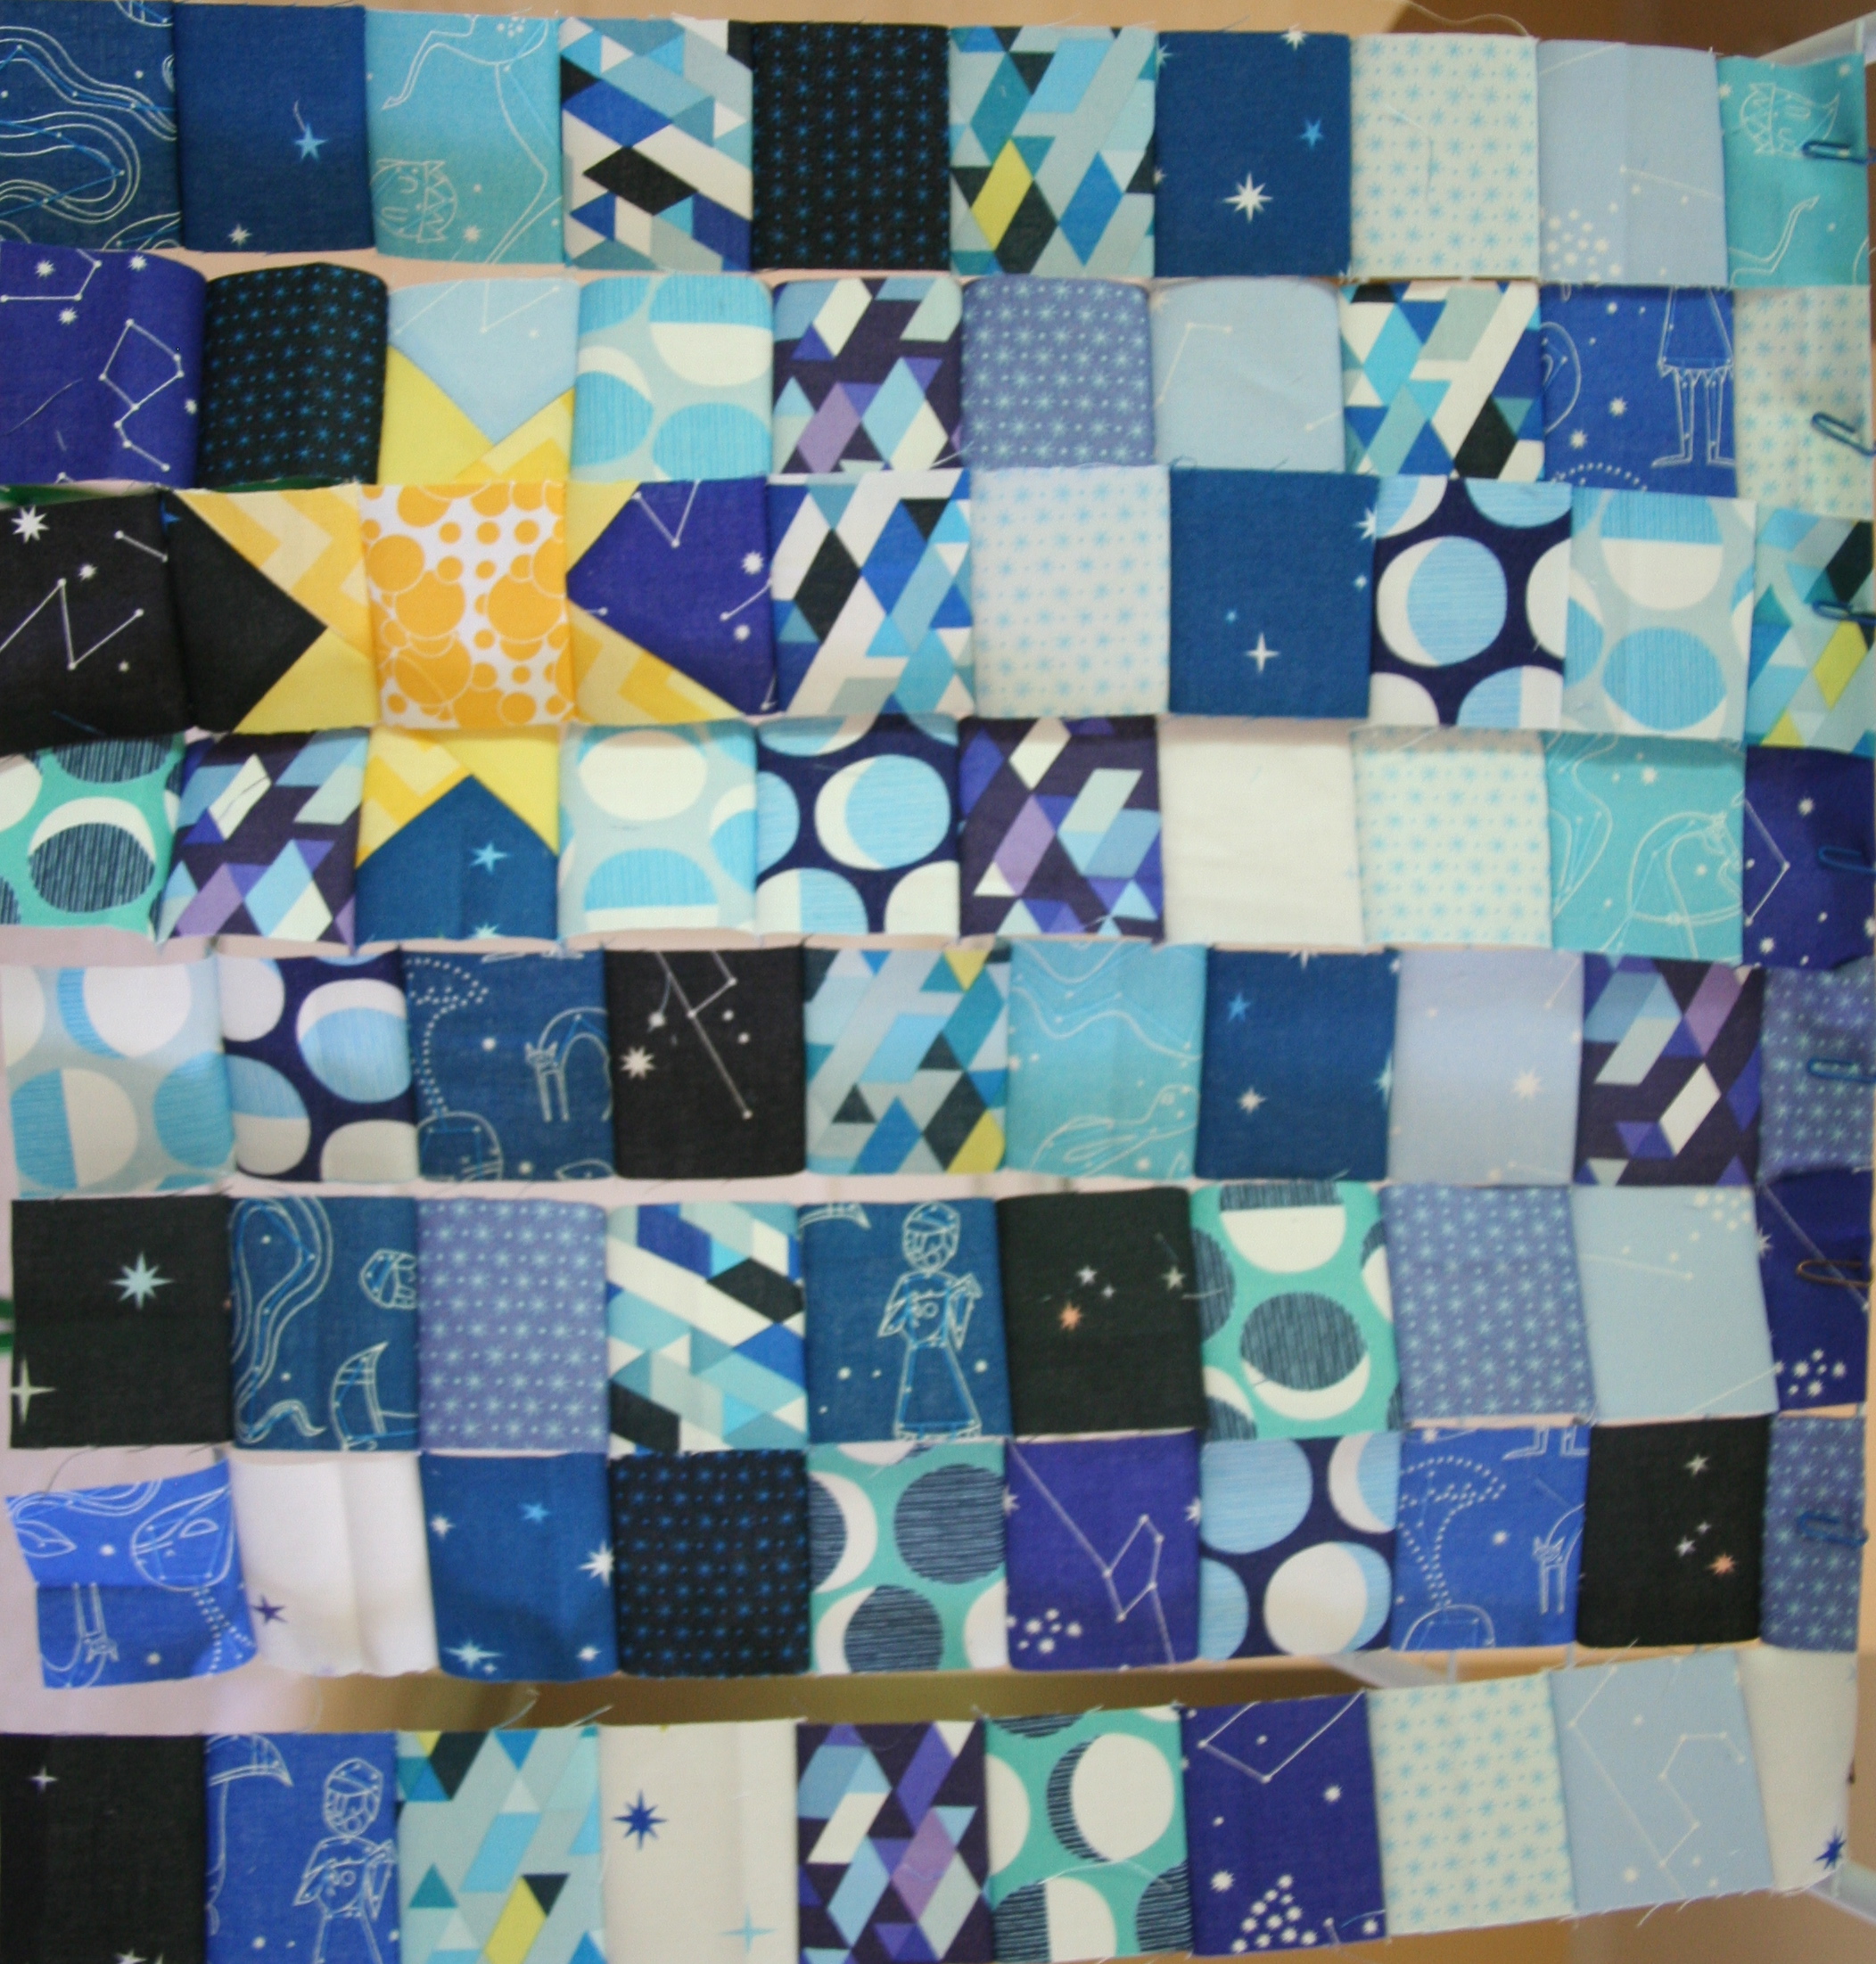
7. Madrona Road Challenge blocks for a mini quilt
8. Wonky Universe Pillow for my son
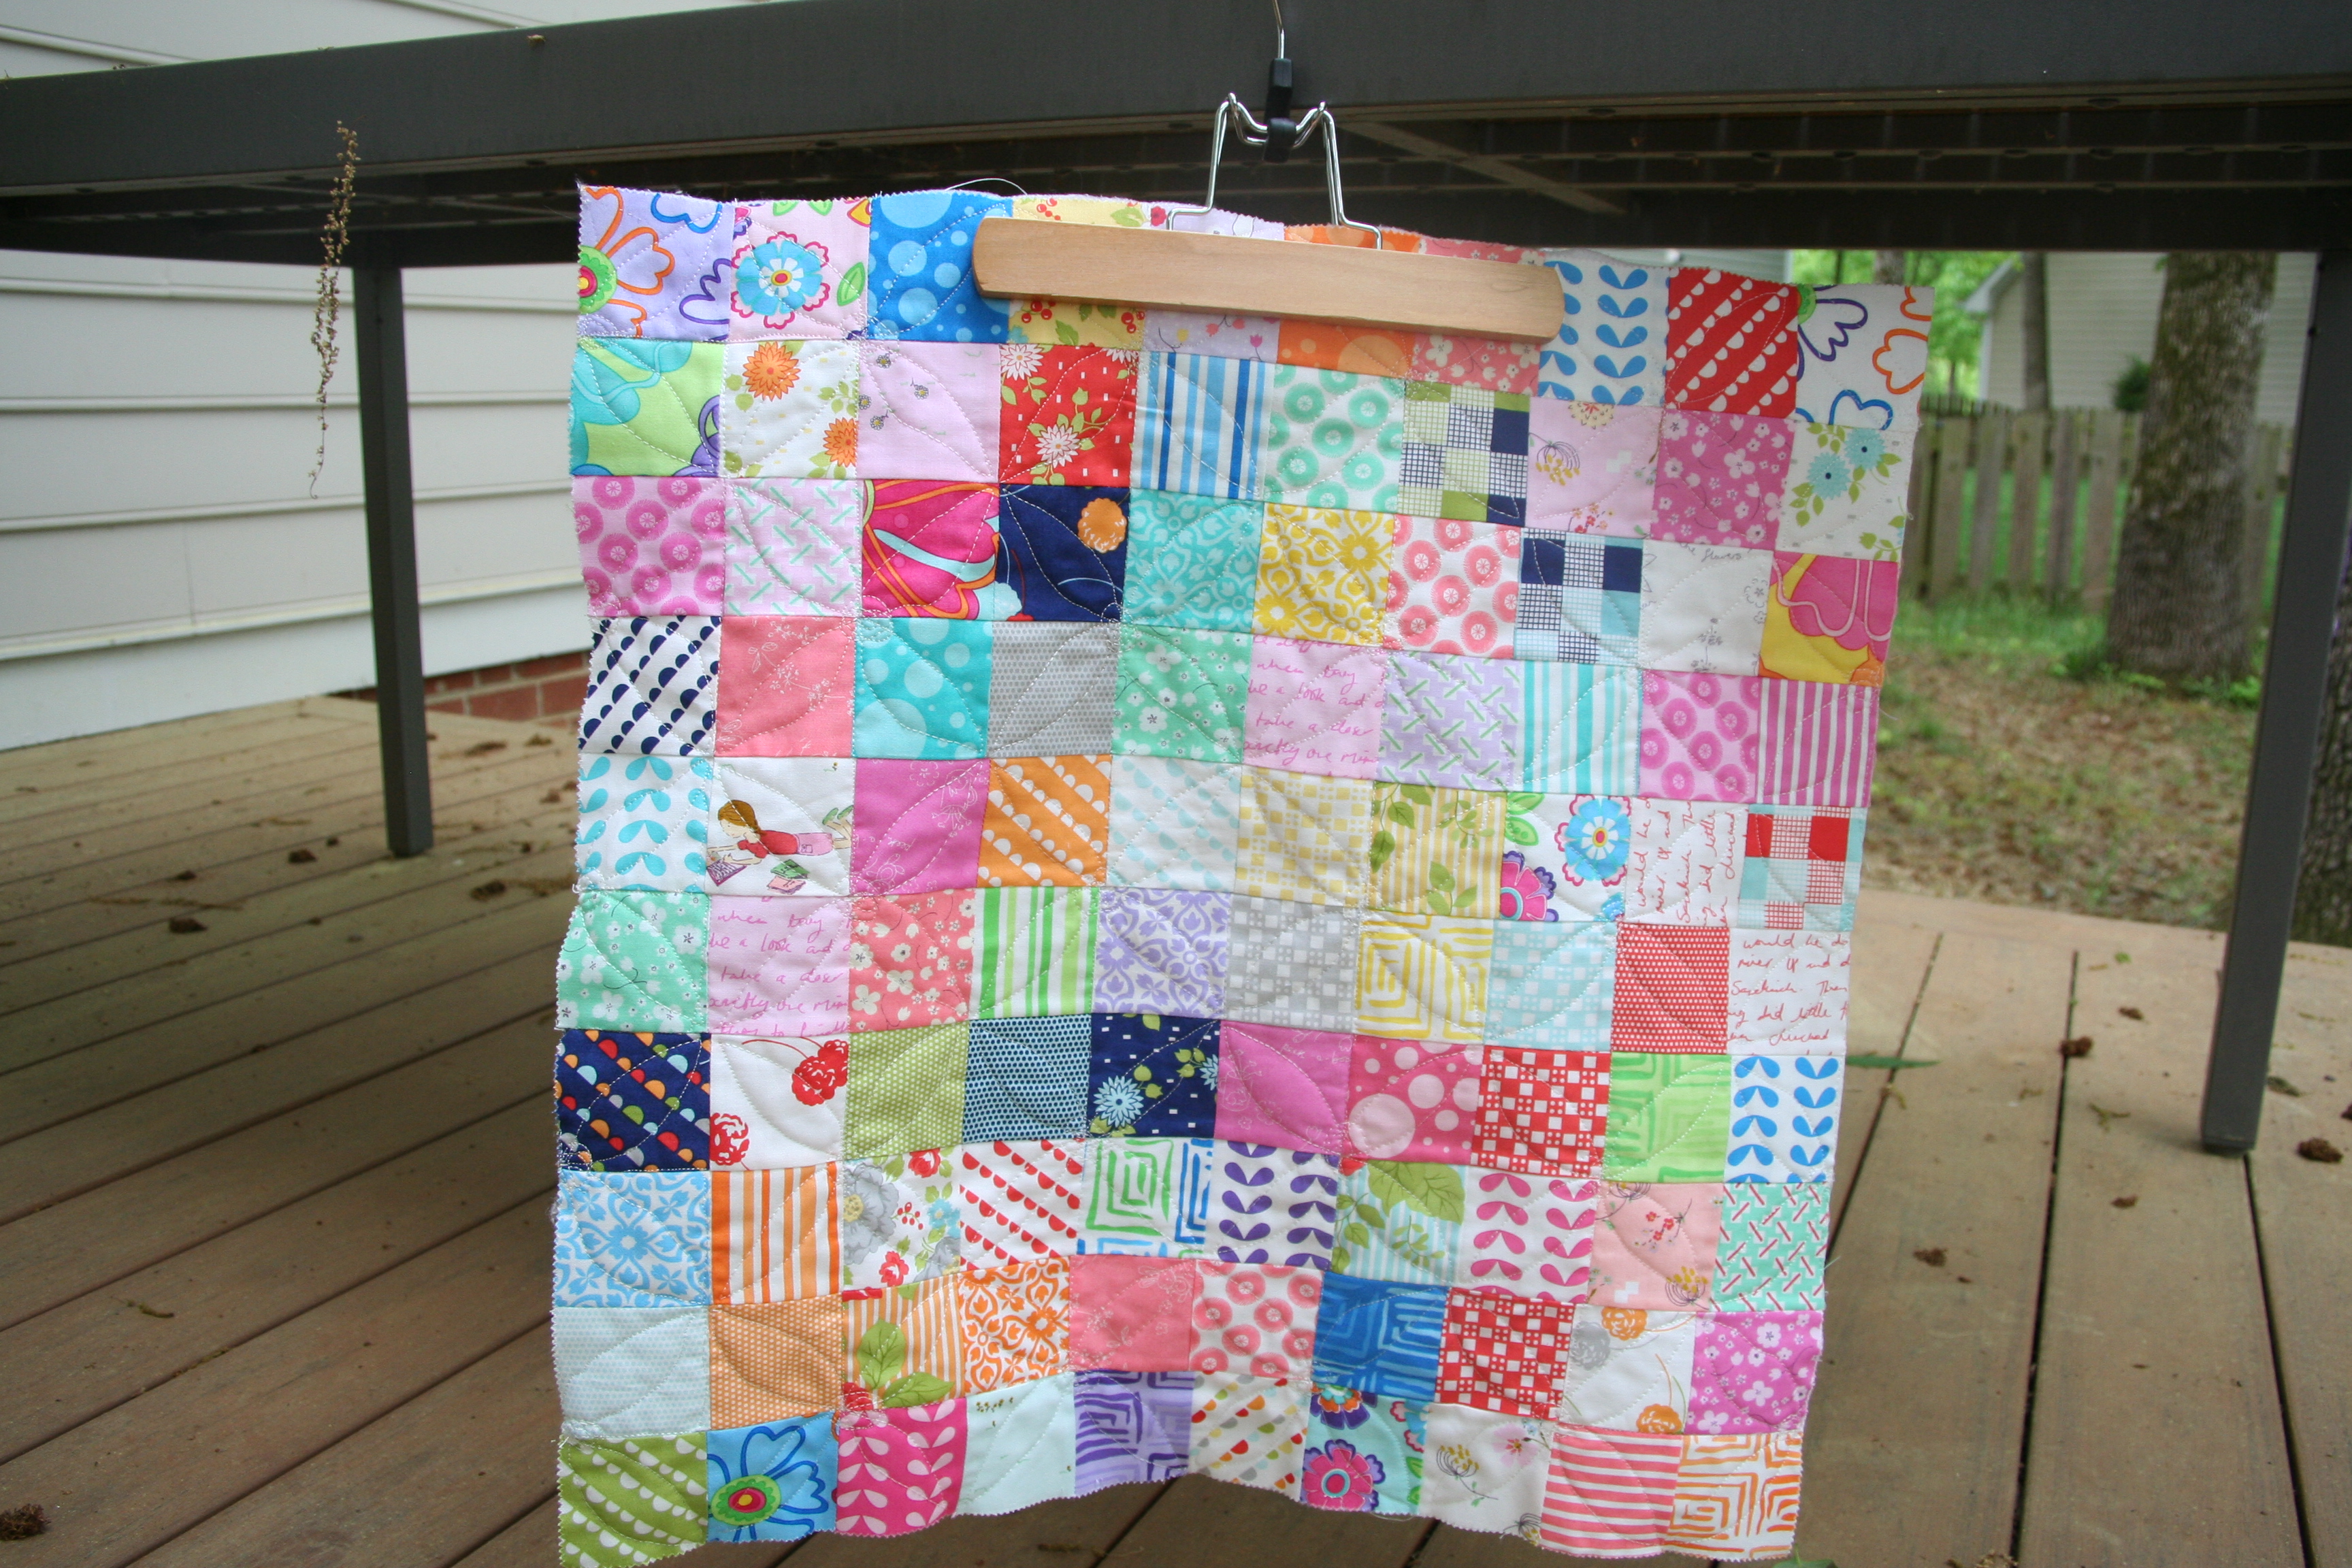
9. First postage stamp Pillow and first FMQ project.

Above is my collage of my finished works for April. I am pretty pleased with what was accomplished. I got a little distracted with Pillows and projects from Patchwork Please but I had had so much fun which is what it is all about.  Great news this week, I also got an order for 5 chair bags….so I am off to work on those 🙂

Here were my goals and where they landed up. My extra projects pictured above were the bag (used for a guild swap), pencil-case and the two cushions that have been my focus this week.

  1. Focus on stock for my Etsy Store.
    • Chair Bags (x2 sets)
      1 set is completed – posted on Etsy and blogged here
    • Oven Mitts (x1 set)
      I finished one for a friend posted here 
    • Coffee Cup Sleeves (x2)
      Completed 3!! and posted in my store….A few kind folks also posted them on pinterest. Blogged here and here
    • Pouches/ Cases (x2)
      I did complete two pouches, just not the two I had planned. Both landed up being gifts. The pencil-case one from Patchwork Please was a lot of fun to make and featured above.
    • Set of place mats (x1 Stretch goal)
      Not surprisingly did not start
  2. Make a Pin cushion (from Patchwork Please) and a travel sewing pouch
    Pin cushion complete and blogged here, also posted on the Zakka Along 2.0 Flickr site
  3. Make a travel baby quilt for charity  (~30x20in.)
    Not started
  4. Madrona Road Challenge – Mini Quilt
    I have managed to get 2 1/2 blocks done. I will have to get a move on or rethink my approach since this Challenge ends May 12th. 

My General goals continue:

  1. Try to eat and exercise to plan
    I think as far as food goes – this month was much more on plan 
  2. Blog regularly using my new schedule
    On target

Linking up for April Goals with “A Lovely Year of finishes”.
My


Also linking up with Amanda Jean @ Crazy Mom Quilts

Wonky Universe

After last week’s cushion top, I received the best compliment, my 5-year-old son asked if I could make him a cushion.  I started the strips and posted on Wednesday my start with the “space” themed cushion top using “Constellations”  by Lizzie House for Andover.

When sewing the strips together, I realized that I can take advantage of my errors purposely inaccurate alignment of the squares (and the wonky star) 😉 and we have a cushion we are calling “The Wonky Universe”.

IMG_7224

I can say this about working with postage stamp squares (and probably other squares too)….It doesn’t take much for the strips not to align just slight errors in cutting and probably inaccurate seams makes all the postage square not line up.

The quilting on this one I went with dark blue straight lines radiating from the wonky star, which is our sun, to kind of represent orbits. These lines were alternating to make sure the softness was left in the cushion cover. I also added yellow lines both horizontal and vertical directions through the sun.

IMG_7226 IMG_7229

When I showed my son this morning his response was “AWESOME!!”. It made my day 🙂

I am linking up with Amanda Jean @ Crazy Mom Quilts for Finish it up Friday.

Quick update: After seeing the amazing cushion from Adrianne @ On The Windy Side, I asked how she gets her squares so aligned….she gave this great advice:

  • accurate cutting helps a lot. Personally, I don’t find pre-cut charms or mini charms very accurate, and I find the pinked edges make it difficult to line them up accurately. I would recommend cutting your own squares or cutting down pre-cuts so they have straight edges.
  • sewing a consistent 1/4″ seam is a matter of practice. Sewing lots and regularly (like at least an hour most days) will help you get better faster. I’m not sure that my 1/4″ seam is exactly a 1/4″, but after a lot of practice, it is at least consistent. If you’re not already using a 1/4″ foot, it is worth the investment. I can’t sew a consistent seam without one.
  •  when accuracy is important, I use a LOT of pins. I line up the seams I want to match and pin through the seams. Depending on how big the squares are, I might also put a pin (or 2) between each pinned seam. I also pin in a slightly unusual way (I didn’t realise this until I started sewing with friends!) – I put the pin through the fabric perpendicular to the edge, with the point towards the edge I will sew along. If you put the pins back from the edge a little bit, you can sew along without removing them as you go.
  • I don’t usually pre-wash or starch my fabrics, but when I know something might be tricky (like the Essex linen in black I used for these cushions), I do starch just for that extra bit of control.

I hope you go over and check out her blog :-). Have a good weekend all.

WiP Wednesday {24.04.2013}

I am continuing on with postage stamp cushions this week and thoroughly enjoying piecing them together. Last week, I posted about this one below, which I hope to finish by this Friday:

IMG_7187

The biggest reward I got after sharing this one with everyone, was my 5-year-old asked if he could have one too. Surprisingly, I felt so proud and delighted he wanted one :-), of course I replied and off I went to make one.

I recently purchased the Constellations bundle by Lizzie House for Andover,  as I want to use it in a quilt for my son. I decided that I would use a strip of each fabric and add a wonky star in yellow for the sun. I have sewn all the strips for the pillow (10 of them) and here are the top 8 (all I could fit on my hanger). You can see the wonky star which was my first wonky star – it was fun seeing how the pieces come together. I am loving the constellation fabric – great for a boy. The photo has been rotated so you can see what the final pillow will look like.

IMG_7208

I am thinking of either quilting straight lines 1/4 inch from the seams (both horizontal and vertically) or diagonal lines through the corners. I am again hoping to have at least the top finish by Friday to show every one.

Anyway, we are over the hump of the week, hope everyone’s week is going well.